Character Sheet en fr
Make a character sheet with RCSE
The Rolisteam Character Sheet Editor is the best tool to make character sheet. Its design is dedicated to provide experience as close as possible to using the official character sheet of any RPG game.
To make a character sheet, please follow these few steps:
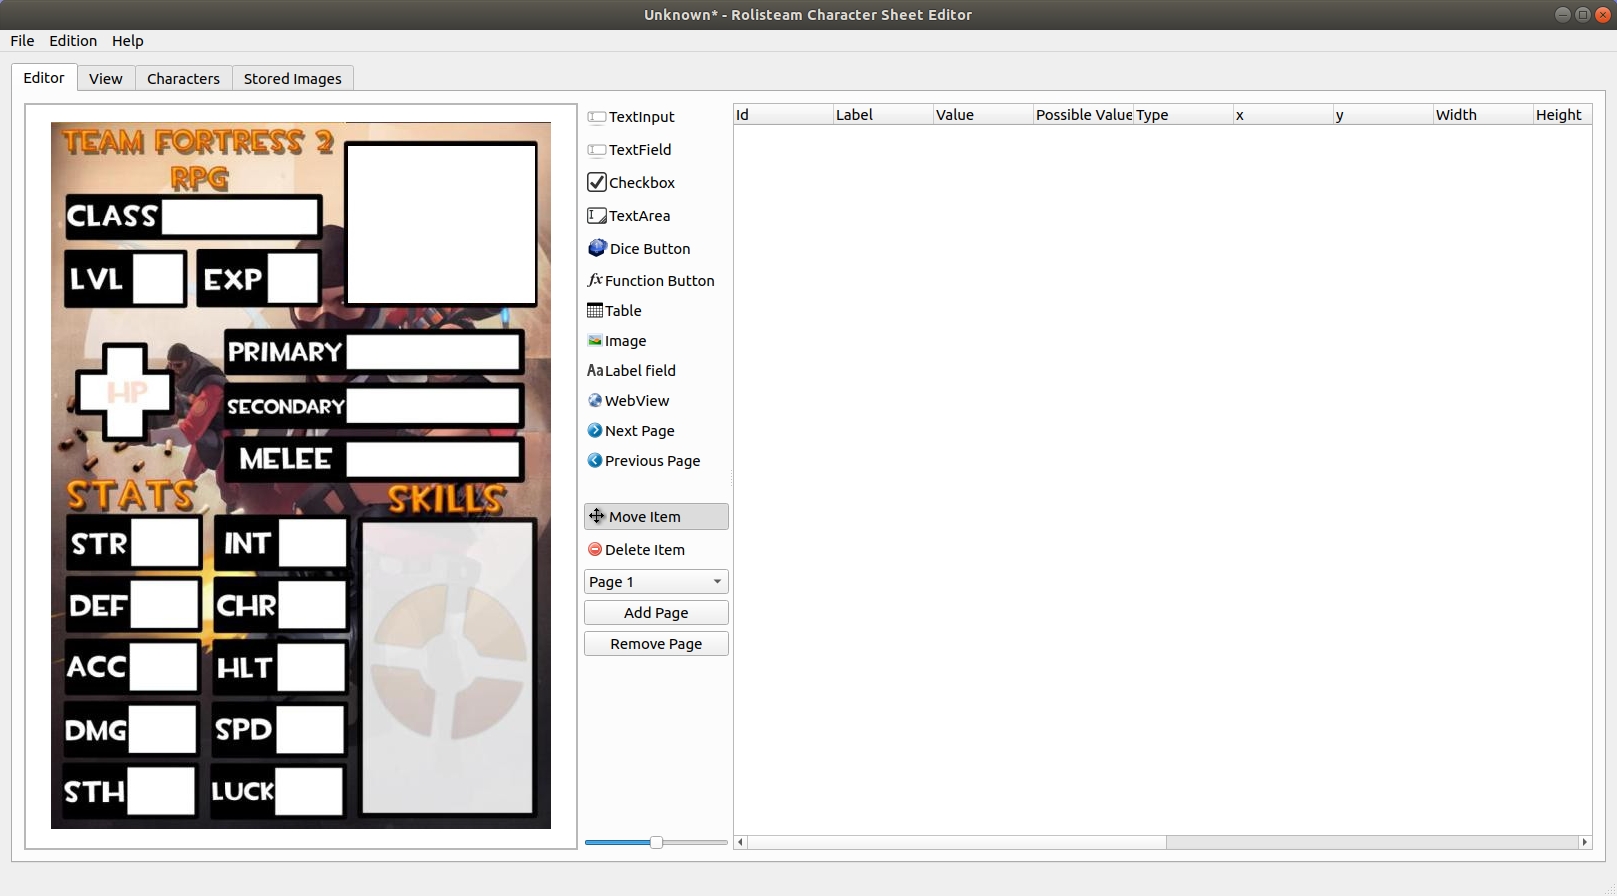
Step 1: Import image
The first step is to drop background image on the editor (left side of Editor tab).
This image could be the official charactersheet of your game for example.
There are two ways to import image:
- Drag and drop image from your computer to RCSE (left side).
- You can also import from the menu > Define Background Image
In the case, where you need several pages into your charactersheet. You can easily add pages with the button dedicated to this task. Then you will have to define the background of new pages by importing background images.
Save your file !
Convert Pdf to image
There are several online tools to convert PDF to image.
Please be careful about the image quality. Some basic settings can produce bad image. Ensure texts are readable.
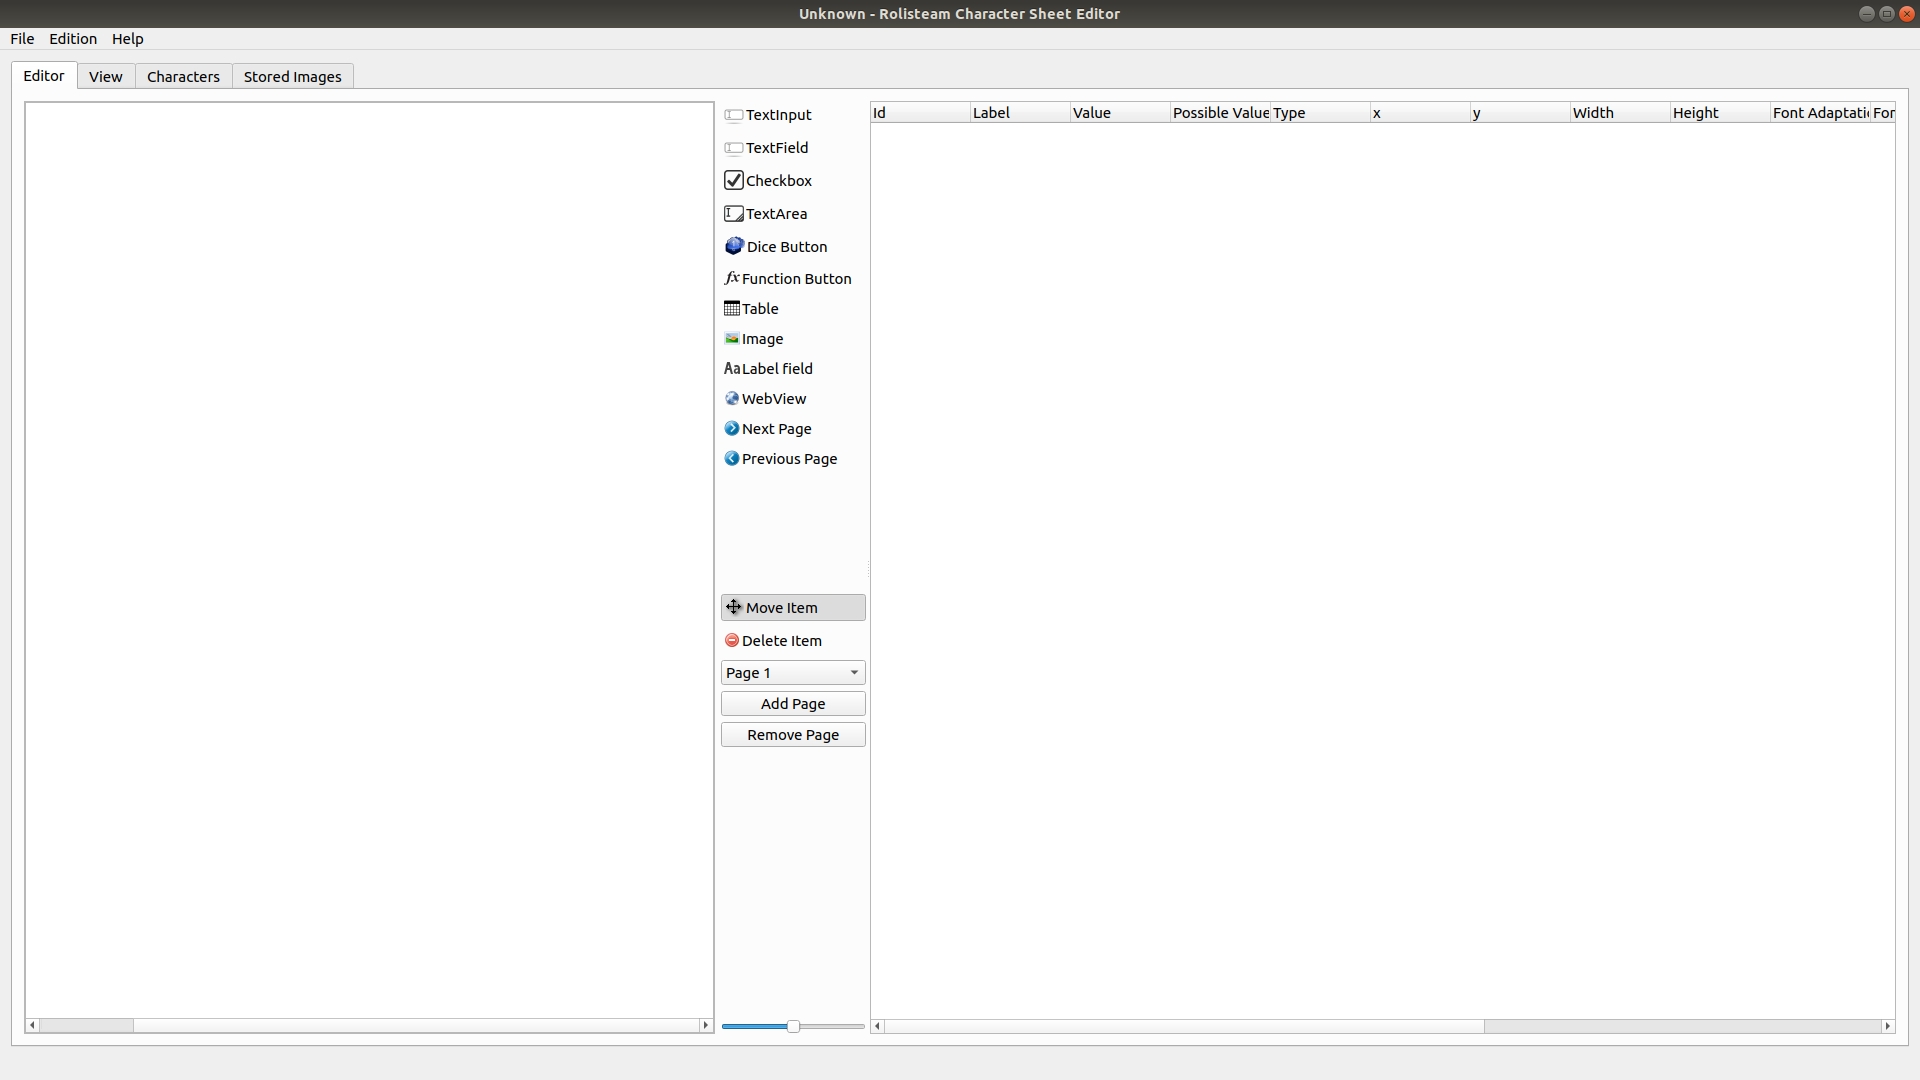
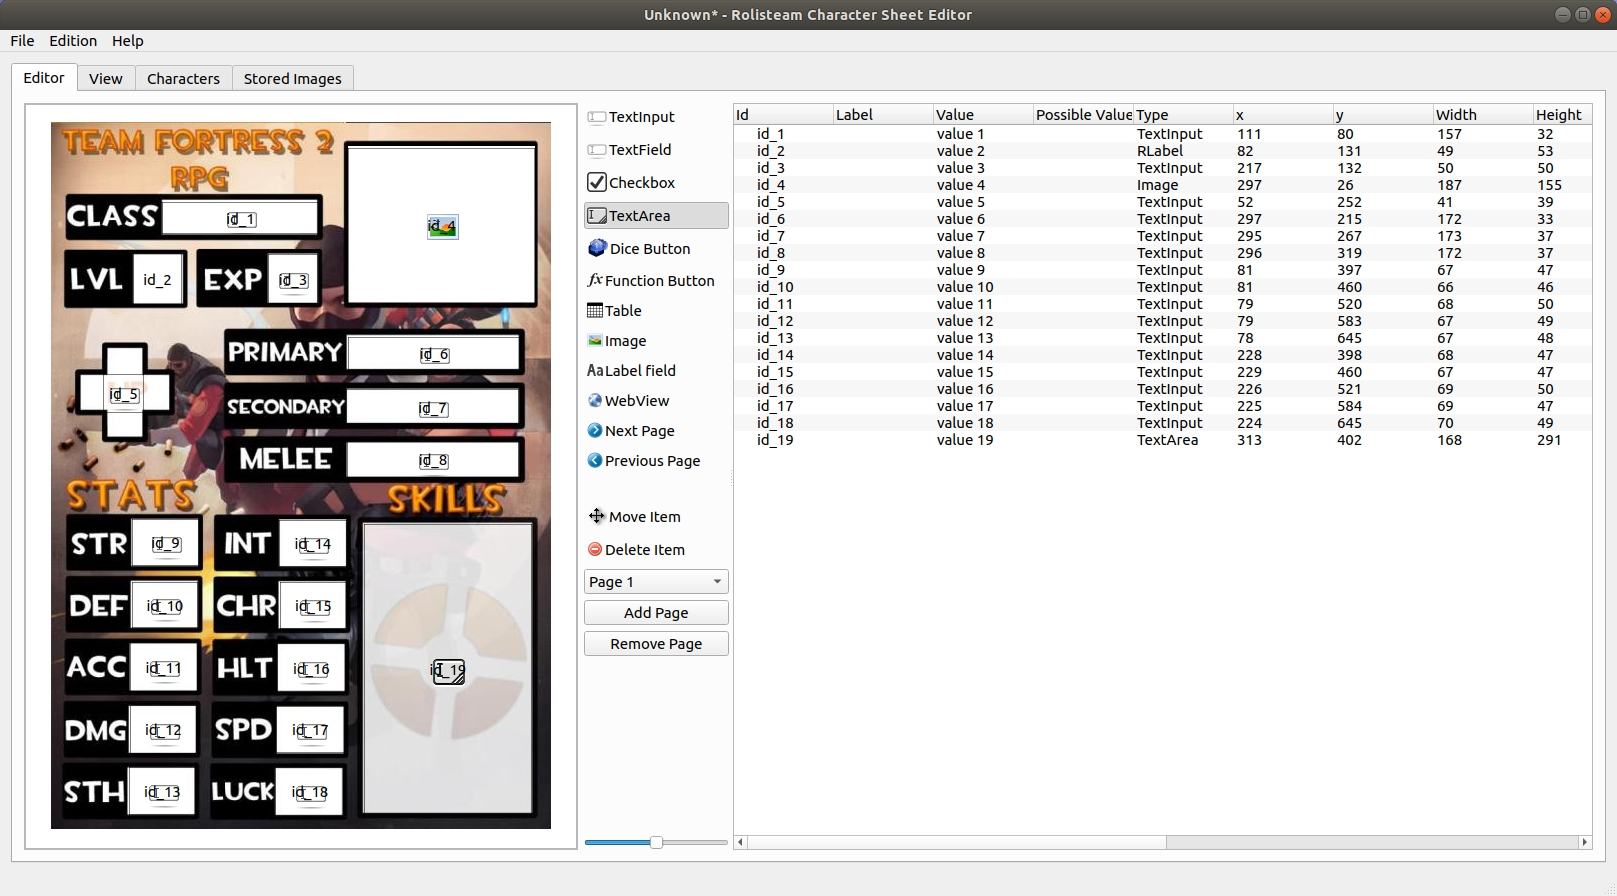
Step 2: Add fields on the sheet
Then, it is important to set the position of each text field. This work can be really long but thanks to RCSE you can make it graphically.
Each field is also added onto the right table. You can remove field from this table.
There are many field kinds available into RCSE :
| Name | Description | Icon |
|---|---|---|
| TextInput | it stores one line of text, it has no border and no decoration. It can be change to selector (see below) |  |
| TextField | It stores one line of text, it has border and decoration. | |
| Checkbox | It stored a 0 or 1 value and display it as checkbox. |  |
| TextArea | It stores text (several lines) with decoration and border. |  |
| Image | Display a image, the path to the image should be url, such as http://myimage.org/character.jpg |  |
| DiceButton | Add clickable button to roll dice command |  |
| Button | Add clickable button to call qml function or make any computation |  |
| Table | Add dynamic table, manage several lines (useful for skill list..) |  |
| text label | Add text label, this text can’t be edited |  |
| Webpage | Add webpage view on the character sheet, set url as value to show the website |  |
| PreviousPage | Add Button to make navigation between page easier (go to the previous page) |  |
| NextPage | Add Button to make navigation between page easier (go to next page) |  |
- Select a tool
- Click on visual editor (left side)
- A placeholder appears on the visual editor and a new line is added on the right side
- Move the mouse cursor to define the proper size for this item (size can be changed after)
Save your file !
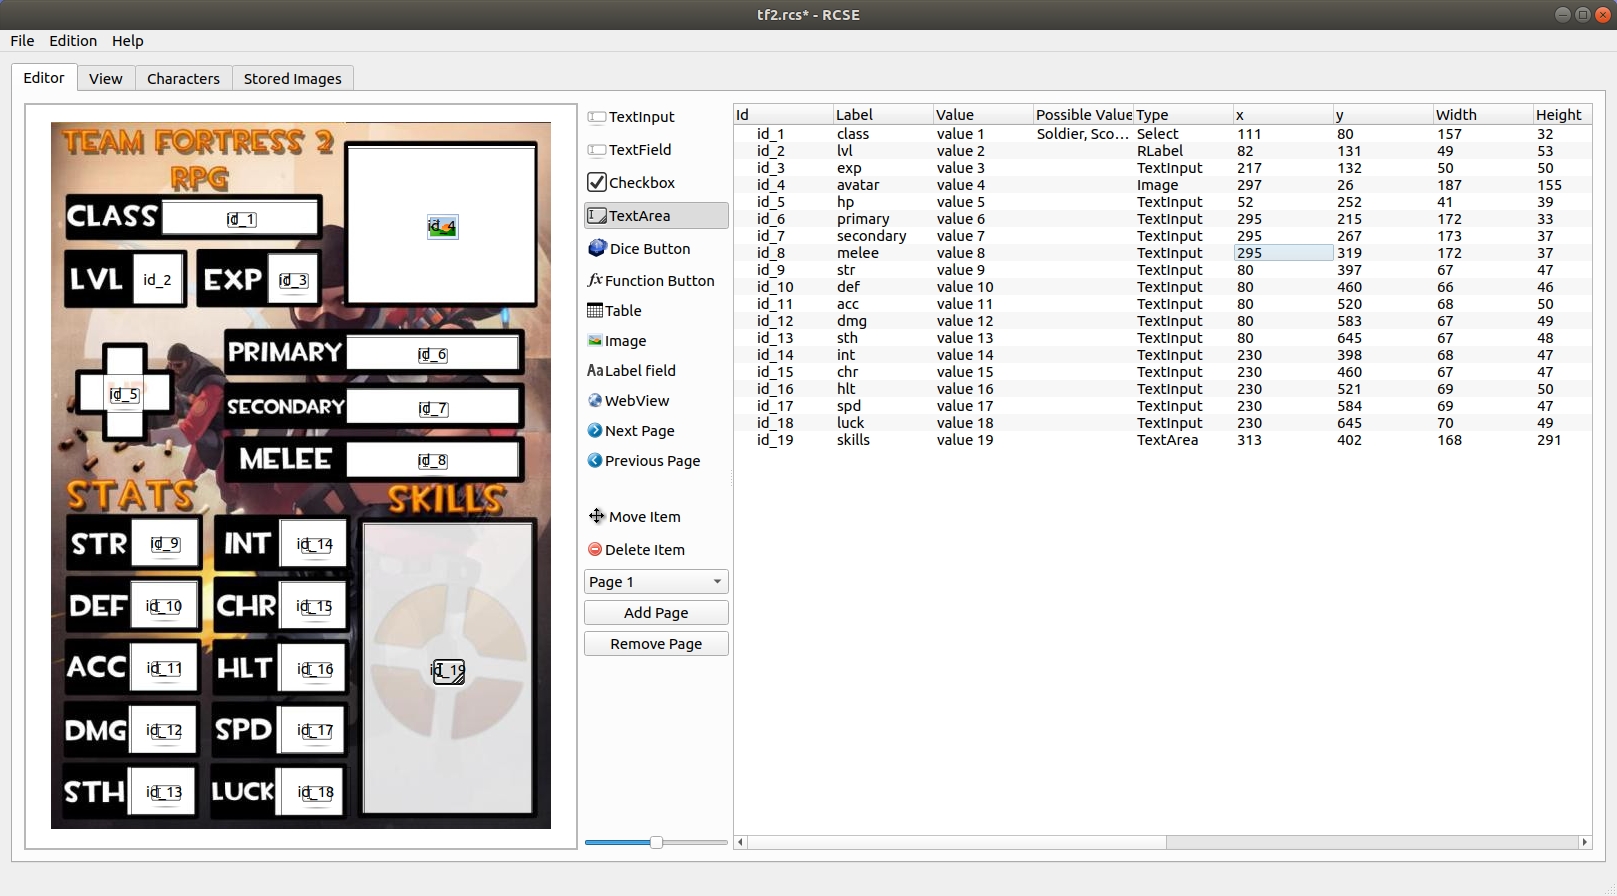
Step 3: Edit fields
when all your fields are set, it is important to name them. This name can be use into formula.
Including the name, many other properties can be edited. All you have to do is to edit from the right table on the first tab.
Save your file !
Columns:
Id
This property is the unique id for that data. By default, RCSE generates them automatically. It is recommended to keep the default value. Changing them requires to respect some rules:
- Start with lower case letter
- No space
- Letters, digits and _
- No special character
Ids can be used to get access to character information in formula. It’s helpful when they are short.
Examples:
=${id_5}+4
Label
This property is a human readable id for that field. It is recommanded to set the label of all fields. It is possible to get access to the data by its label.
Tips: keep them short.
Example:
=${intelligence}+4
Value
The field value is displayed onto the character sheet. Please set values close to real game values. There are two reasons about that:
- Values are used inside formula. So computation of formula can be checked.
- As values are displayed, you can adjust the element (size, font, color) to make sure it is readable.
Values are set with generated text.
Possible values
This field is only useful for TextInput. It allows to change a TextInput to selector. Selector (also known as Combobox) are items dedicated to select one value from limited list.
To define the value set, values are separeted with comma.
Example:
head,body,left arm,right arm, left leg, right leg
Type
This column give you a reminder of the type of the field: TextInput, TextField, checkbox, TextArea, Button, Image…
You can change it.
X
Field Position on X-axis (left to right). You can change it to align fields precisely.
Y
Field Position on Y-axis (top to bottom). You can change it to align fields precisely.
width
Width of the field. You can change it to align fields precisely.
Height
Height of the field. You can change it to align fields precisely.
Font adaptation
This option can be enable to adapt font size to the size of the character sheet.
Text Alignment
You can set where the text should be displayed in the field.
|Top left corner| top center|top right corner| |middle left| middle center| middle right| |bottom left corner| bottom center| bottom right corner|
Text color
You can set the text color.
Background Color
You can set the background color
Border
You can set where the border should display (Top, right, left bottom, all or no border)
Save your file !
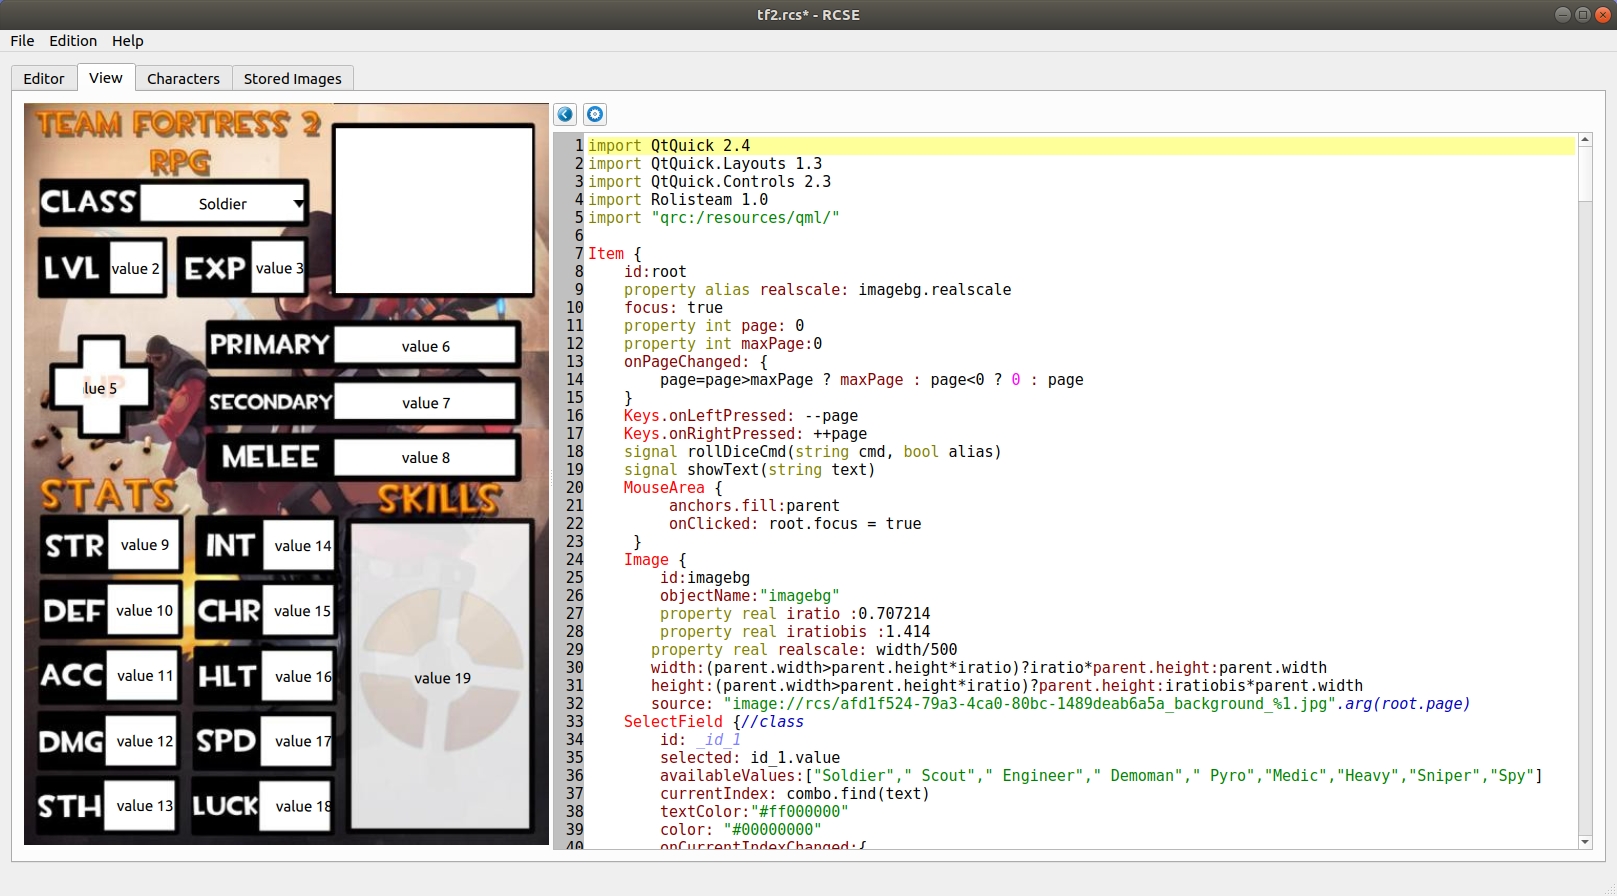
Step 4: Generate sheet
When you have added all the fields you want, you may generate the sheet
by clicking on Edit menu > Generate Code and Sheet (Ctrl+r).
Sheet is visible in the View tab. The tab shows sheet exactly as it will be in Rolisteam.
The code tab sees its content changed by this action. It shows qml code.
You can adjust the sheet (in the editor tab step 3) and generate again and
again until it fits your needs. You can repeat this operation as many times as you
want to get the perfect result.
Save your file !
For veterans / experts
It is also possible to amend QML code directly to add new features to the sheet. You can play music, videos or add animations and many other stuffs. Be careful, when you modify the generated code, you must not ask to generate code and sheet. It will erase all your modifications.
Step 5: Add characters
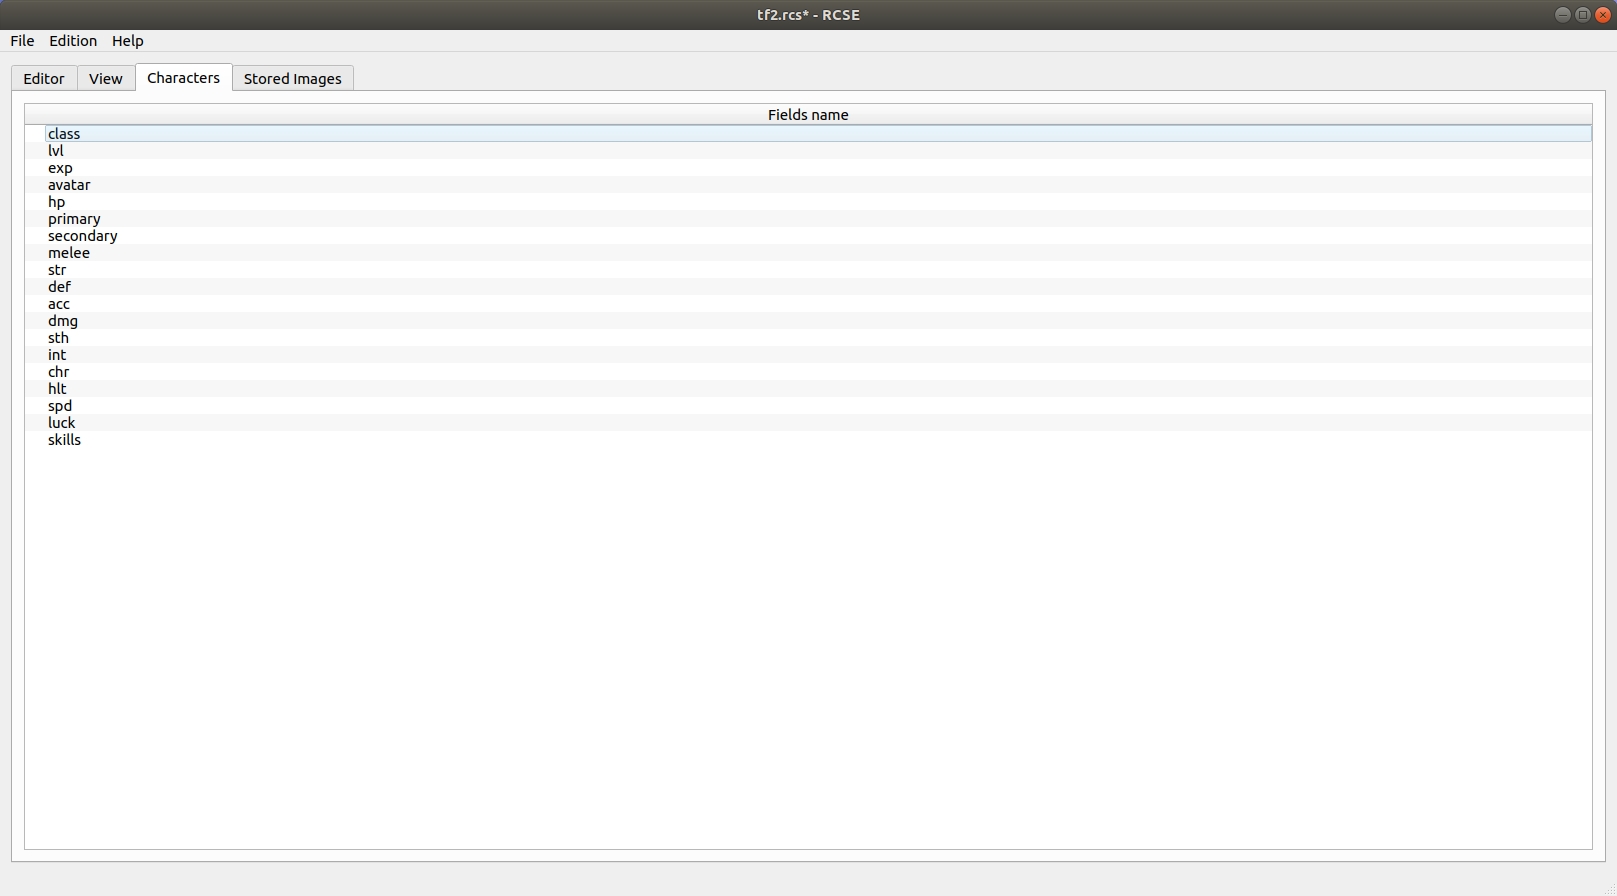
Let’s go to the third tab: Characters. From here, characters can be added into the file.
A column appears for each added characters. It is recommended to add default value for each field. RCSE helps you to set one value on several lines. One cell can be defined as the character’s name. This will set the column header.
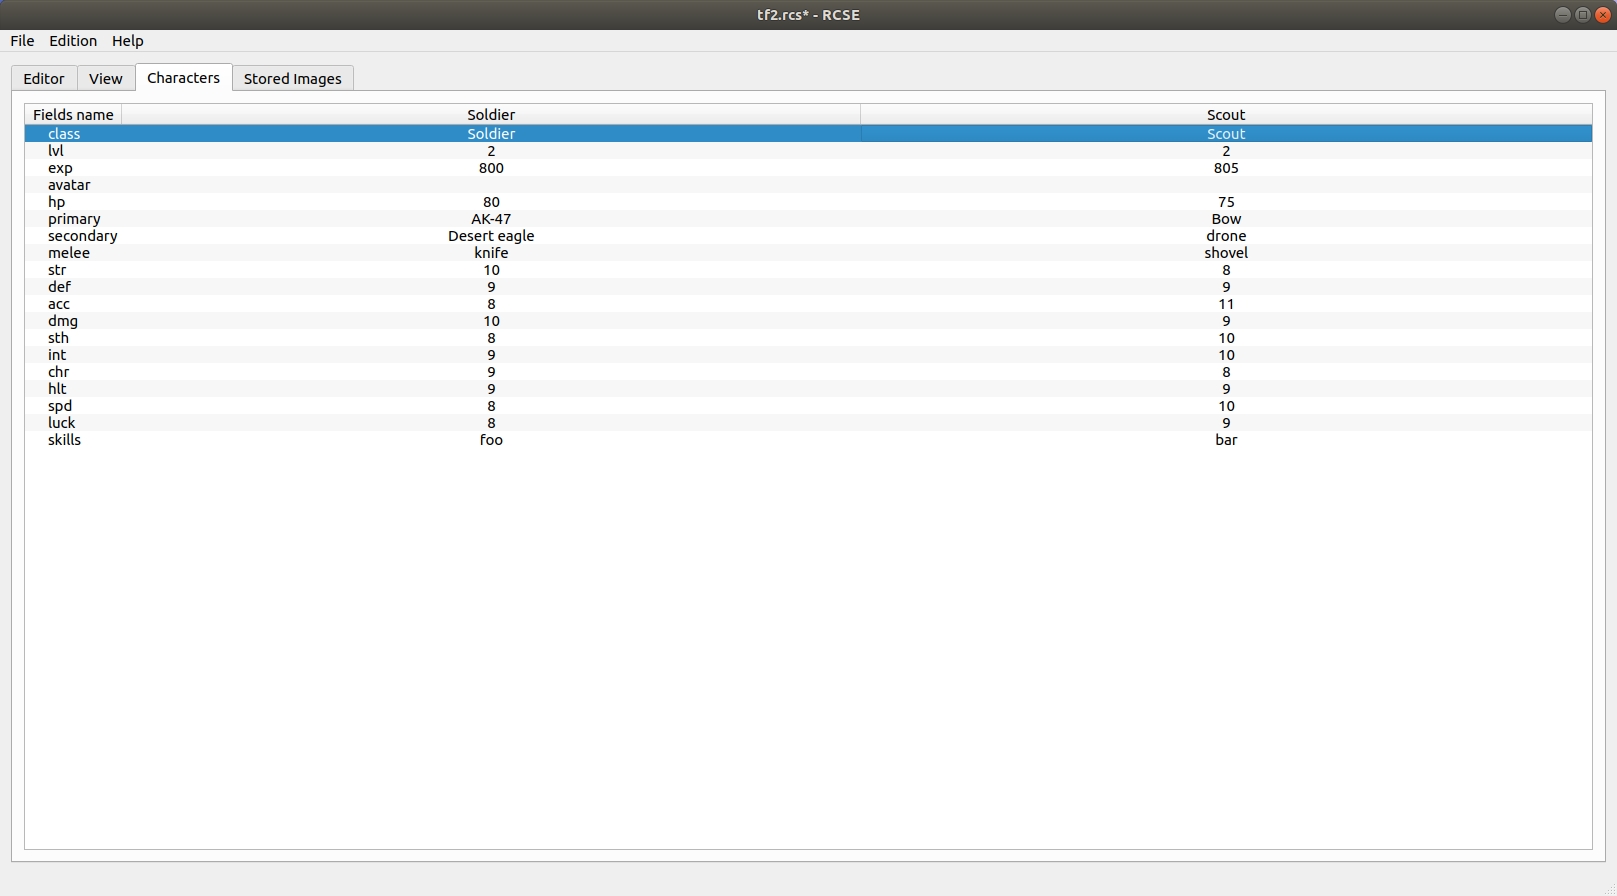
As you can see, there is no data for avatar. In order to set images into character sheet. There are two options:
First, the laziest solution is to put an url to the image (http://site.com/image/myAvatar.png). The second solution is to go to the stored images tab.
Step 6 : Add images [optional]
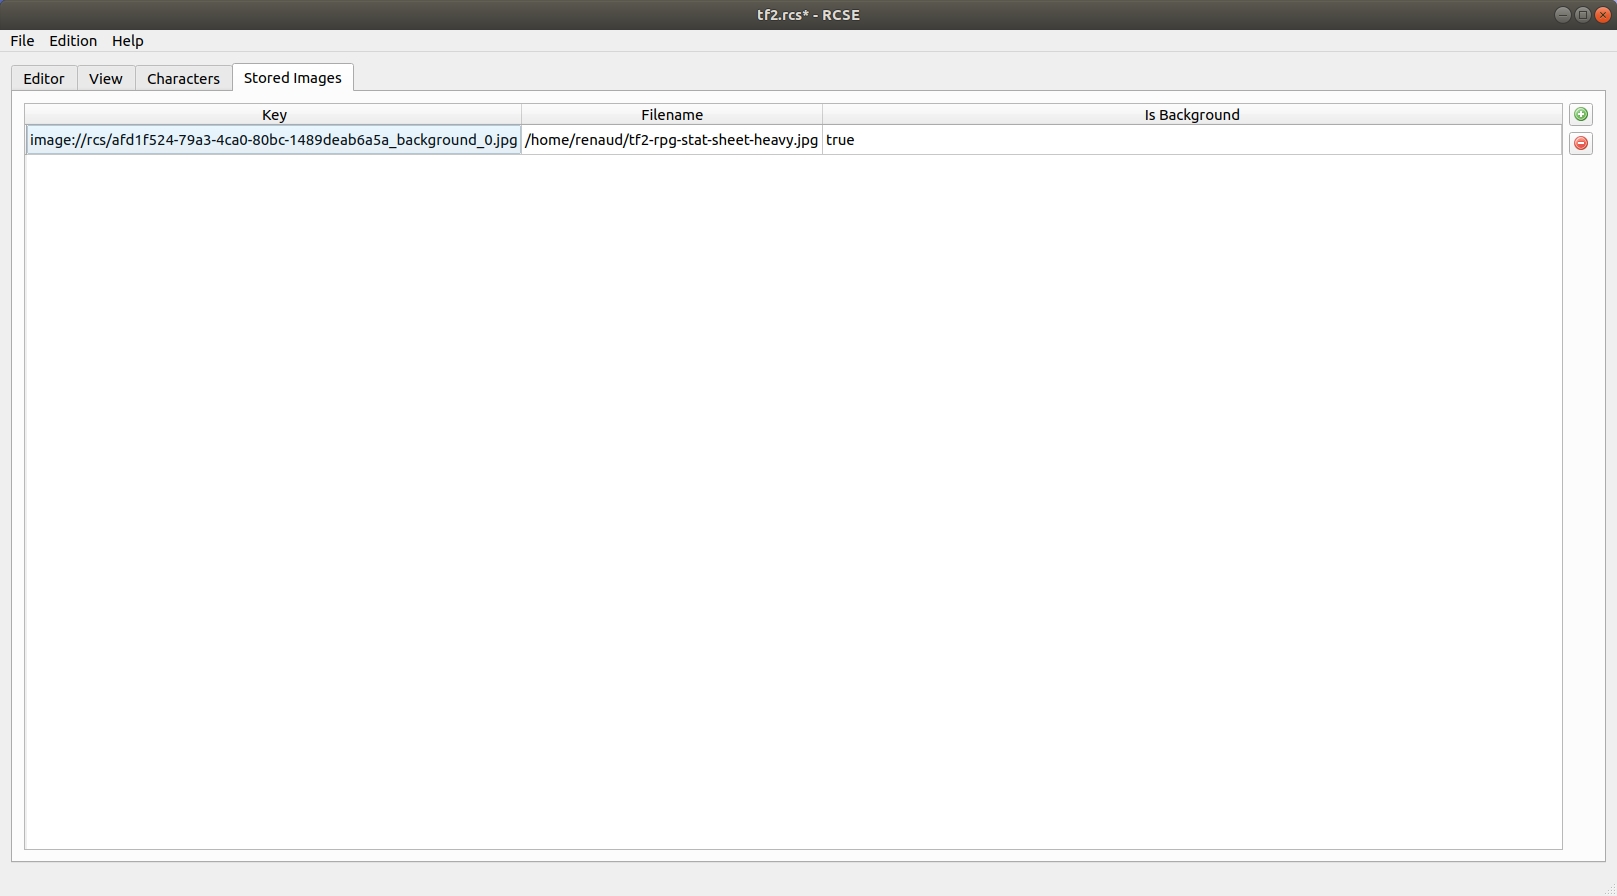
Then, click on add button  and select image from your computer.

Then we have to copythe url of each image and paste it in the appropriated character.
The contextual menu offers the action to copy the url .
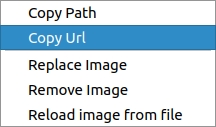
Then paste it into character.
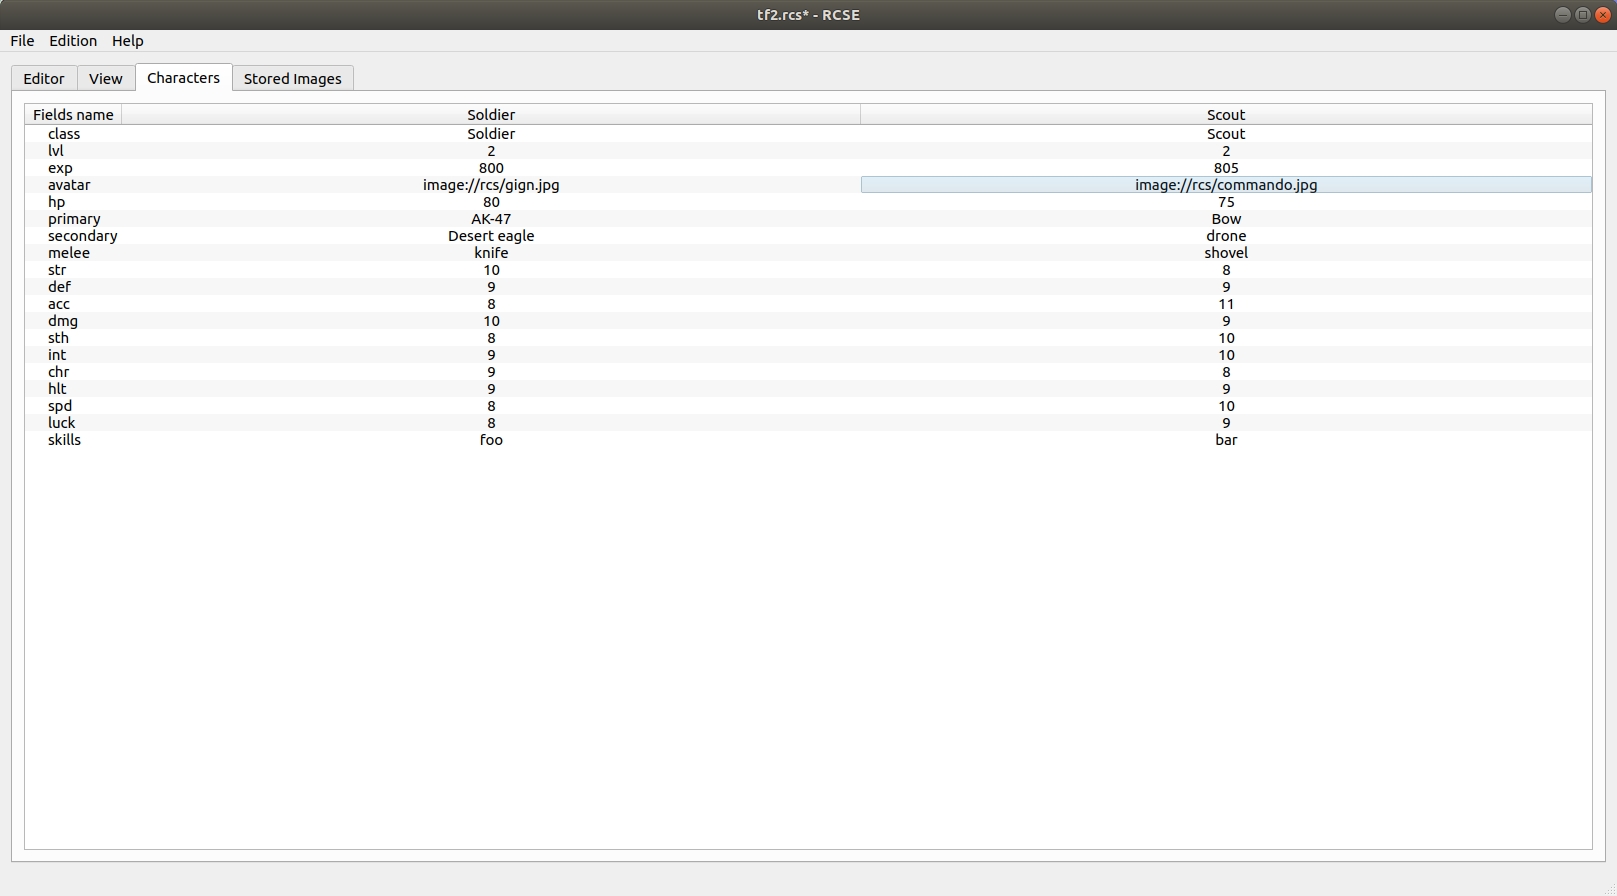
Save your file !
step 7: Formula and automatization [optional]
Charactersheet embeds formula engine. You can compute automatically values. The sheet does the job for the GM or player. To add a new formula, you just have to start the line with := such as any spreadsheet software.
Possible Operation
The formula system can manage many functions and operations.
Get value
As we saw, you can get the value of any field thank of its label or id. You must encapsulate id or label like this: ${label} ou ${id}.
Arithmetic
You can do all usual operations.
Examples:
Sum
4+4
${intelligence}+3
Subtraction
12-3
${intelligence}-3
Multiplication
2*7
2x7 =${intelligence}*3
Division
15/5
15÷5 =${intelligence}/3 =${intelligence}÷3
abs
Absolue value takes only one argument.
=abs(-3) 3
=abs(3) 3
=abs(${intellegence}-11) 8
min
This function takes several arguments.
=min(3,8,10,1) 1
=min(${wits},${dexterity}) 3
max
This function takes several arguments.
=max(3,8,10,1) 10
=min(${wits},${dexterity}) 4
concat
This function takes several arguments.
=concat(${investigation}+${perception},”G”,${perception}) 7G3
=concat(${investigation},”d10k”,${perception}) 4d10k3
floor
the function takes one argument.
=floor(3.9) 3
=floor(3.1) 3
=floor(${force}/2) 1
ceil
the function takes one argument.
=ceil(3.9) 4
=ceil(3.1) 4
=ceil(${force}/2) 2
avg
This function takes several arguments.
=avg(10,10) 10
=avg(8,4) 6
=avg(${intelligence},${dexterity}) 3.5
step 7: Use character sheet in Rolisteam
Open/load character sheet
When you save character sheet with RCSE, you get a .rcs file. This file
must be loaded in Rolisteam (File > Open > Character Sheet or
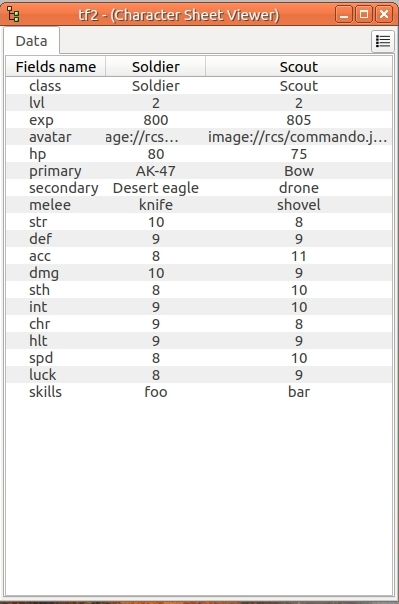
CTRL+U). A new window opens and you see a data tab (picture).
It is the same that the characters tab in RCSE.
It shows all values from characters. GM can have a good overview about all
stored characters at once.
Share sheet to Character
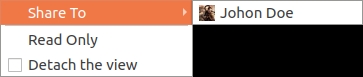
GM must share the character sheet with their player’s character.
The view will be generated and send off to the player.
To do that, you must click on the Share sub-menu from the contextual menu.
Then, you have to pick a character (picture).
View tab is added.
On player screen, the charactersheet window appears with two tabs: data and view.
Player and GM can change values from both view.

Due to technical limitation, data tab does not show data from sub-fields in table.
Many pages
As we saw, it is possible to create character sheet with several pages.
In the view tab, you can change page by pressing Left or Right key.
It is also possible to provide clickable button to manager that.
You can also copy the view and/or detach the tab. This is the way to see several pages at once.
FAQ field
How to use dicebutton
The dicebutton allows users to roll dice directly from the charactersheet. The result is displayed in the global chat roorm. The rolled command is the value of field and it displays its label.
Settings label to Initiative will show Initiative on all character sheets.
Dice command is set in value column. For example, if you set 3d6, the roll will always roll “3d6” (It is strictly equivalent of rolling !3d6 in the chat). Now, many dice rolls depend on character sheet values.
Let’s say, we have to roll “1d20+the character’s agility bonus”, the agility bonus is stored in a field ( id: id_64, label: agilityBonus).
In the dicebutton value, you can write: 1d20+${agilityBonus} or 1d20+${id_64}.
There is no need of formula here. As the dicesystem is able to make translation between to variables “${....}” to value.
After sharing charactersheets to players, each player is able to roll: !1d20+${agilityBonus} in the chat room.
Warning: doing that, will only work after sharing the charactersheet to its player. If the GM click on button Rolisteam won’t be able to know in which characters it must read the value. We plan to fix this issue in future release.
The dice button is emiting a signal roll dice. this signal takes two parameters: the command to roll and a boolean. The boolean is here enable/disable the use of dice aliases.
Rolling huge command with string results (such as 1L[head,left leg,right leg, left arm,right arm, chess]) may cause conflict with aliases.
Change Textinput to selector
Selector type displays a menu where players can select one option among several propositions.
To change any field in selector type, the only required action is to define possible values in the dedicated column
into the right table. Values are separated by comma.
Example: red,blue, green, brown, yellow, black,white, orange, purple.
Add character
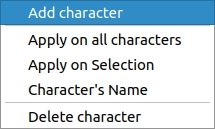
When your charactersheet is all set. As last step, you must add characters. There are two ways to do so.
The first one leads you to the Characters tab in RCSE. The first column shows all fields that you added in your charactersheet. Thanks to the contextual menu, you can click on Add character. Add as many character as you want. New column will appears for each new character. Then, you must set a value to each field. RCSE provides some features to make the edition easier. There are reachable from the contextual menu.
The second method is to share character with their owners thanks to rolisteam and let them set all the values.