 Table of content
We hebben gezien hoe we de campagne en de dobbelsteenaliassen kunnen opzetten, en vervolgens hebben we gezien hoe we een gevechtskaart kunnen maken. De volgende stap is het maken van een personageblad voor ons spel.
Om dat te doen, levert Rolisteam een hulpmiddel genaamd RCSE. Dit is de bewerker voor personagebladen. Laten we eens kijken hoe u die gebruikt.
Maak een personageblad met RCSE
De Rolisteam Character Sheet Editor is het beste hulpmiddel om personagebladen te maken. Het ontwerp is erop gericht een ervaring te bieden die zo dicht mogelijk in de buurt komt van het gebruik van het officiële personageblad van een RPG-spel.
Volg deze paar stappen om een personageblad te maken:
Stap 1: Afbeelding (of PDF) importeren
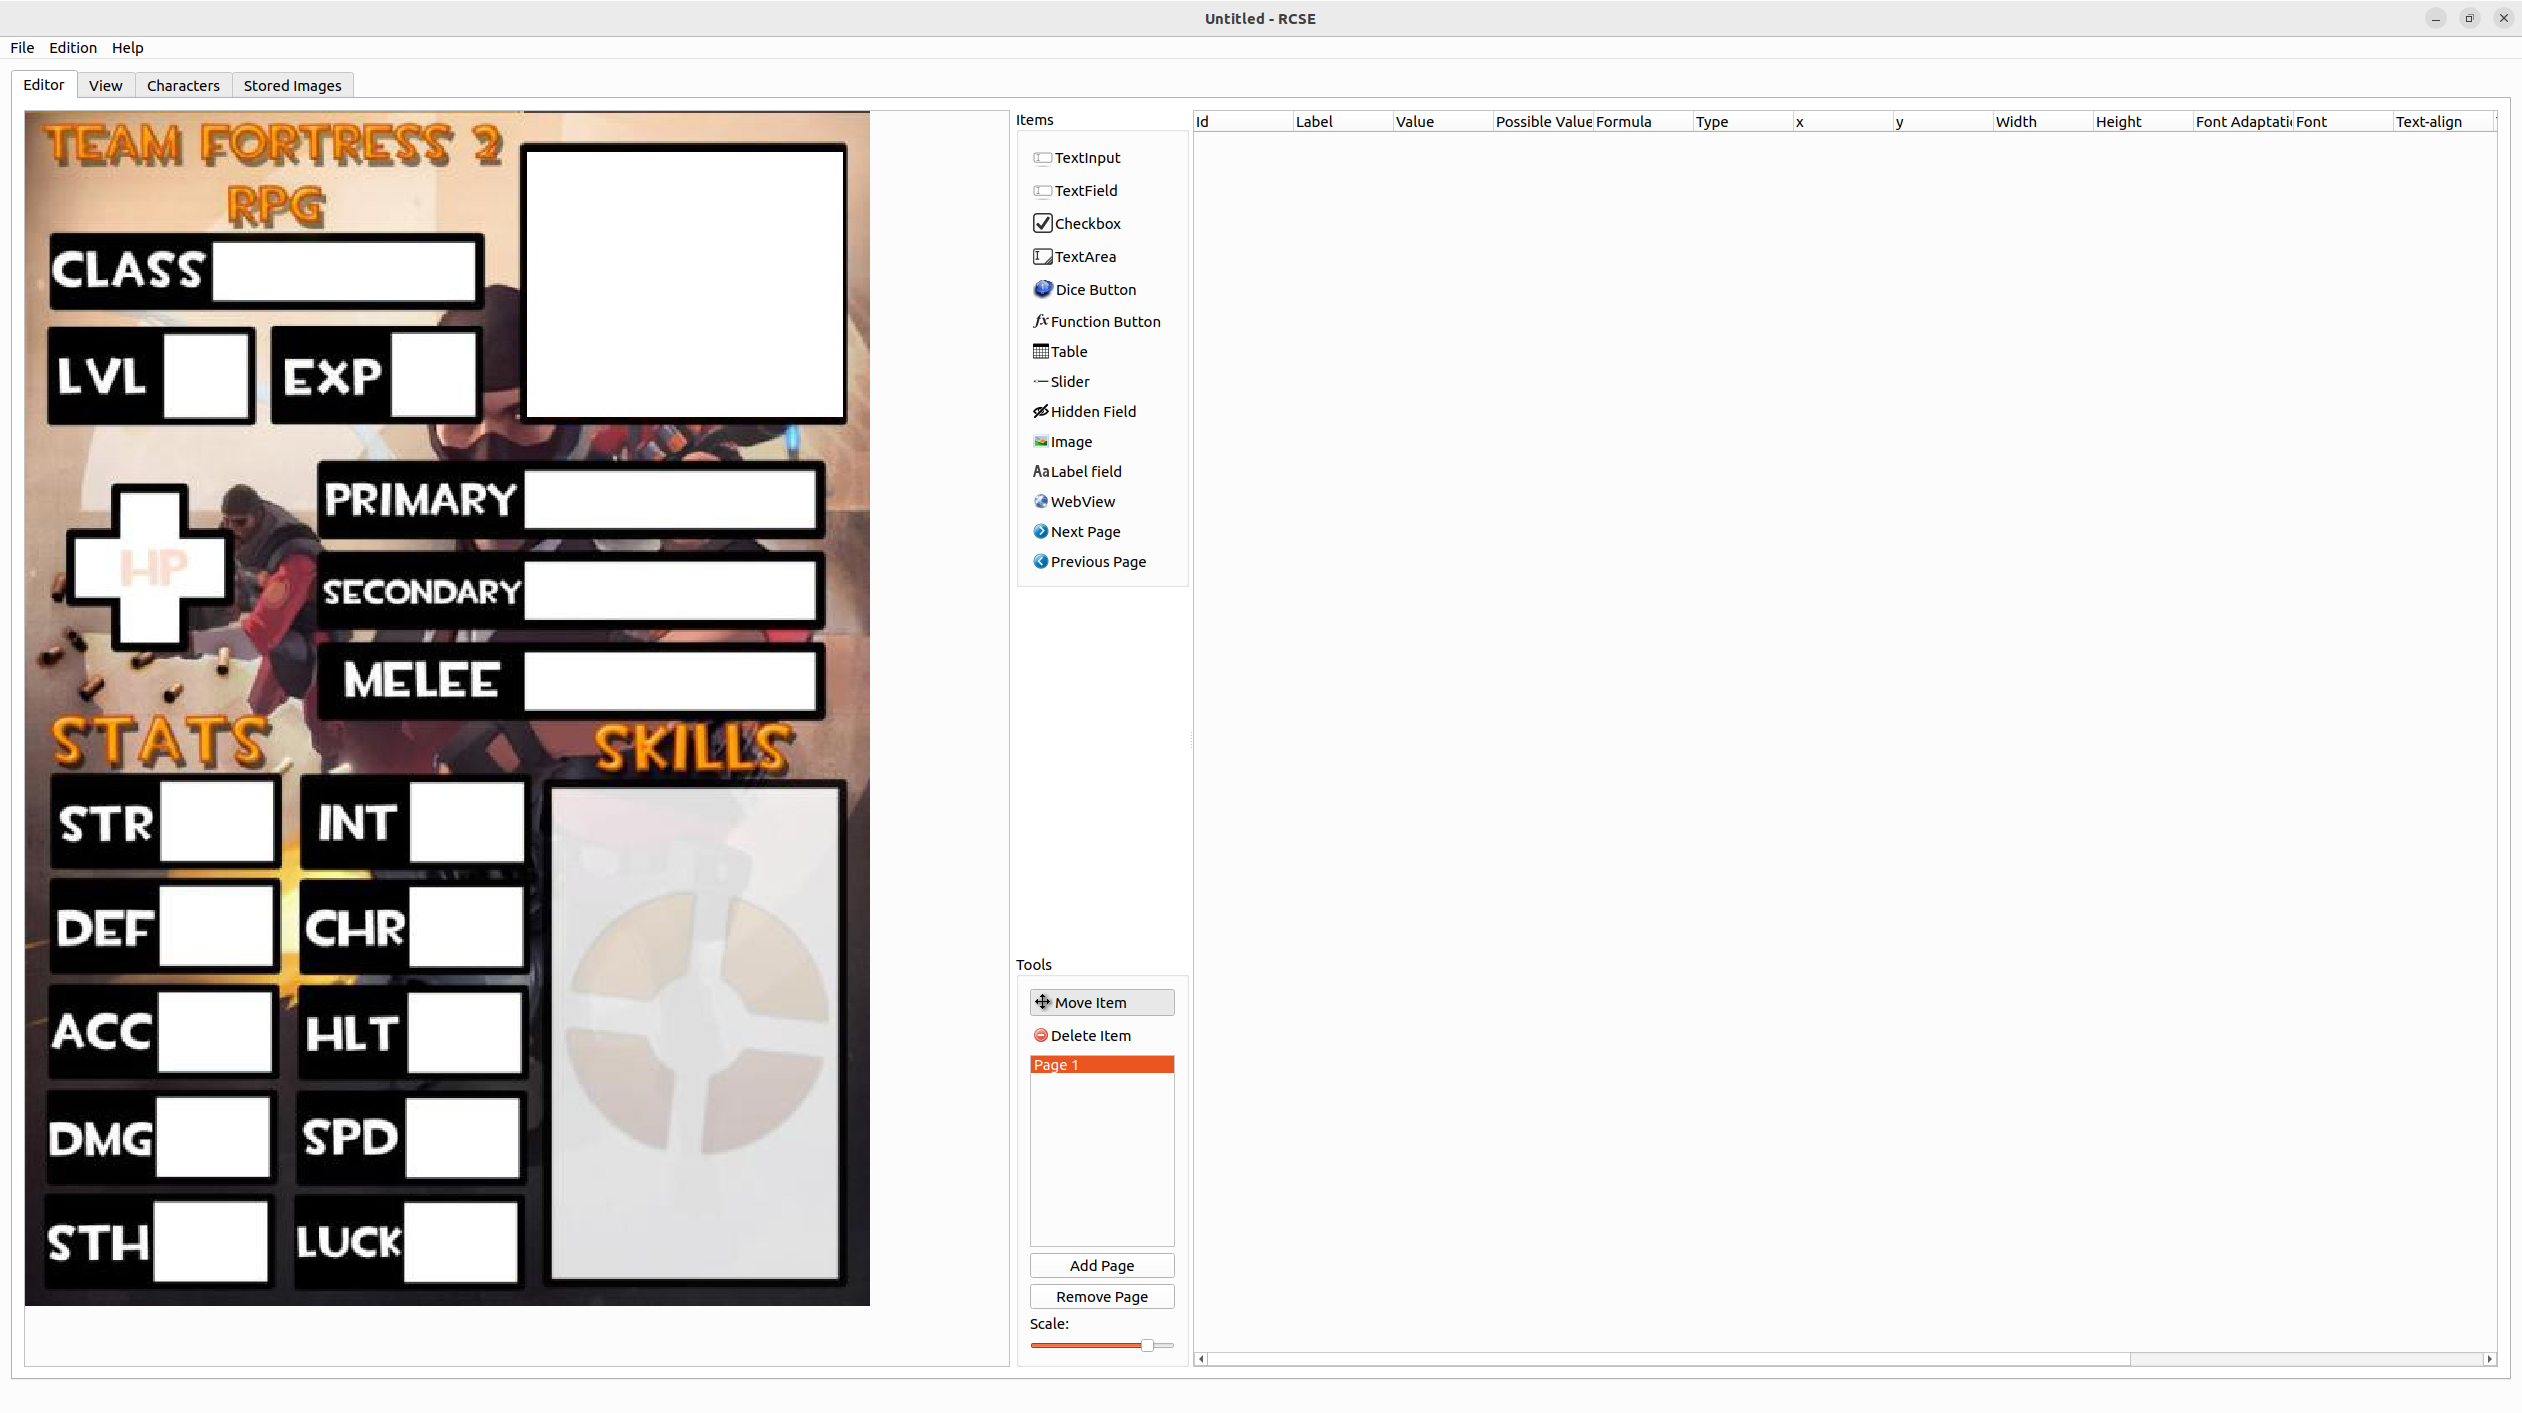
De eerste stap is het loslaten van een achtergrondafbeelding naar de bewerker (linkerzijde van het tabblad Bewerker). Deze afbeelding kan bijvoorbeeld het officiële personageblad van uw spel zijn.
Er zijn twee manieren om een afbeelding te importeren:
- Sleep vanaf uw computer naar RCSE en laat de afbeelding los (linkerzijde).
- U kunt ook importeren via het menu > Achtergrondafbeelding definiëren
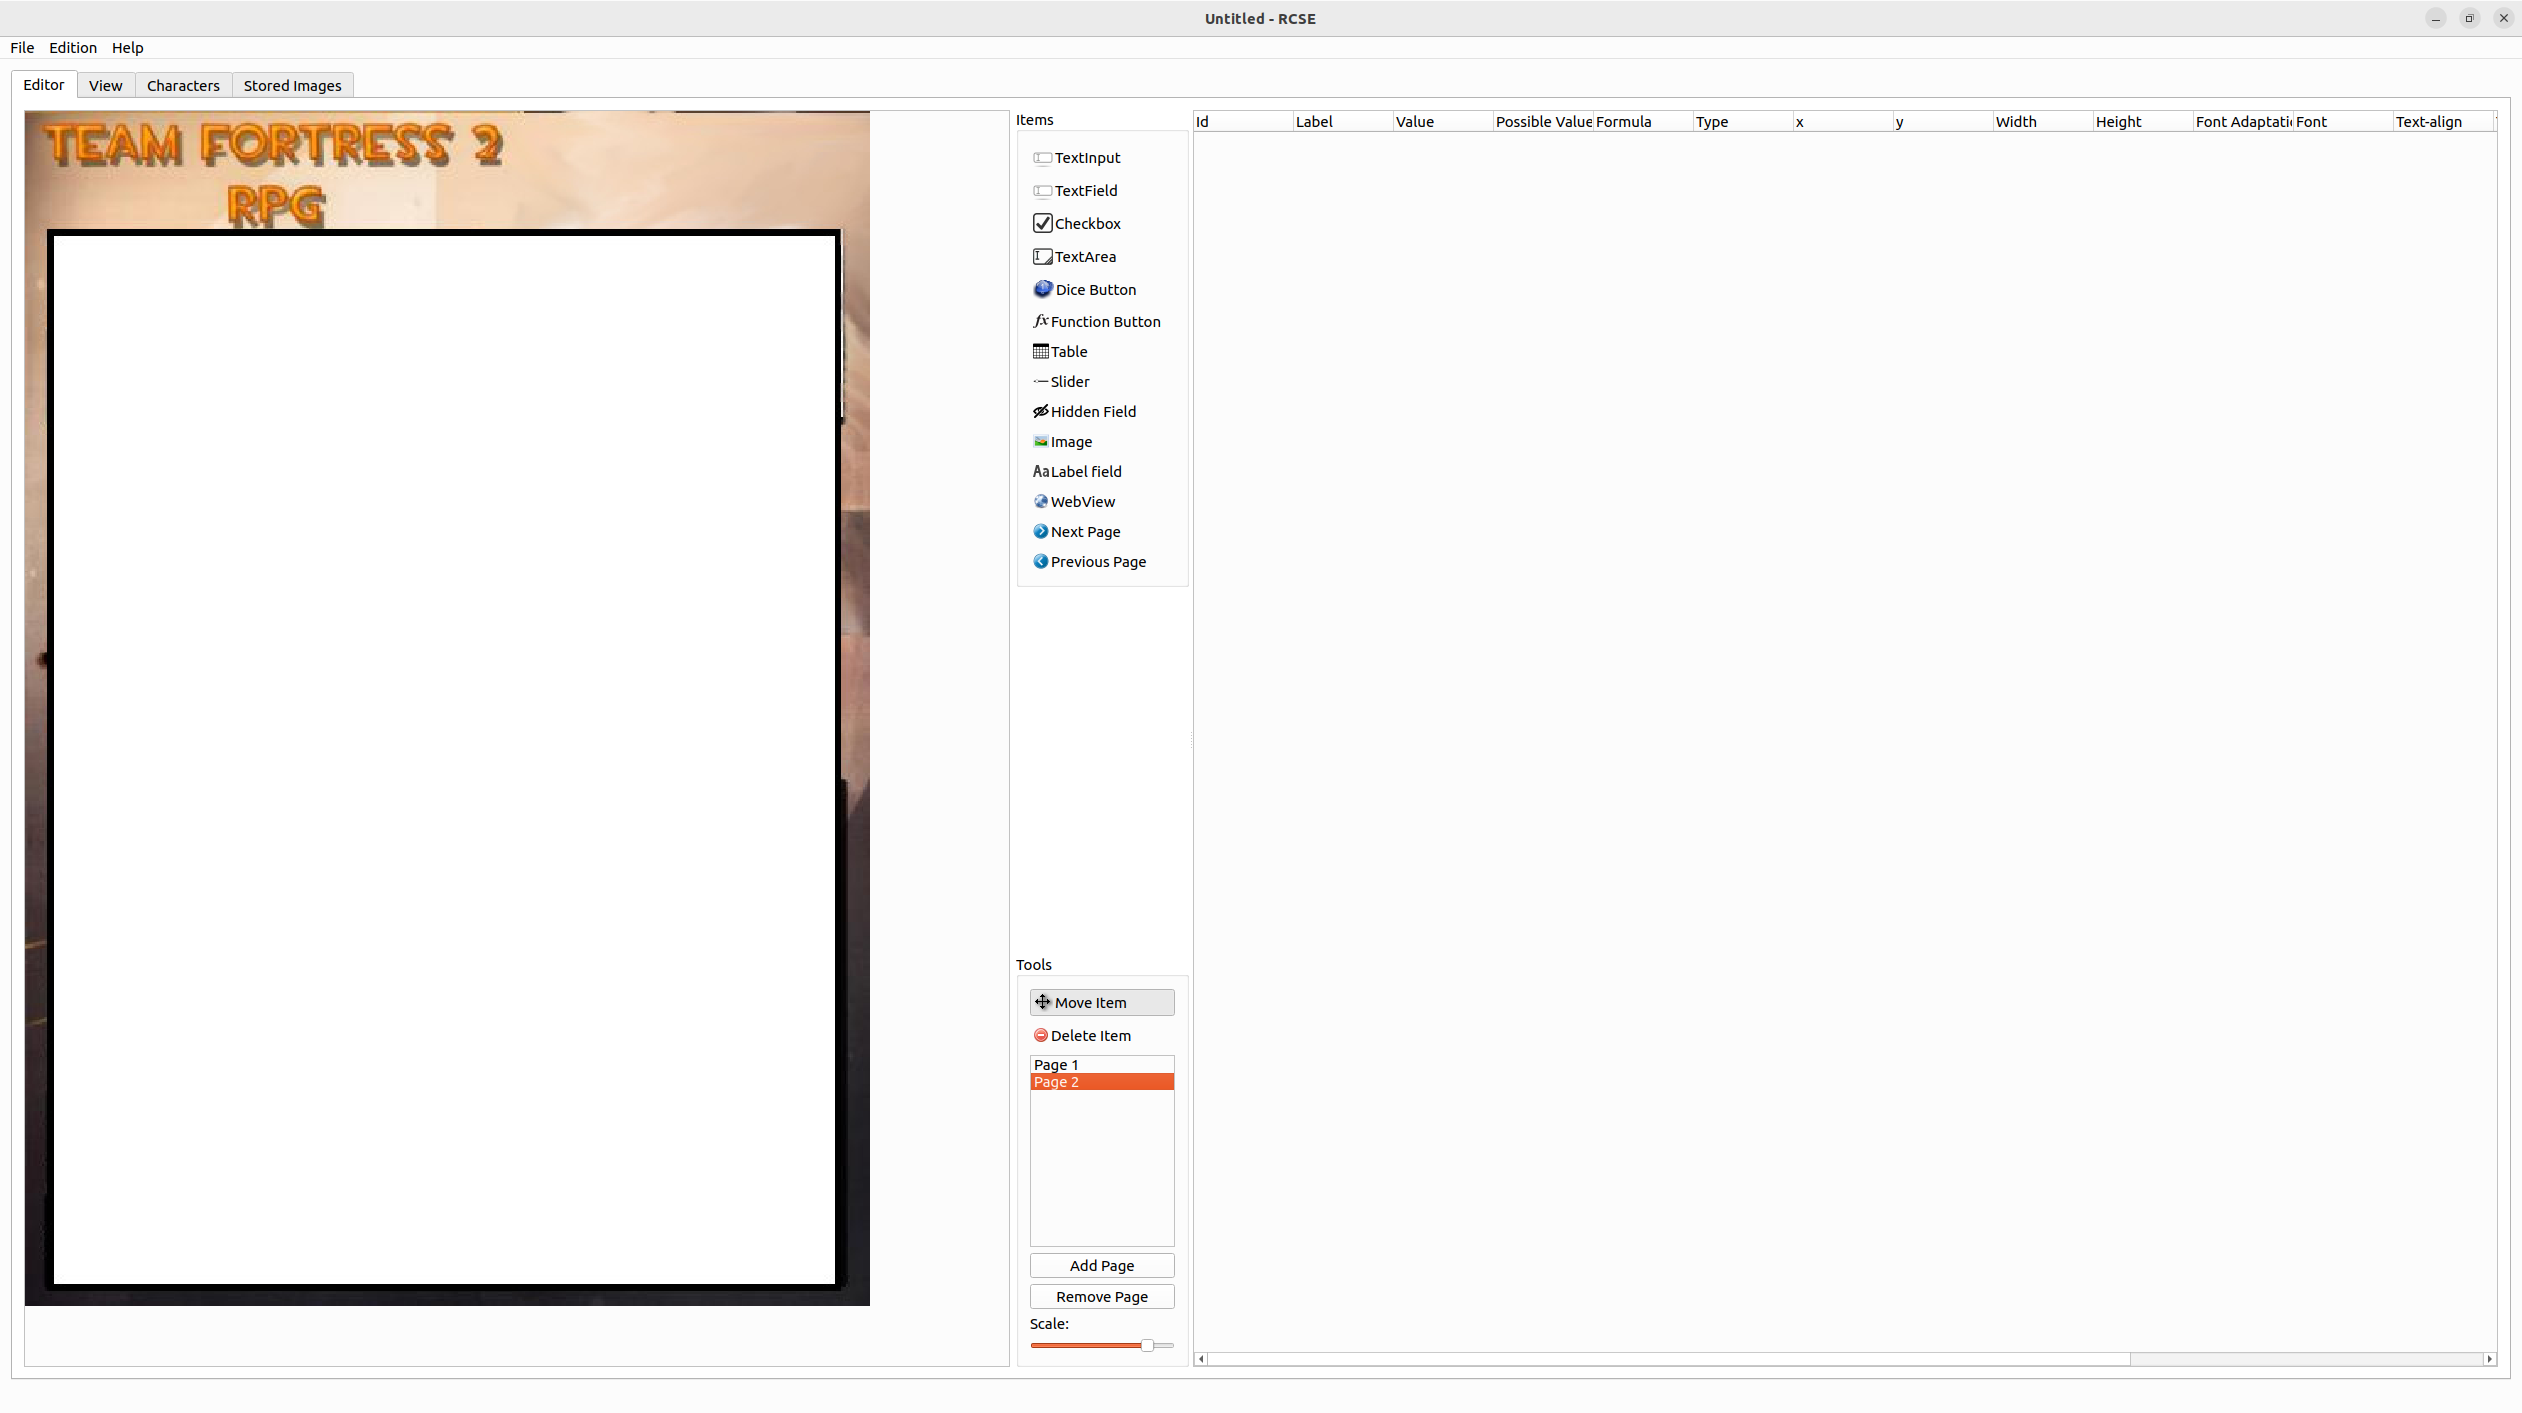
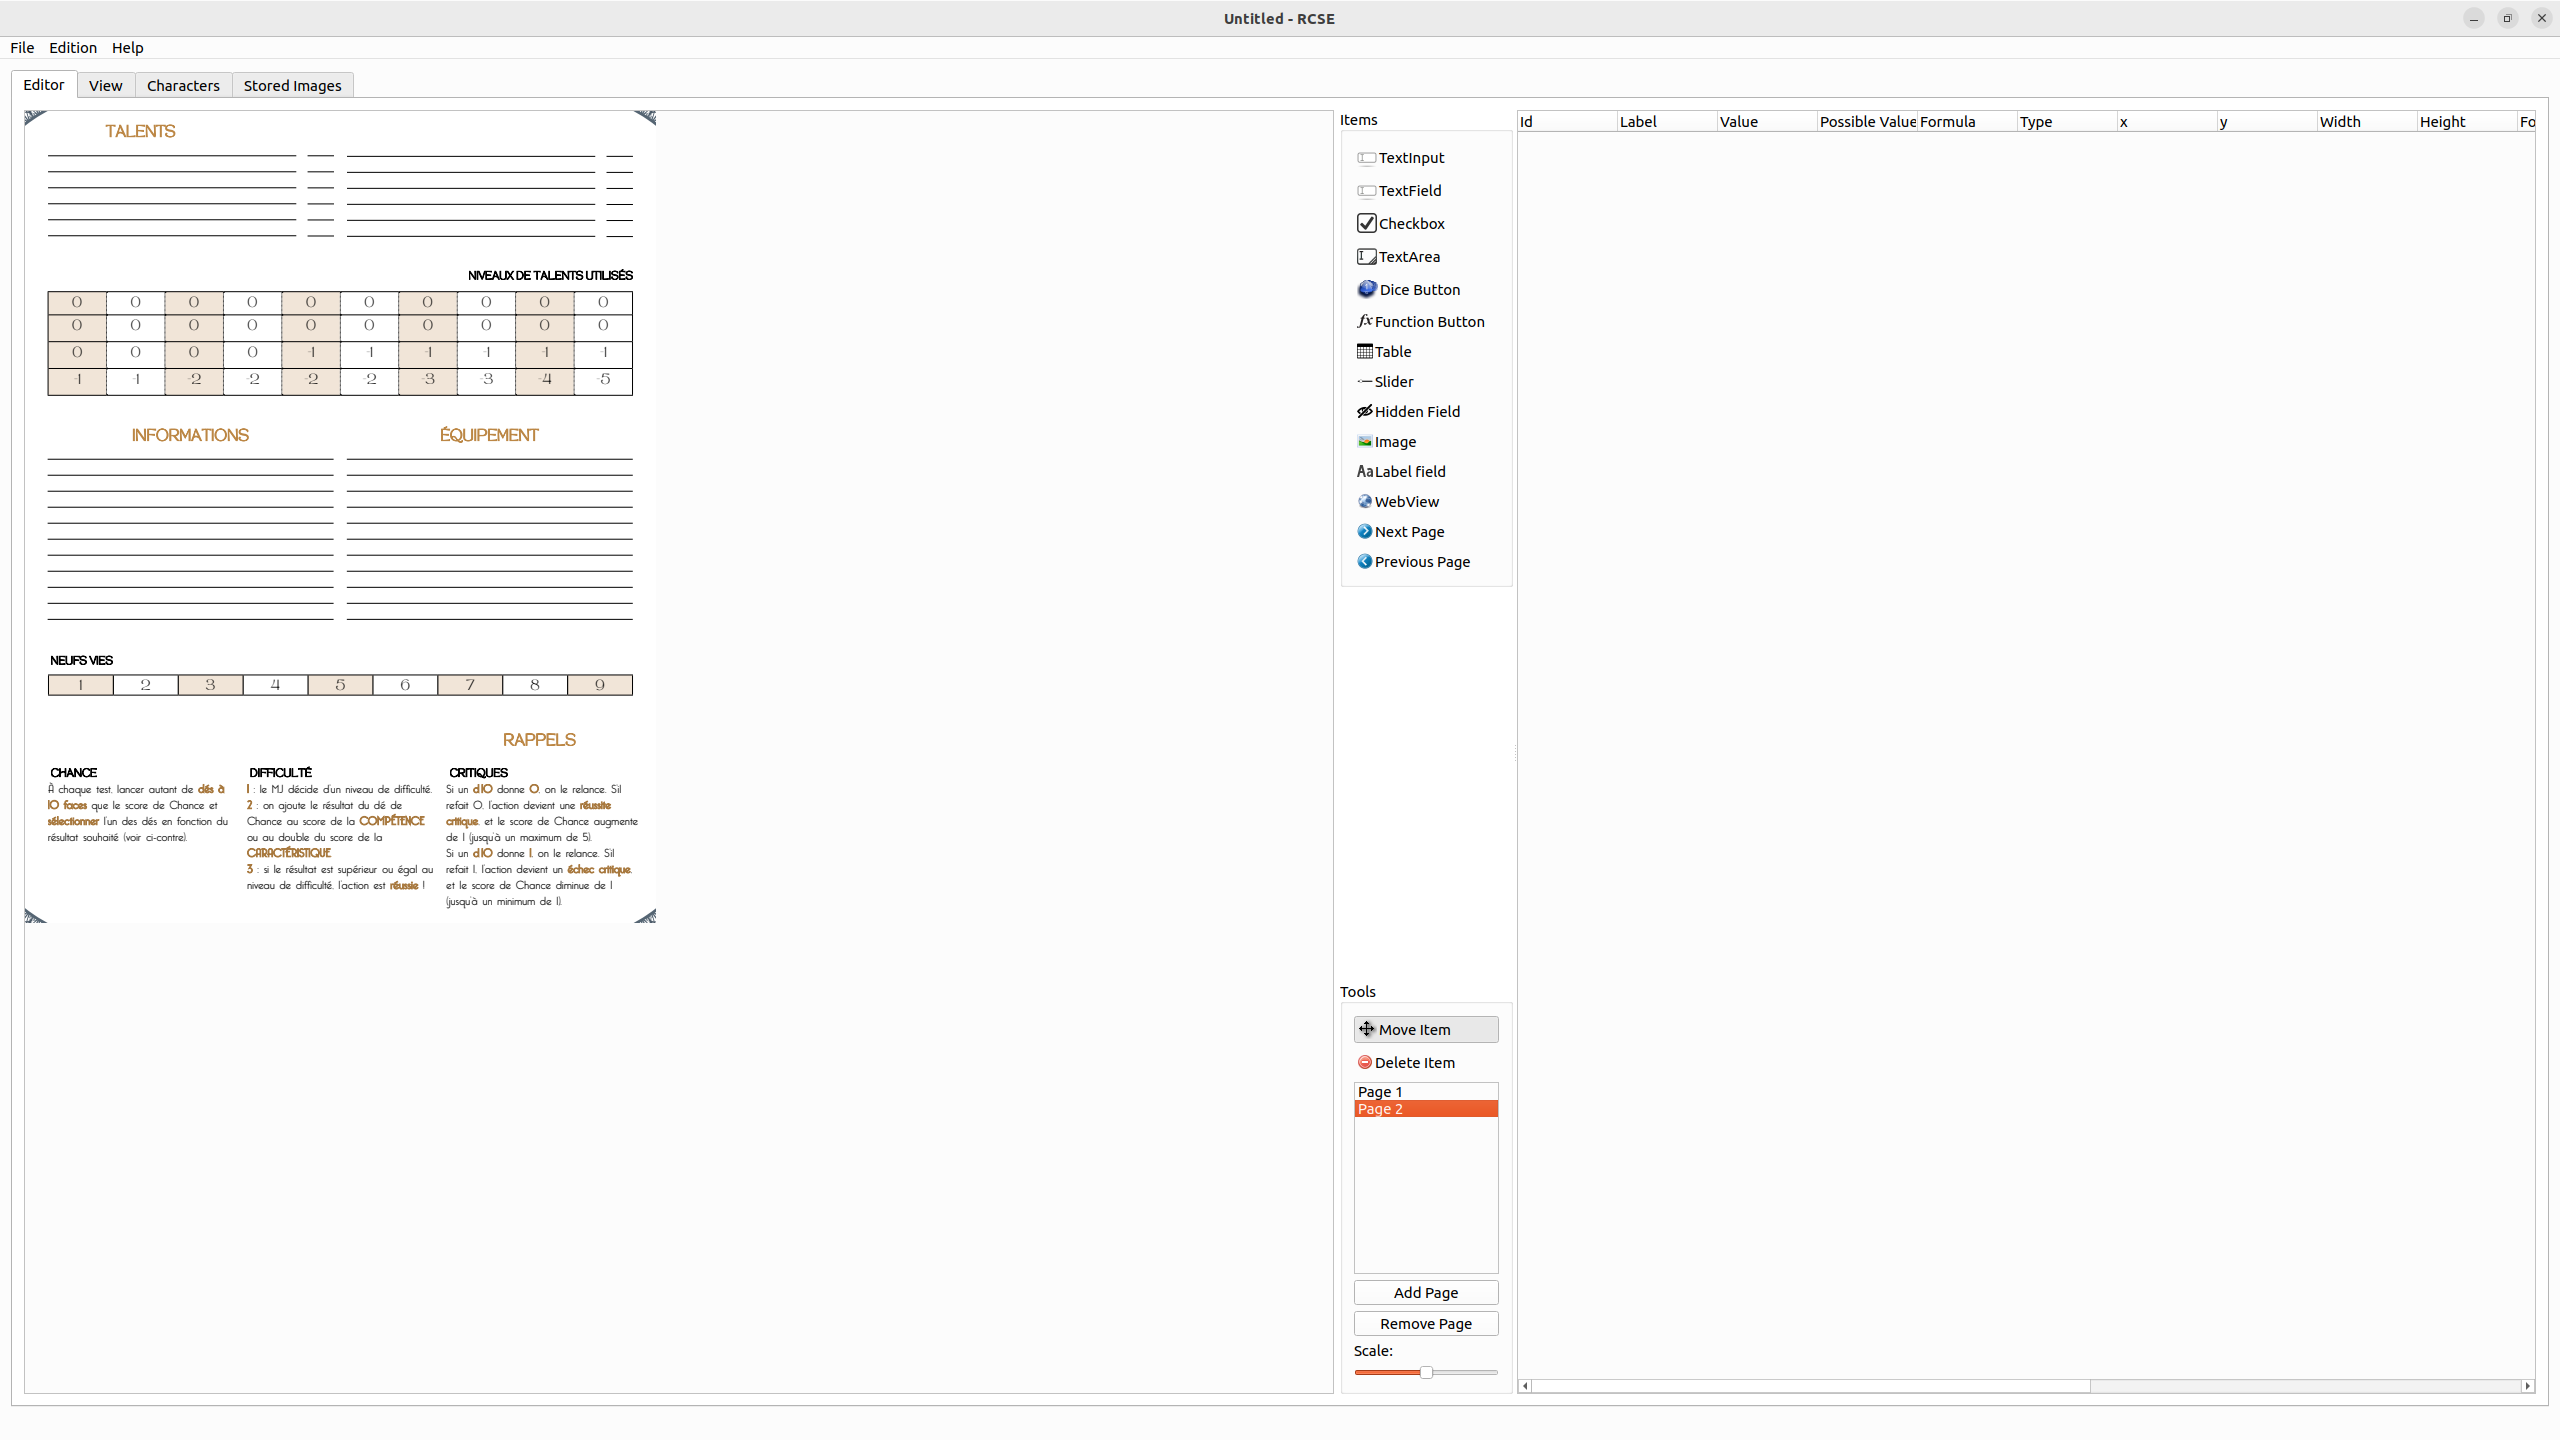
Als u meerdere pagina's nodig hebt voor uw personageblad, kunt u eenvoudig pagina's toevoegen met de daarvoor bestemde knop. Vervolgens moet u de achtergrond van de nieuwe pagina's definiëren door achtergrondafbeeldingen te importeren.
Sla uw bestand op !
Hoe PDF als achtergrond gebruiken
RCSE biedt inheemse ondersteuning voor PDF.
U hoeft alleen maar naar Bestand > PDF importeren te gaan. Dit dialoogvenster wordt geopend:
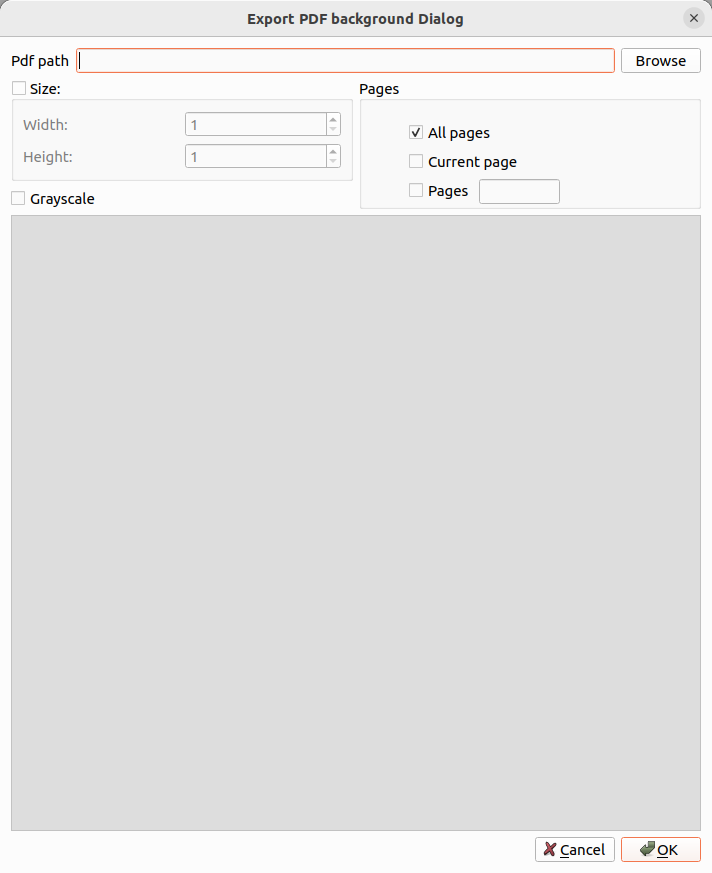
Klik op 'Bladeren' om uw personagebladbestand te selecteren.
Daarna kunt u
- De grootte instellen (van de geëxporteerde afbeeldingen)
- Selecteer de pagina's
- Neem de afbeelding in grijsschaal
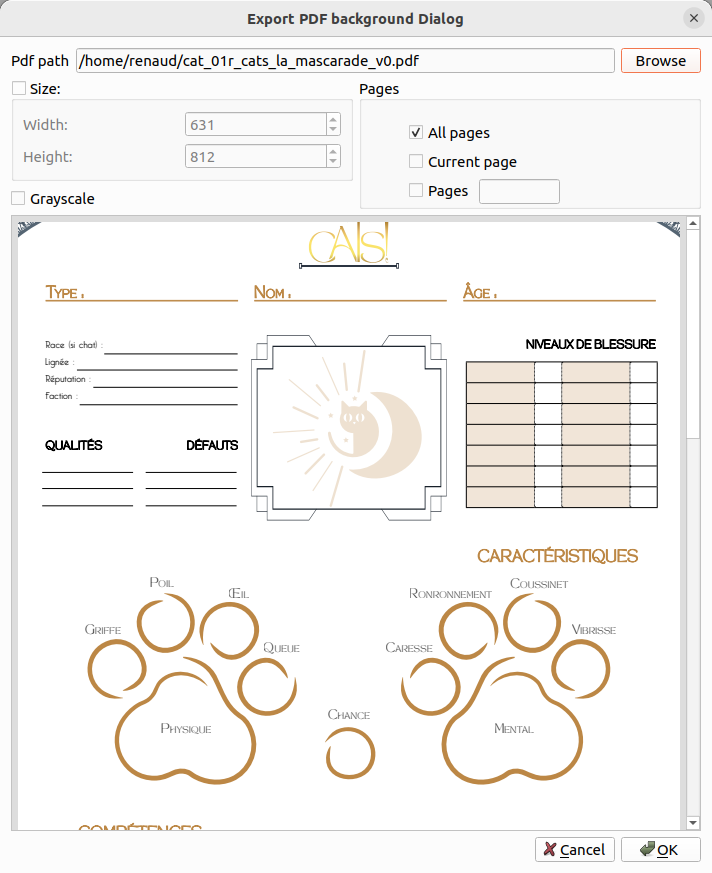
Laatste stap, klik op 'Ok'.
En voilà: zoals u ziet, ondersteunt het meerdere paginabladen.
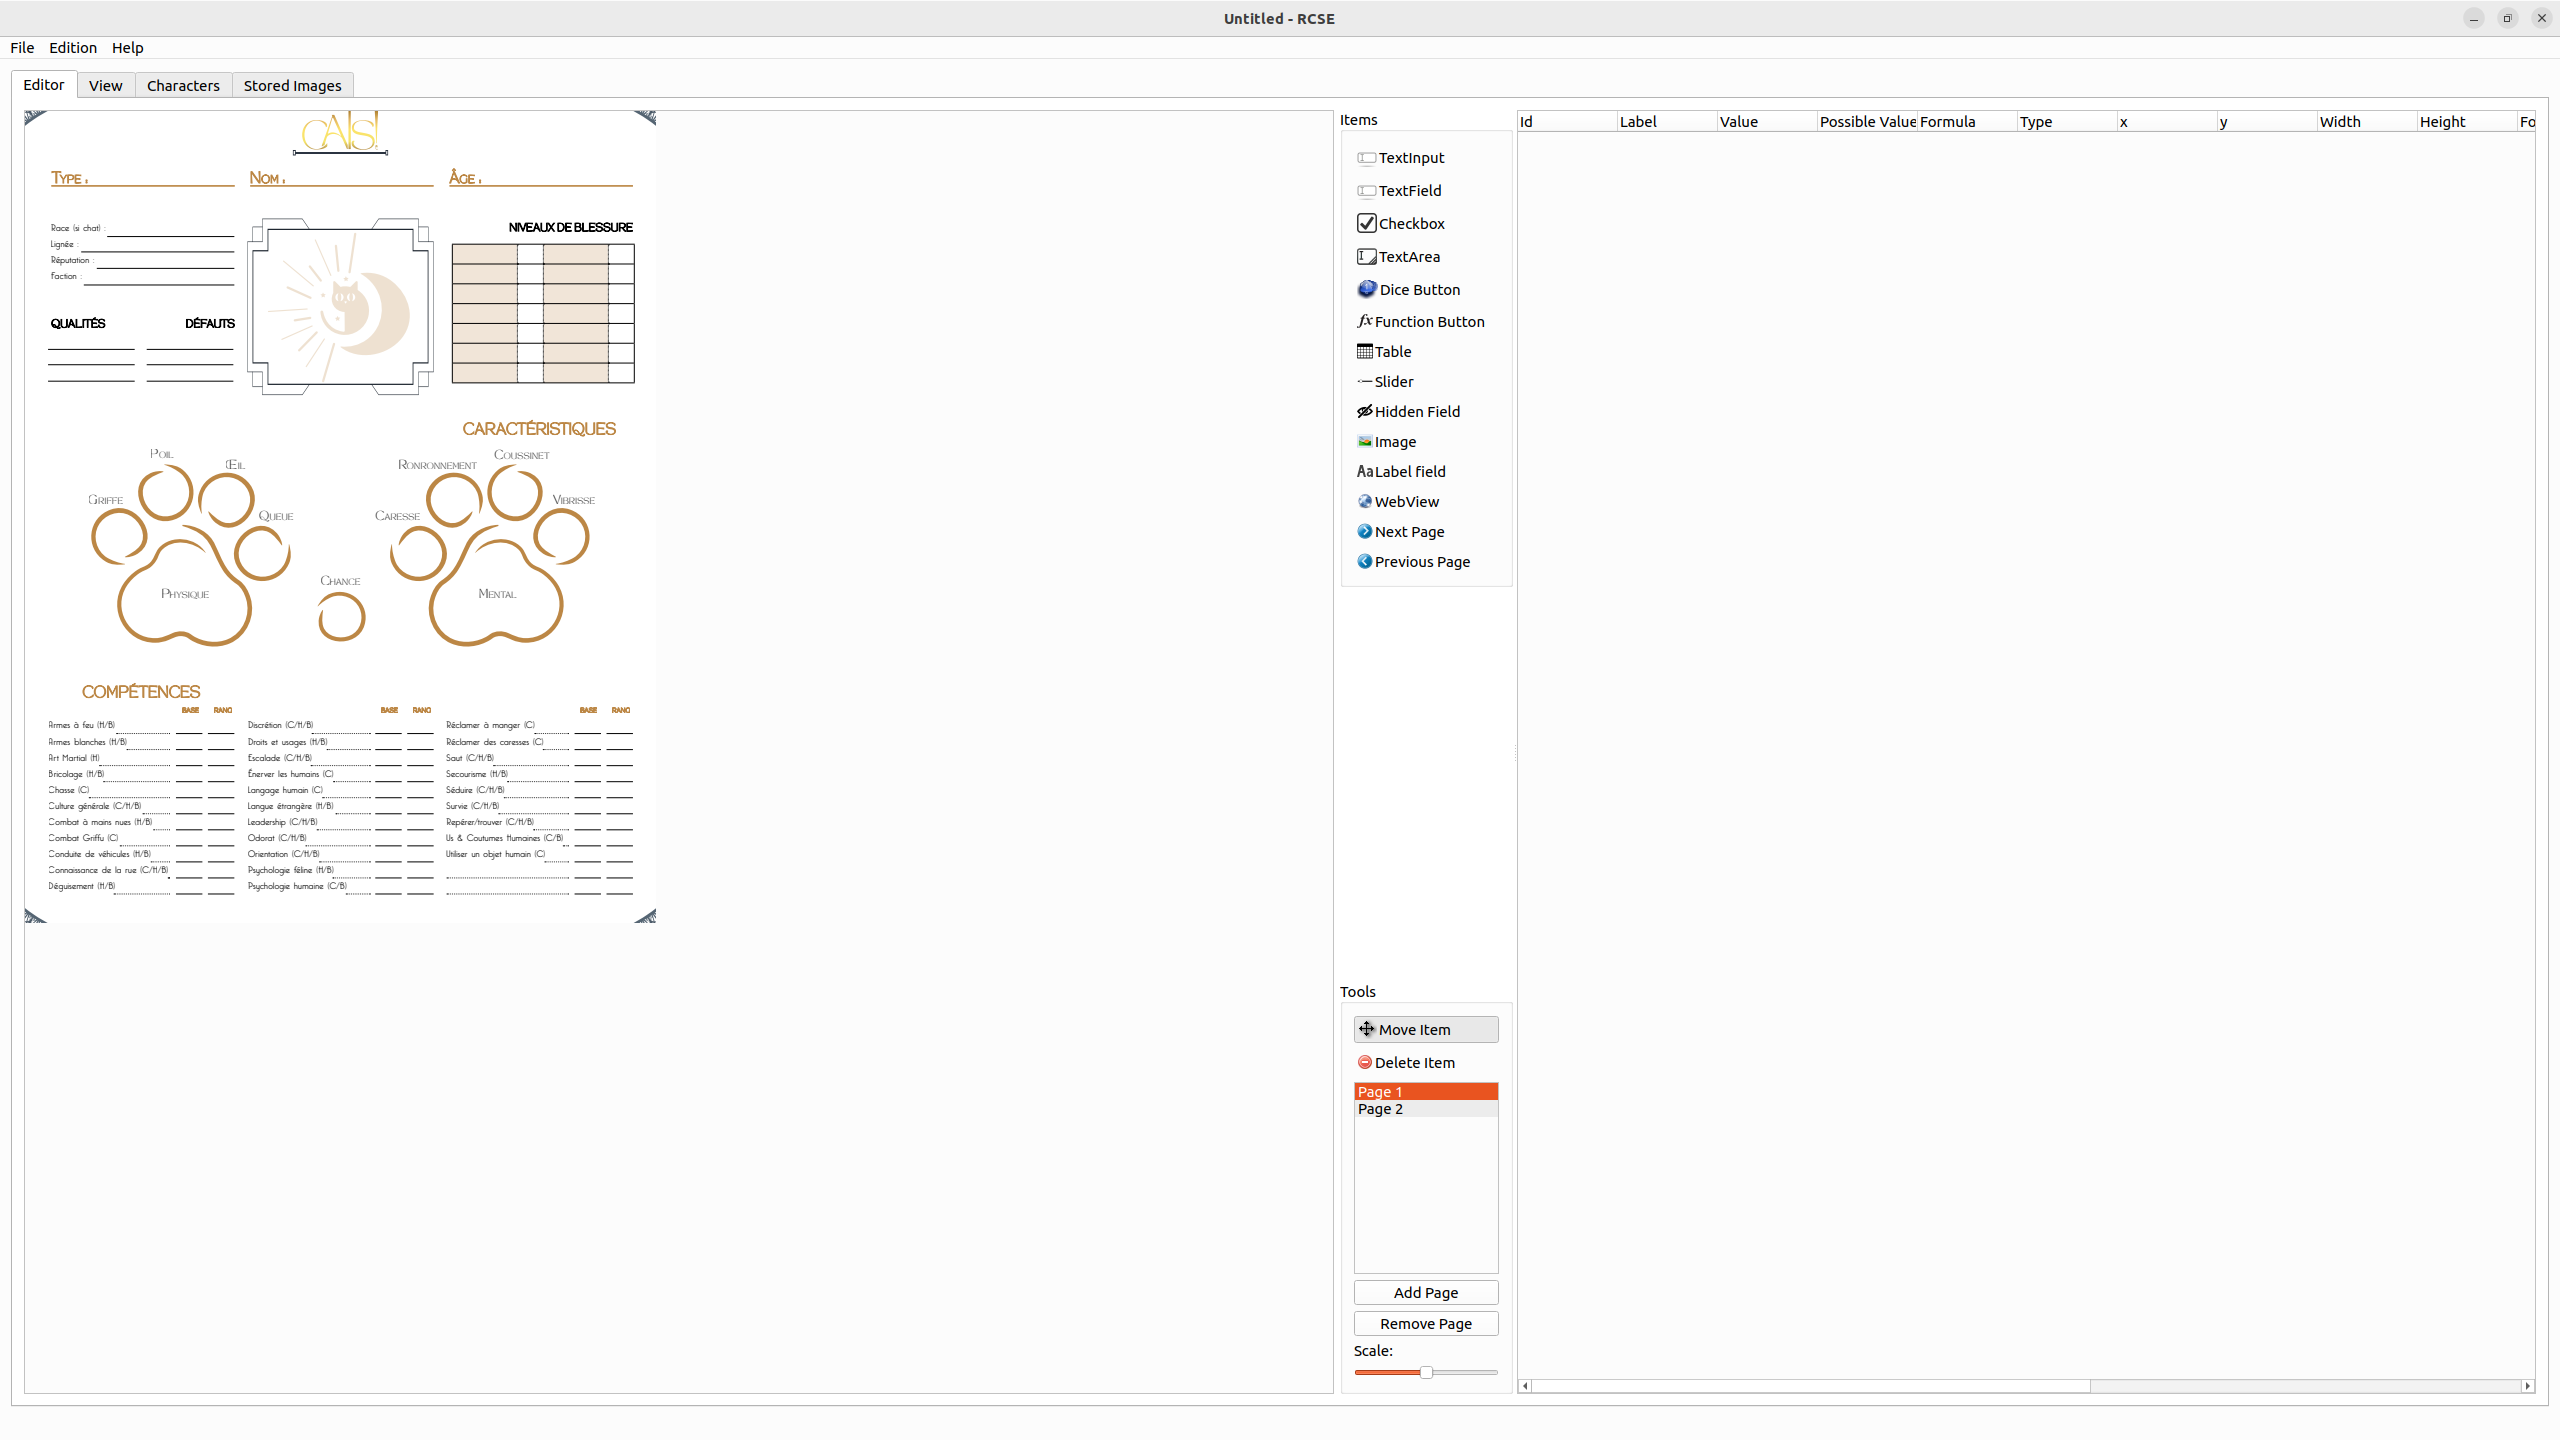
Stap 2: voeg velden toe aan het werkblad
Vervolgens is het belangrijk om de positie van elk veld te bepalen. Dit werk kan erg lang duren, maar dankzij RCSE kun u het grafisch weergeven.
Elk veld wordt ook toegevoegd aan de rechter tabel. u kunt velden uit deze tabel verwijderen.
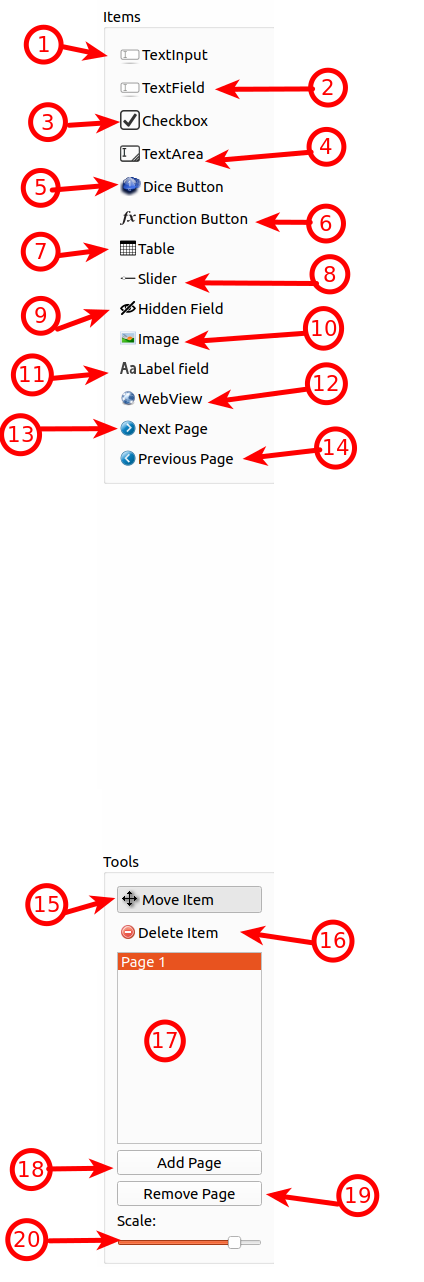
Er zijn veel verschillende velden binnen RCSE beschikbaar.
| id | Naam | Beschrijving |
|---|---|---|
| 1 | Tekstinvoer | Tekstinvoerveld voor één regel zonder randen of opmaak. Kan worden gepromoveerd naar een selector (zie hieronder) |
| 2 | Tekstveld | Tekstinvoer op één regel met randen en opmaak. |
| 3 | Keuzevakje | Slaat de waarde 0 of 1 op en geeft deze weer als een selectievakje. |
| 4 | Tekstgebied | Tekstinvoer met meerdere regels, inclusief opmaak en rand. |
| 5 | Dobbelsteenknop | Voeg een klikbare knop toe aan de opdracht om met de dobbelstenen te gooien. De opdracht moet worden ingesteld als de waarde van het veld |
| 6 | Functieknop | Voeg een klikbare knop toe om een QML-functie aan te roepen of een berekening uit te voeren |
| 7 | Tabel | Voeg een dynamische tabel toe en beheer meerdere regels (handig voor het beheren van lijsten met vaardigheden, objecten…) |
| 8 | Schuifregelaar | Selecteer een waarde tussen de minimum- en maximumwaarde (standaard 0 tot 100) |
| 9 | Verborgen veld | Voeg een verborgen veld toe aan het blad. Dit maakt het mogelijk om een tussentijdse berekening uit te voeren. |
| 10 | Afbeelding | Een afbeelding weergeven vanaf een URL |
| 11 | tekstlabel | Voeg een label voor alleen-lezen tekst toe |
| 12 | Webweergave | Voeg een webweergave toe en stel de URL in als waarde om elke gewenste website weer te geven |
| 13 | VorigePagina | Voeg een knop toe om de navigatie tussen pagina's te vergemakkelijken (ga naar de vorige pagina) |
| 14 | VolgendePagina | Voeg een knop toe om de navigatie tussen pagina's te vergemakkelijken (ga naar de volgende pagina) |
| 15 | Verplaatsen | Hulpmiddel voor het selecteren of verplaatsen van velden. |
| 16 | Items verwijderen | Verwijder items wanneer u erop klikt terwijl dit hulpmiddel actief is. |
| 17 | Paginakiezer | Gemakkelijk toegang tot pagina's |
| 18 | Pagina toevoegen | Voeg de pagina toe aan het einde van alle bestaande pagina's. |
| 19 | Pagina verwijderen | Verwijder de nu geselecteerde pagina |
| 20 | Schaal | Stel de huidige schaal van het werkvel in |
- Hulpmiddel selecteren
- Klik op de visuele bewerker (aan de linkerkant)
- Er verschijnt een plaatshouder in de visuele bewerker en er wordt een nieuwe regel toegevoegd aan de rechterkant
- Verplaats de muiscursor om de juiste grootte voor dit item te bepalen (de grootte kan later worden gewijzigd)
Sla uw bestand op !
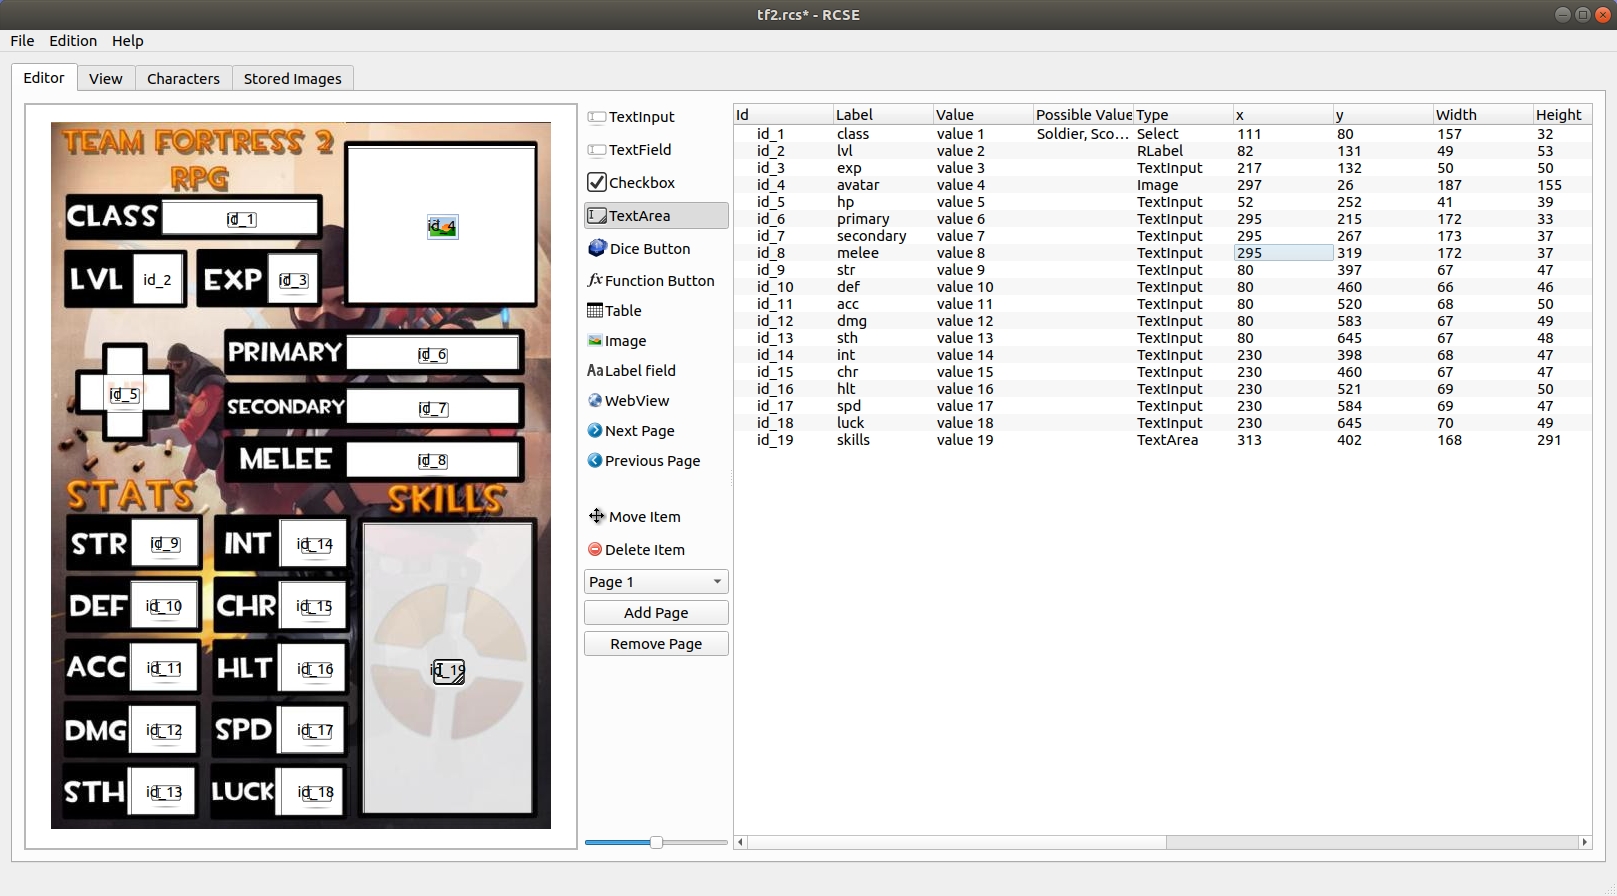
Stap 3: Velden bewerken
Nadat al uw velden zijn ingesteld, is het belangrijk om ze een naam te geven. Deze naam kunt u vervolgens in een formule gebruiken.
Naast de naam kunnen nog veel andere eigenschappen worden bewerkt. Het enige wat u hoeft te doen, is de juiste tabel op het eerste tabblad te bewerken.
Sla uw bestand op !
Details over elke kolom:
Id
Deze eigenschap is de unieke ID voor die gegevens. Standaard genereert RCSE deze automatisch. Het is aan te raden de standaardwaarde te behouden. Het wijzigen ervan vereist dat u zich aan enkele regels houdt:
- Begin met een kleine letter
- Geen spatie
- Letters, cijfers en _
- Geen speciaal teken
ID's kunnen worden gebruikt om toegang te krijgen tot karakterinformatie in formules.
Hoe korter, hoe beter: Voorbeelden: =${id_5}+4
Label
Deze eigenschap is een leesbare ID voor dat veld.
Het wordt aanbevolen om het label van alle velden in te stellen.
Het is mogelijk om toegang te krijgen tot de gegevens via het label: =${intelligence}+4.
Waarde
De veldwaarde wordt weergegeven op het personageblad. Stel de waarden zo in dat ze dicht bij de werkelijke spelwaarden liggen. Daar zijn twee redenen voor:
- De waarden worden in de formule gebruikt. Zo kan de berekening van de formule worden gecontroleerd.
- Naarmate de waarden worden weergegeven, kunt u het element aanpassen (grootte, lettertype, kleur) om ervoor te zorgen dat het leesbaar is.
Waarden worden ingesteld met gegenereerde tekst.
Mogelijke waarden
Dit veld is alleen bruikbaar voor Tekstinvoer. Hiermee kunt u een Tekstinvoer wijzigen in een selector. Een selector (ook wel keuzevak genoemd) is een item waarmee u één waarde uit een beperkte lijst kunt selecteren.
Om de set waarden te definiëren, worden de waarden gescheiden door komma's: hoofd,lichaam,linkerarm,rechterarm,linkerbeen,rechterbeen
Type
Wijzig het veldtype naar een ander type. Een tabel kan niet naar een ander type worden geconverteerd (en geen enkel veld kan een tabel worden).
X
Veldpositie op de X-as (van links naar rechts). U kunt deze aanpassen om velden nauwkeurig uit te lijnen.
Y
Veldpositie op de Y-as (van boven naar beneden). U kunt deze aanpassen om velden nauwkeurig uit te lijnen.
Breedte
De breedte van het veld. u kunt deze aanpassen om velden nauwkeurig uit te lijnen.
Hoogte
De hoogte van het veld. u kunt deze aanpassen om velden nauwkeurig uit te lijnen.
Aanpassing van lettertype
Deze optie kan worden ingeschakeld om de lettergrootte aan te passen aan de grootte van het tekenblad.
Uitlijning tekst
U kunt instellen waar de tekst in het veld moet worden weergegeven.
| Linkerbovenhoek | Middenboven | Rechterbovenhoek |
| Midden links | Midden midden | Midden rechts |
| Linkeronderhoek | Onder midden | Rechteronderhoek |
Tekstkleur
U kunt de tekstkleur instellen.
Achtergrondkleur
U kunt de achtergrondkleur instellen.
Rand
U kunt instellen waar de rand moet worden weergegeven (boven, rechts, links, onder, overal of geen rand).
Sla uw bestand op !
Stap 4: blad genereren
Nadat u alle gewenste velden hebt toegevoegd, kunt u het spreadsheet genereren door te klikken opMenu bewerken > Code en spreadsheet genereren (Ctrl+R).
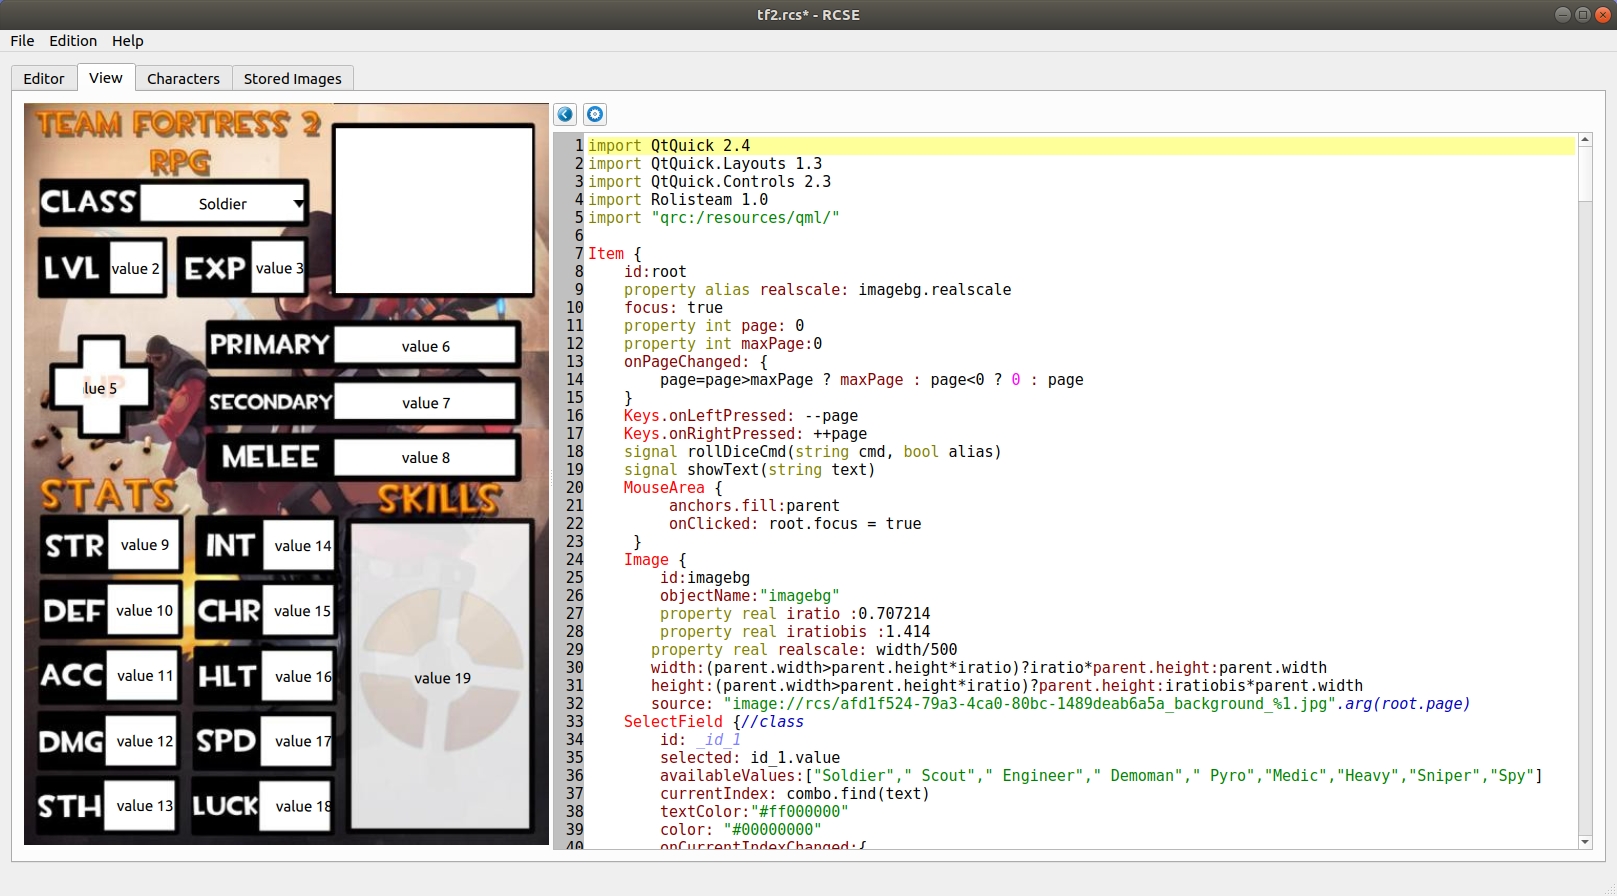
Het spreadsheet is zichtbaar in het tabblad Beeld. Het tabblad toont het spreadsheet precies zoals het er in Rolisteam uit zal zien.
Door deze actie verandert de inhoud van het tabblad 'Code'. Het toont QML-code.
U kunt het spreadsheet aanpassen (in het tabblad bewerker, stap 3) en het steeds opnieuw genereren totdat het aan uw wensen voldoet. U kunt deze bewerking zo vaak herhalen als u wilt om het perfecte resultaat te bereiken.
Sla uw bestand op !
Schrijf uw eigen QML

Het is ook mogelijk om de QML-code direct aan te passen om nieuwe functies aan het werkblad toe te voegen. U kunt muziek afspelen, video's toevoegen, animaties toevoegen en nog veel meer. Wees voorzichtig: als u de gegenereerde code wijzigt, mag u niet vragen om de code en het werkblad opnieuw te genereren. Dit zal al uw wijzigingen wissen.
Stap 5: personages toevoegen
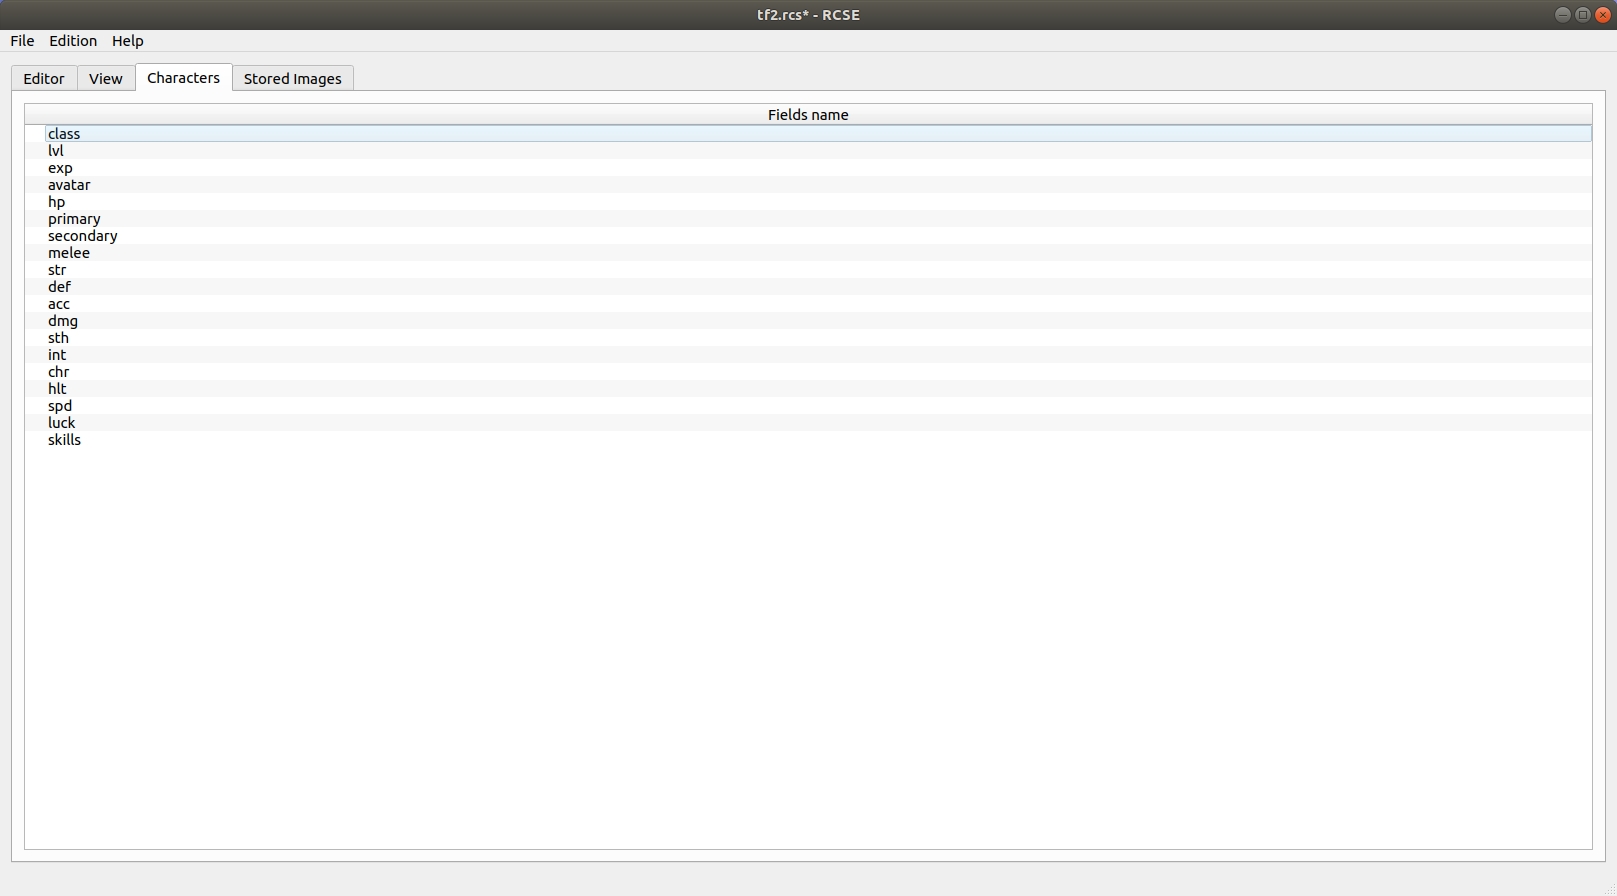
Laten we naar het derde tabblad gaan: 'Personages'. Hier kunnen personages aan het bestand worden toegevoegd.
Voor elk toegevoegd personage verschijnt een kolom. Het is aan te raden om voor elk veld een standaardwaarde in te stellen. RCSE helpt u om één waarde over meerdere regels te verdelen. Eén cel kan worden gedefinieerd als de naam van het personage. Hiermee wordt de kolomkop ingesteld.
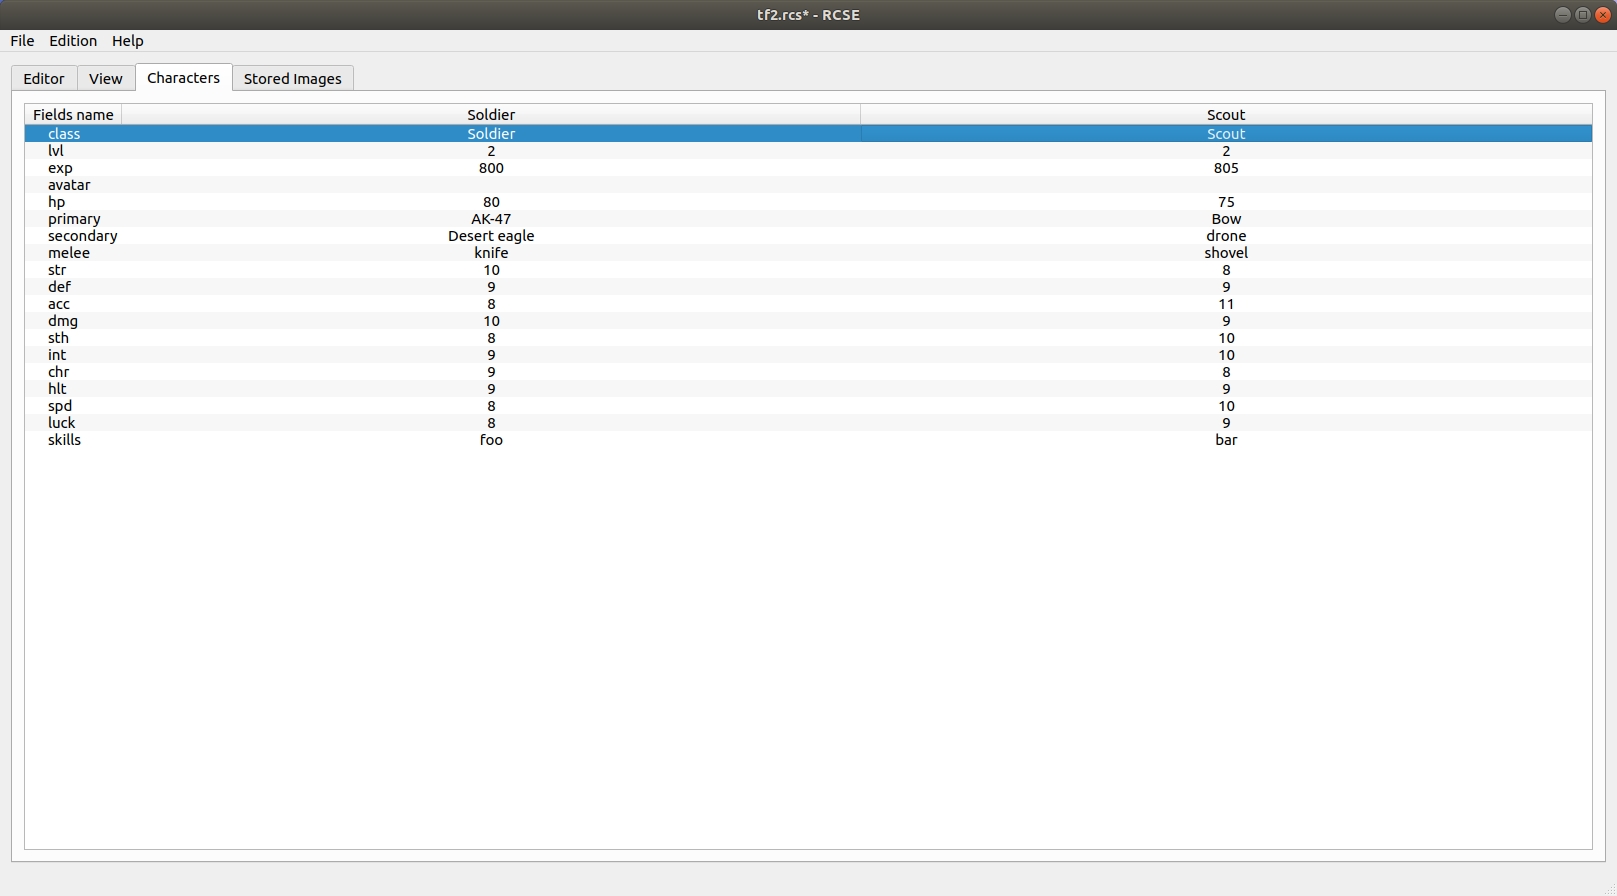
Zoals u ziet, zijn er geen gegevens voor de avatar. Om afbeeldingen in het personageblad in te stellen, zijn er twee opties: Ten eerste is de makkelijkste oplossing om een URL naar de afbeelding in te voeren (http://site.com/image/myAvatar.png). De tweede oplossing is om naar het tabblad 'opgeslagen afbeeldingen' te gaan.
Stap 6: afbeeldingen toevoegen [optioneel]
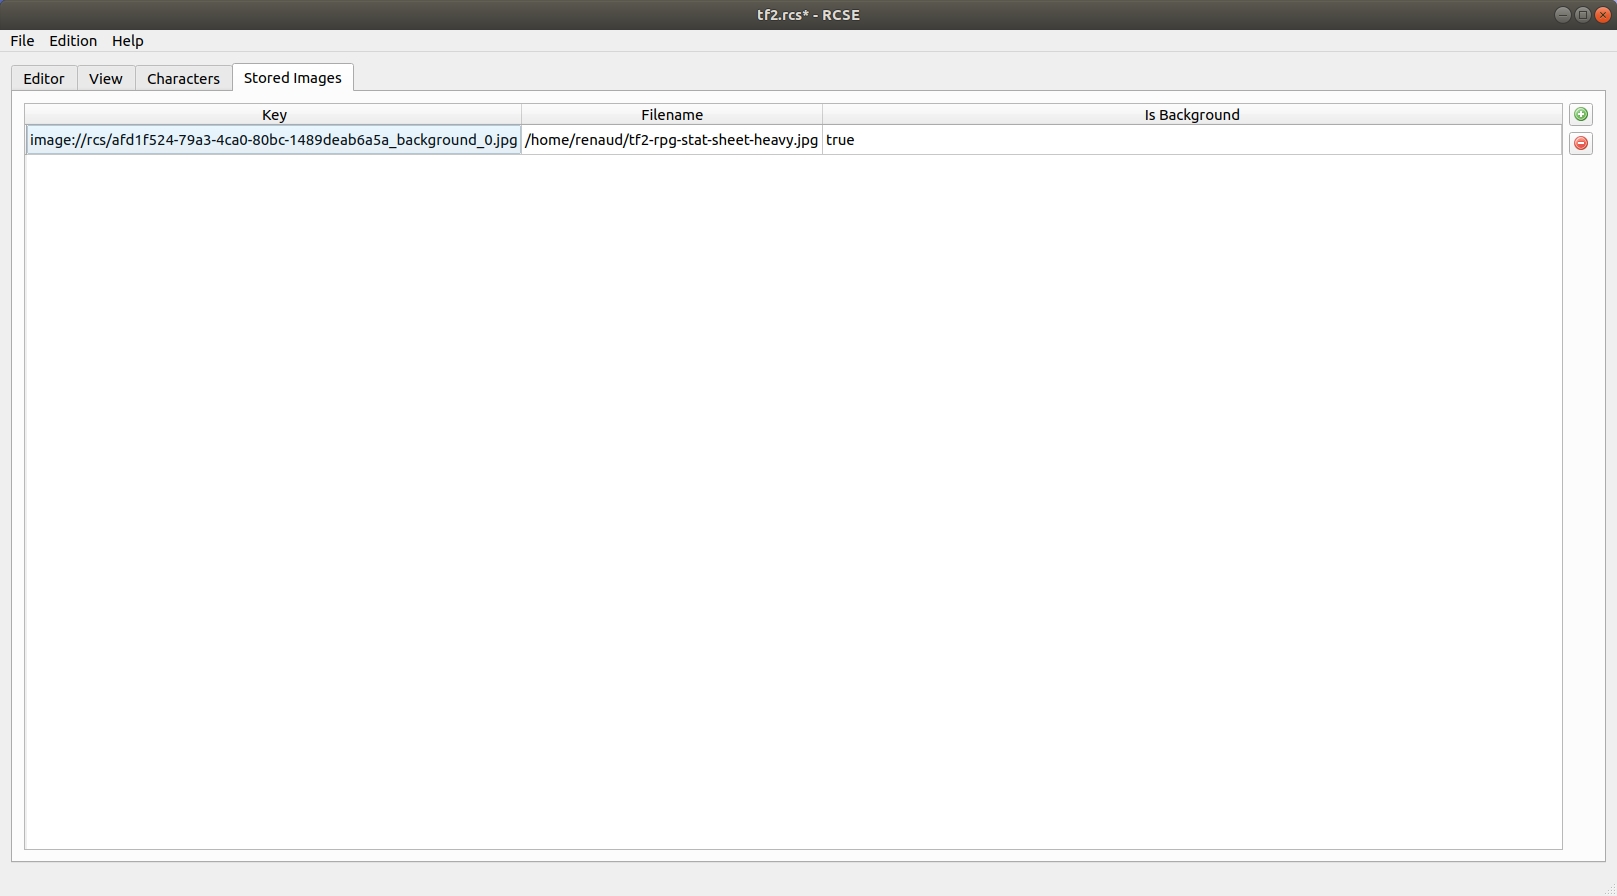
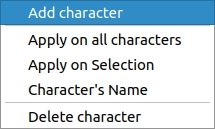
Klik vervolgens op de knop 'Toevoegen'

Vervolgens moeten we de URL van elke afbeelding kopiëren en in het daarvoor bestemde veld plakken. Het contextmenu biedt de mogelijkheid om de URL te kopiëren.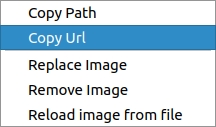
Plak het vervolgens in het personageveld.
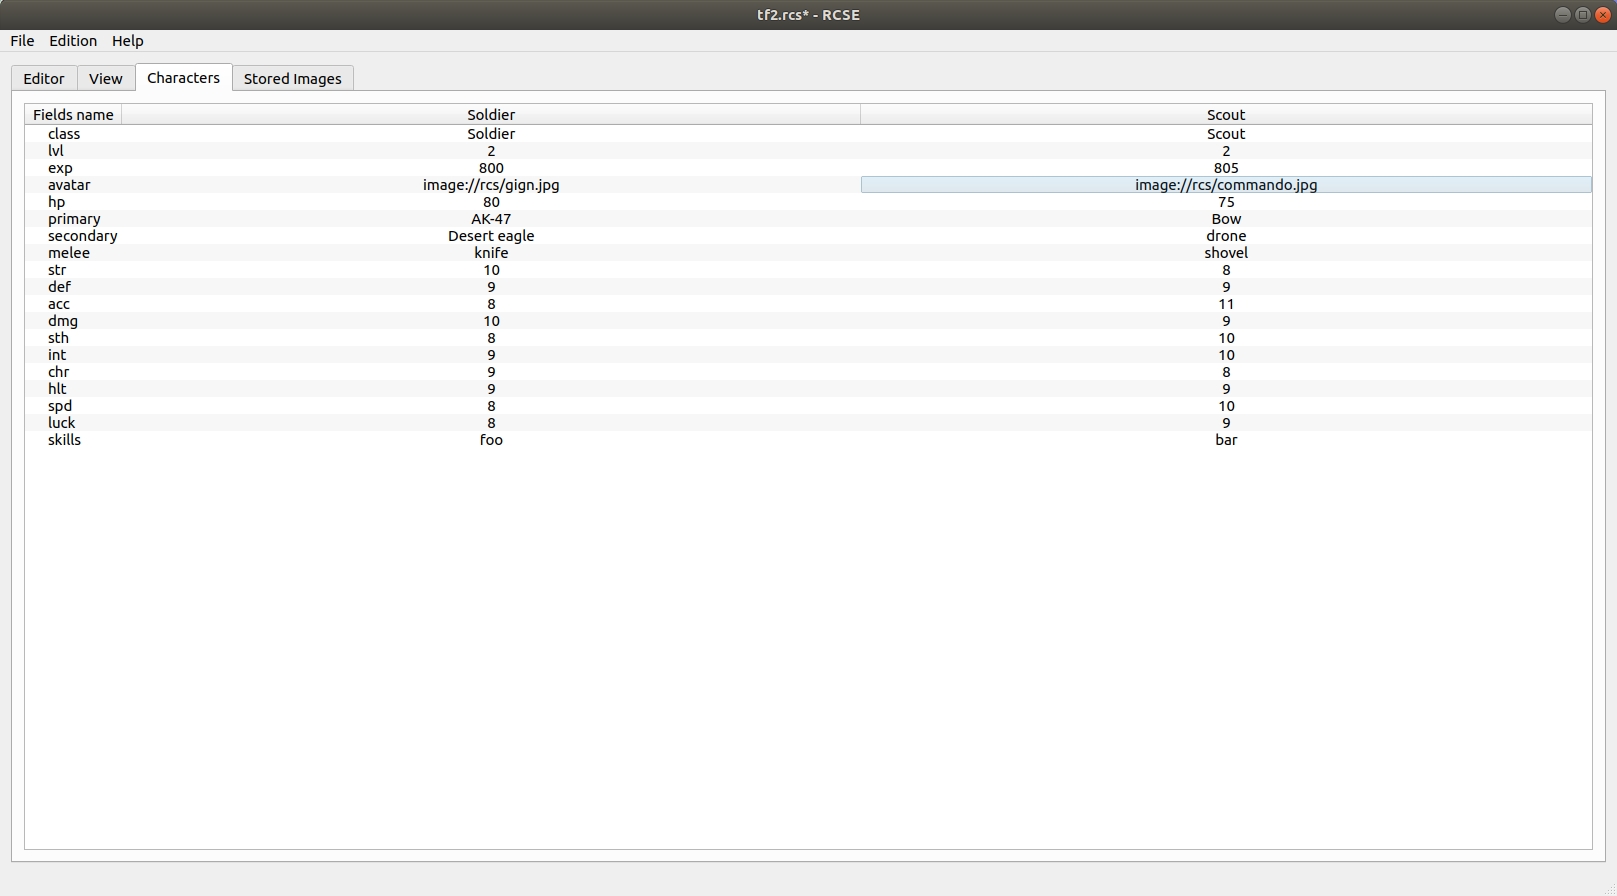
Sla uw bestand op !
Stap 7: formules en automatisering [optioneel]
Het personageblad bevat een formule-engine. U kunt waarden automatisch berekenen. Het blad doet het werk voor de spelleider of speler. Om een nieuwe formule toe te voegen, hoeft u alleen maar de regel te beginnen met =, net zoals in elk spreadsheetprogramma.
Mogelijke bewerkingen
Het formulesysteem kan veel functies en bewerkingen beheren.
Haal waarde op
Zoals we zagen, kunt u de waarde van elk veld verkrijgen via het label of de ID. U moet de ID of het label als volgt inkapselen: ${label} of ${id}.
Rekenen
U kunt alle gebruikelijke bewerkingen uitvoeren.
Voorbeelden:
Som
4+4
${intelligence}+3
Aftrekking
12-3
${intelligence}-3
Vermenigvuldiging
=2*7
=2x7
=${intelligence}*3
Deling
=15/5
=15÷5
=${intelligence}/3
=${intelligence}÷3
abs
Absolute waarde vereist slechts één argument.
=abs(-3)
3
=abs(3)
3
=abs(${intelligence}-11)
8
min
Deze functie vereist meerdere argumenten.
=min(3,8,10,1)
1
=min(${wits},${dexterity})
3
max
Deze functie vereist meerdere argumenten.
=max(3,8,10,1)
10
=min(${wits},${dexterity})
4
concat
Deze functie vereist meerdere argumenten.
=concat(${investigation}+${perception},"G",${perception})
7G3
=concat(${investigation},"d10k",${perception})
4d10k3
floor
De functie vereist één argument.
=floor(3.9)
3
=floor(3.1)
3
=floor(${force}/2)
1
plafond
De functie vereist één argument.
=ceil(3.9)
4
=ceil(3.1)
4
=ceil(${force}/2)
2
gem
Deze functie vereist meerdere argumenten.
=avg(10,10)
10
=avg(8,4)
6
=avg(${intelligence},${dexterity})
3.5
Stap 8: gebruik personageblad in Rolisteam
Personageblad openen/laden
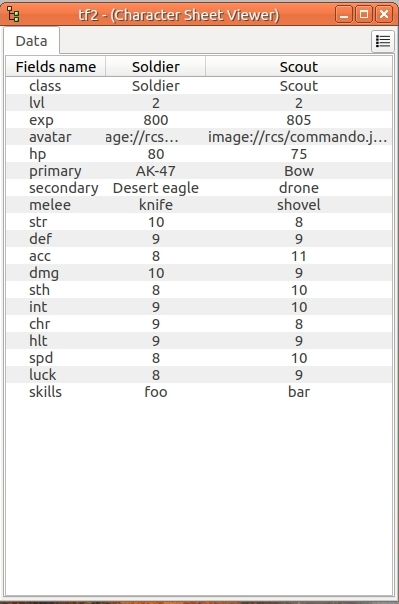
Wanneer u een personageblad opslaat met RCSE, krijg u een .rcs-bestand. Dit bestand moet in Rolisteam worden geladen (Bestand > Openen > Personageblad of CTRL+U). Er opent een nieuw venster met een tabblad 'Gegevens' (zie afbeelding).
Dit is hetzelfde als het tabblad 'Personages' in RCSE.
Het toont alle waarden van de personages. De spelleider kan in één oogopslag een goed overzicht krijgen van alle opgeslagen personages.
Deel blad van personage met de speler
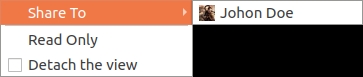
De spelleider moet het personageblad delen met het personage van de speler.
De weergave wordt gegenereerd en naar de speler verzonden. Om dit te doen, moet u op het submenu 'Delen' in het contextmenu klikken.
Vervolgens moet u een personage (afbeelding) kiezen.
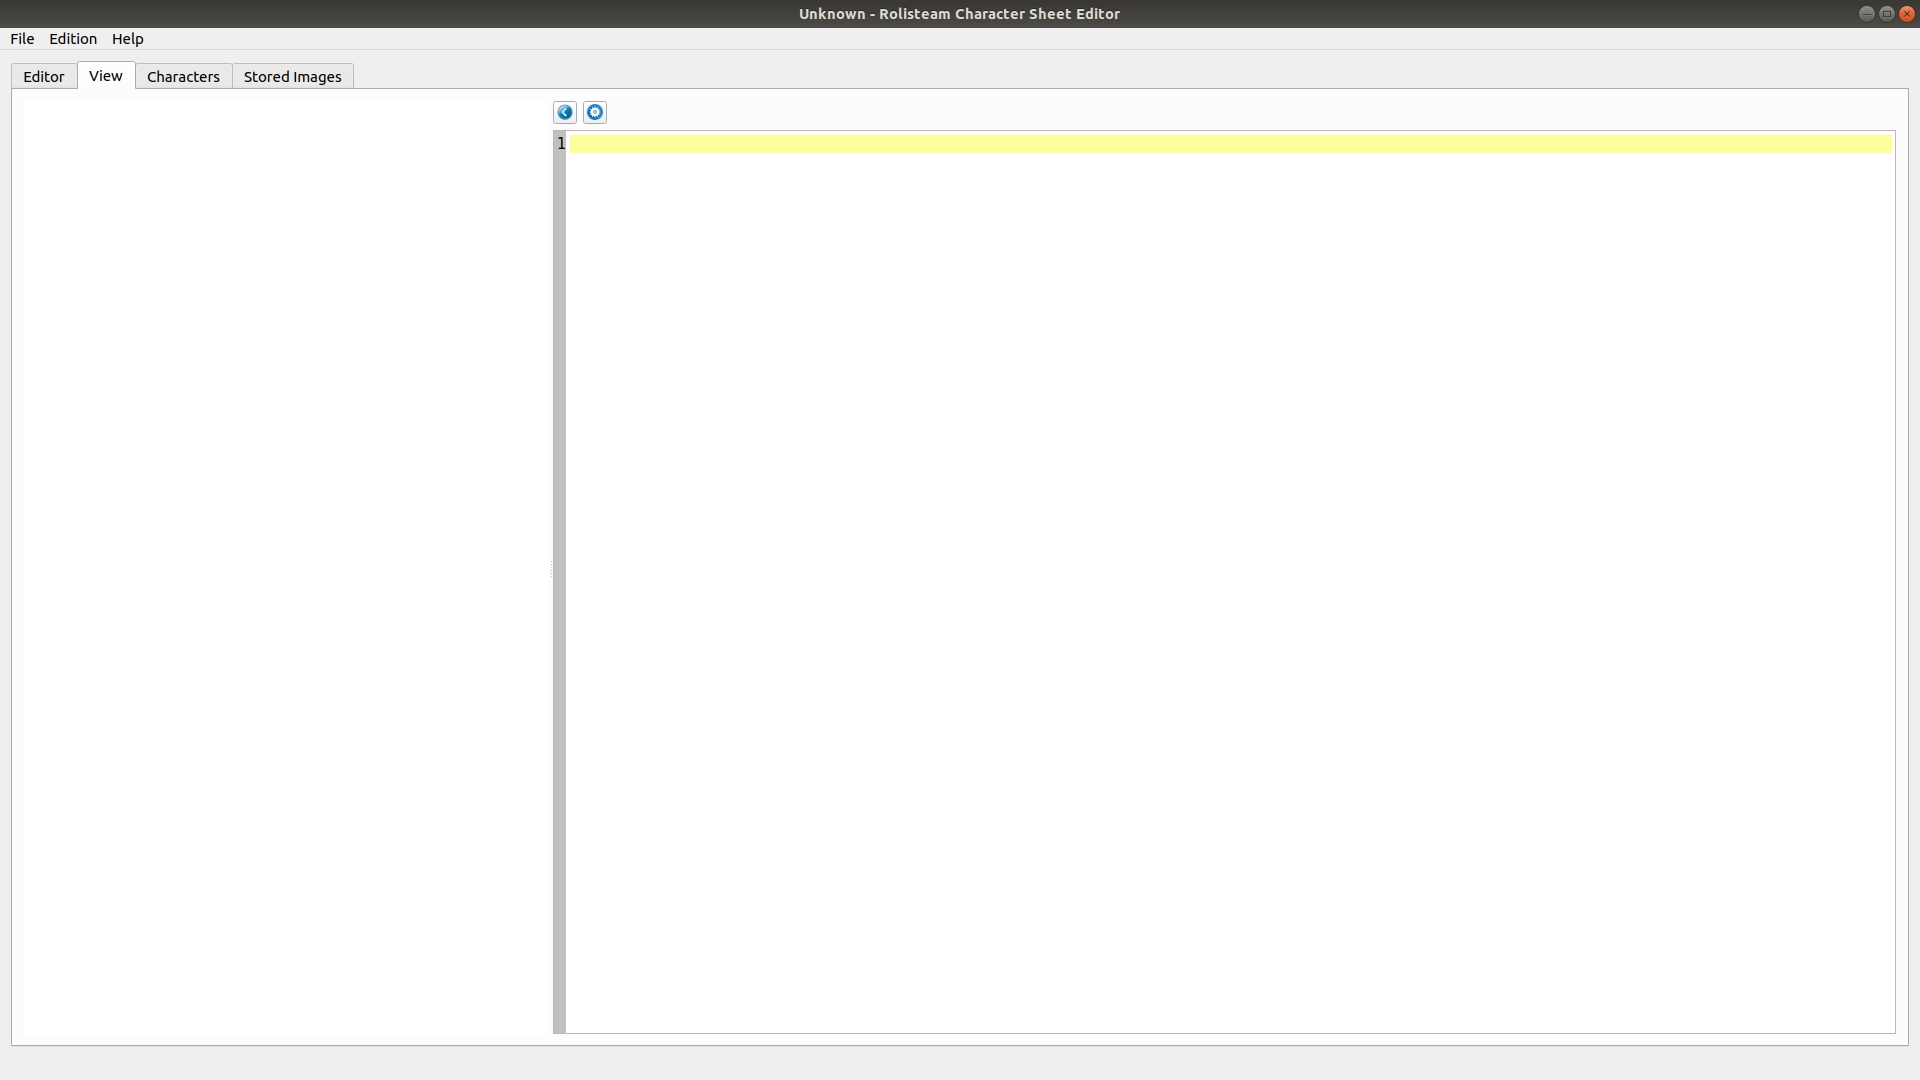
Het tabblad 'Weergave' wordt toegevoegd.
Op het scherm van de speler verschijnt het venster met het personageblad met twee tabbladen: 'Gegevens' en 'Weergave'. De speler en de spelleider kunnen waarden wijzigen vanuit beide weergaven.

Vanwege technische beperkingen worden in het tabblad 'Gegevens' geen gegevens uit subvelden in de tabel weergegeven.
Vele pagina's
Zoals we hebben gezien, is het mogelijk om een personageblad met meerdere pagina's te maken. In het tabblad 'Weergave' kunt u van pagina wisselen door op de toets Links of Rechts te drukken.
Het is ook mogelijk om een te klikken knop toe te voegen voor de beheerder.
U kunt de weergave ook kopiëren en/of het tabblad loskoppelen. Zo kunt u meerdere pagina's tegelijk bekijken.
FAQ
Hoe de dobbelsteenknop gebruiken?
Met de dobbelsteenknop kunnen gebruikers rechtstreeks vanuit het personageblad dobbelstenen gooien. Het resultaat wordt weergegeven in de algemene chat. De gegooide opdracht is de waarde van het veld en toont het bijbehorende label.
Als u het label instelt op Initiatief, wordt Initiatief weergegeven op alle personagebladen.
De dobbelsteenopdracht wordt ingesteld in de waardekolom. Als u bijvoorbeeld 3d6 instelt, zal de worp altijd "3d6" zijn (dit is exact hetzelfde als !3d6 gooien in de chat). Veel dobbelsteenworpen zijn echter afhankelijk van de waarden op het personageblad.
Stel, we moeten "1d20 + de behendigheidsbonus van het personage" gooien, dan wordt de behendigheidsbonus opgeslagen in een veld (id: id_64, label: agilityBonus).
Bij de dobbelsteenknop kunt u de volgende waarde invoeren: 1d20+${agilityBonus} of 1d20+${id_64}.
Een formule is hier niet nodig. Het dobbelsteensysteem kan namelijk zelf de variabelen "${....}" vertalen naar een waarde. Nadat u de personagebladen met de spelers hebt gedeeld, kan elke speler in de chat de volgende worp doen: !1d20+${agilityBonus}.
Waarschuwing: dit werkt alleen nadat het personageblad met de speler is gedeeld. Als de spelleider op de knop klikt, weet Rolisteam niet voor welke personages de waarde moet worden gelezen. We zijn van plan dit probleem in een toekomstige uitgave op te lossen.
De dobbelsteenknop geeft een signaal om de dobbelstenen te gooien. Dit signaal heeft twee parameters: de opdracht om te gooien en een booleanwaarde. De booleanwaarde geeft aan of het gebruik van dobbelsteenaliassen is in- of uitgeschakeld.
Het uitvoeren van een enorm commando met tekenreeksresultaten (zoals 1L[hoofd,linker been, rechter been, linker arm, rechter arm, borst]) kan conflicten met aliassen veroorzaken.
Hoe kan tekstinvoer omgezet worden naar een selector?
Het selectietype toont een menu waarin spelers één optie kunnen kiezen uit meerdere voorstellen. Om een veld in het selectietype te wijzigen, hoeft u alleen de mogelijke waarden in de daarvoor bestemde kolom in de juiste tabel in te voeren. De waarden worden gescheiden door komma's.
Voorbeeld: rood, blauw, groen, bruin, geel, zwart, wit, oranje, paars.