 Table of content
Abbiamo analizzato come configurare una campagna, gli alias dei dadi e come creare una mappa di battaglia. Il prossimo passo è creare una scheda personaggio per il nostro gioco.
Per farlo, Rolisteam contiene uno strumento chiamato RCSE: è l'editor delle schede dei personaggi. Vediamo come usarlo.
Creare una scheda personaggio con RCSE
Rolisteam Character Sheet Editor (editor di schede personaggio di Rolisteam) è lo strumento migliore per creare una scheda personaggio. La sua struttura cerca di fornire un'esperienza di creazione il più fedele possibile a una scheda personaggio ufficiale di un qualsiasi gioco RPG.
Per creare una scheda personaggio, segui questi passaggi:
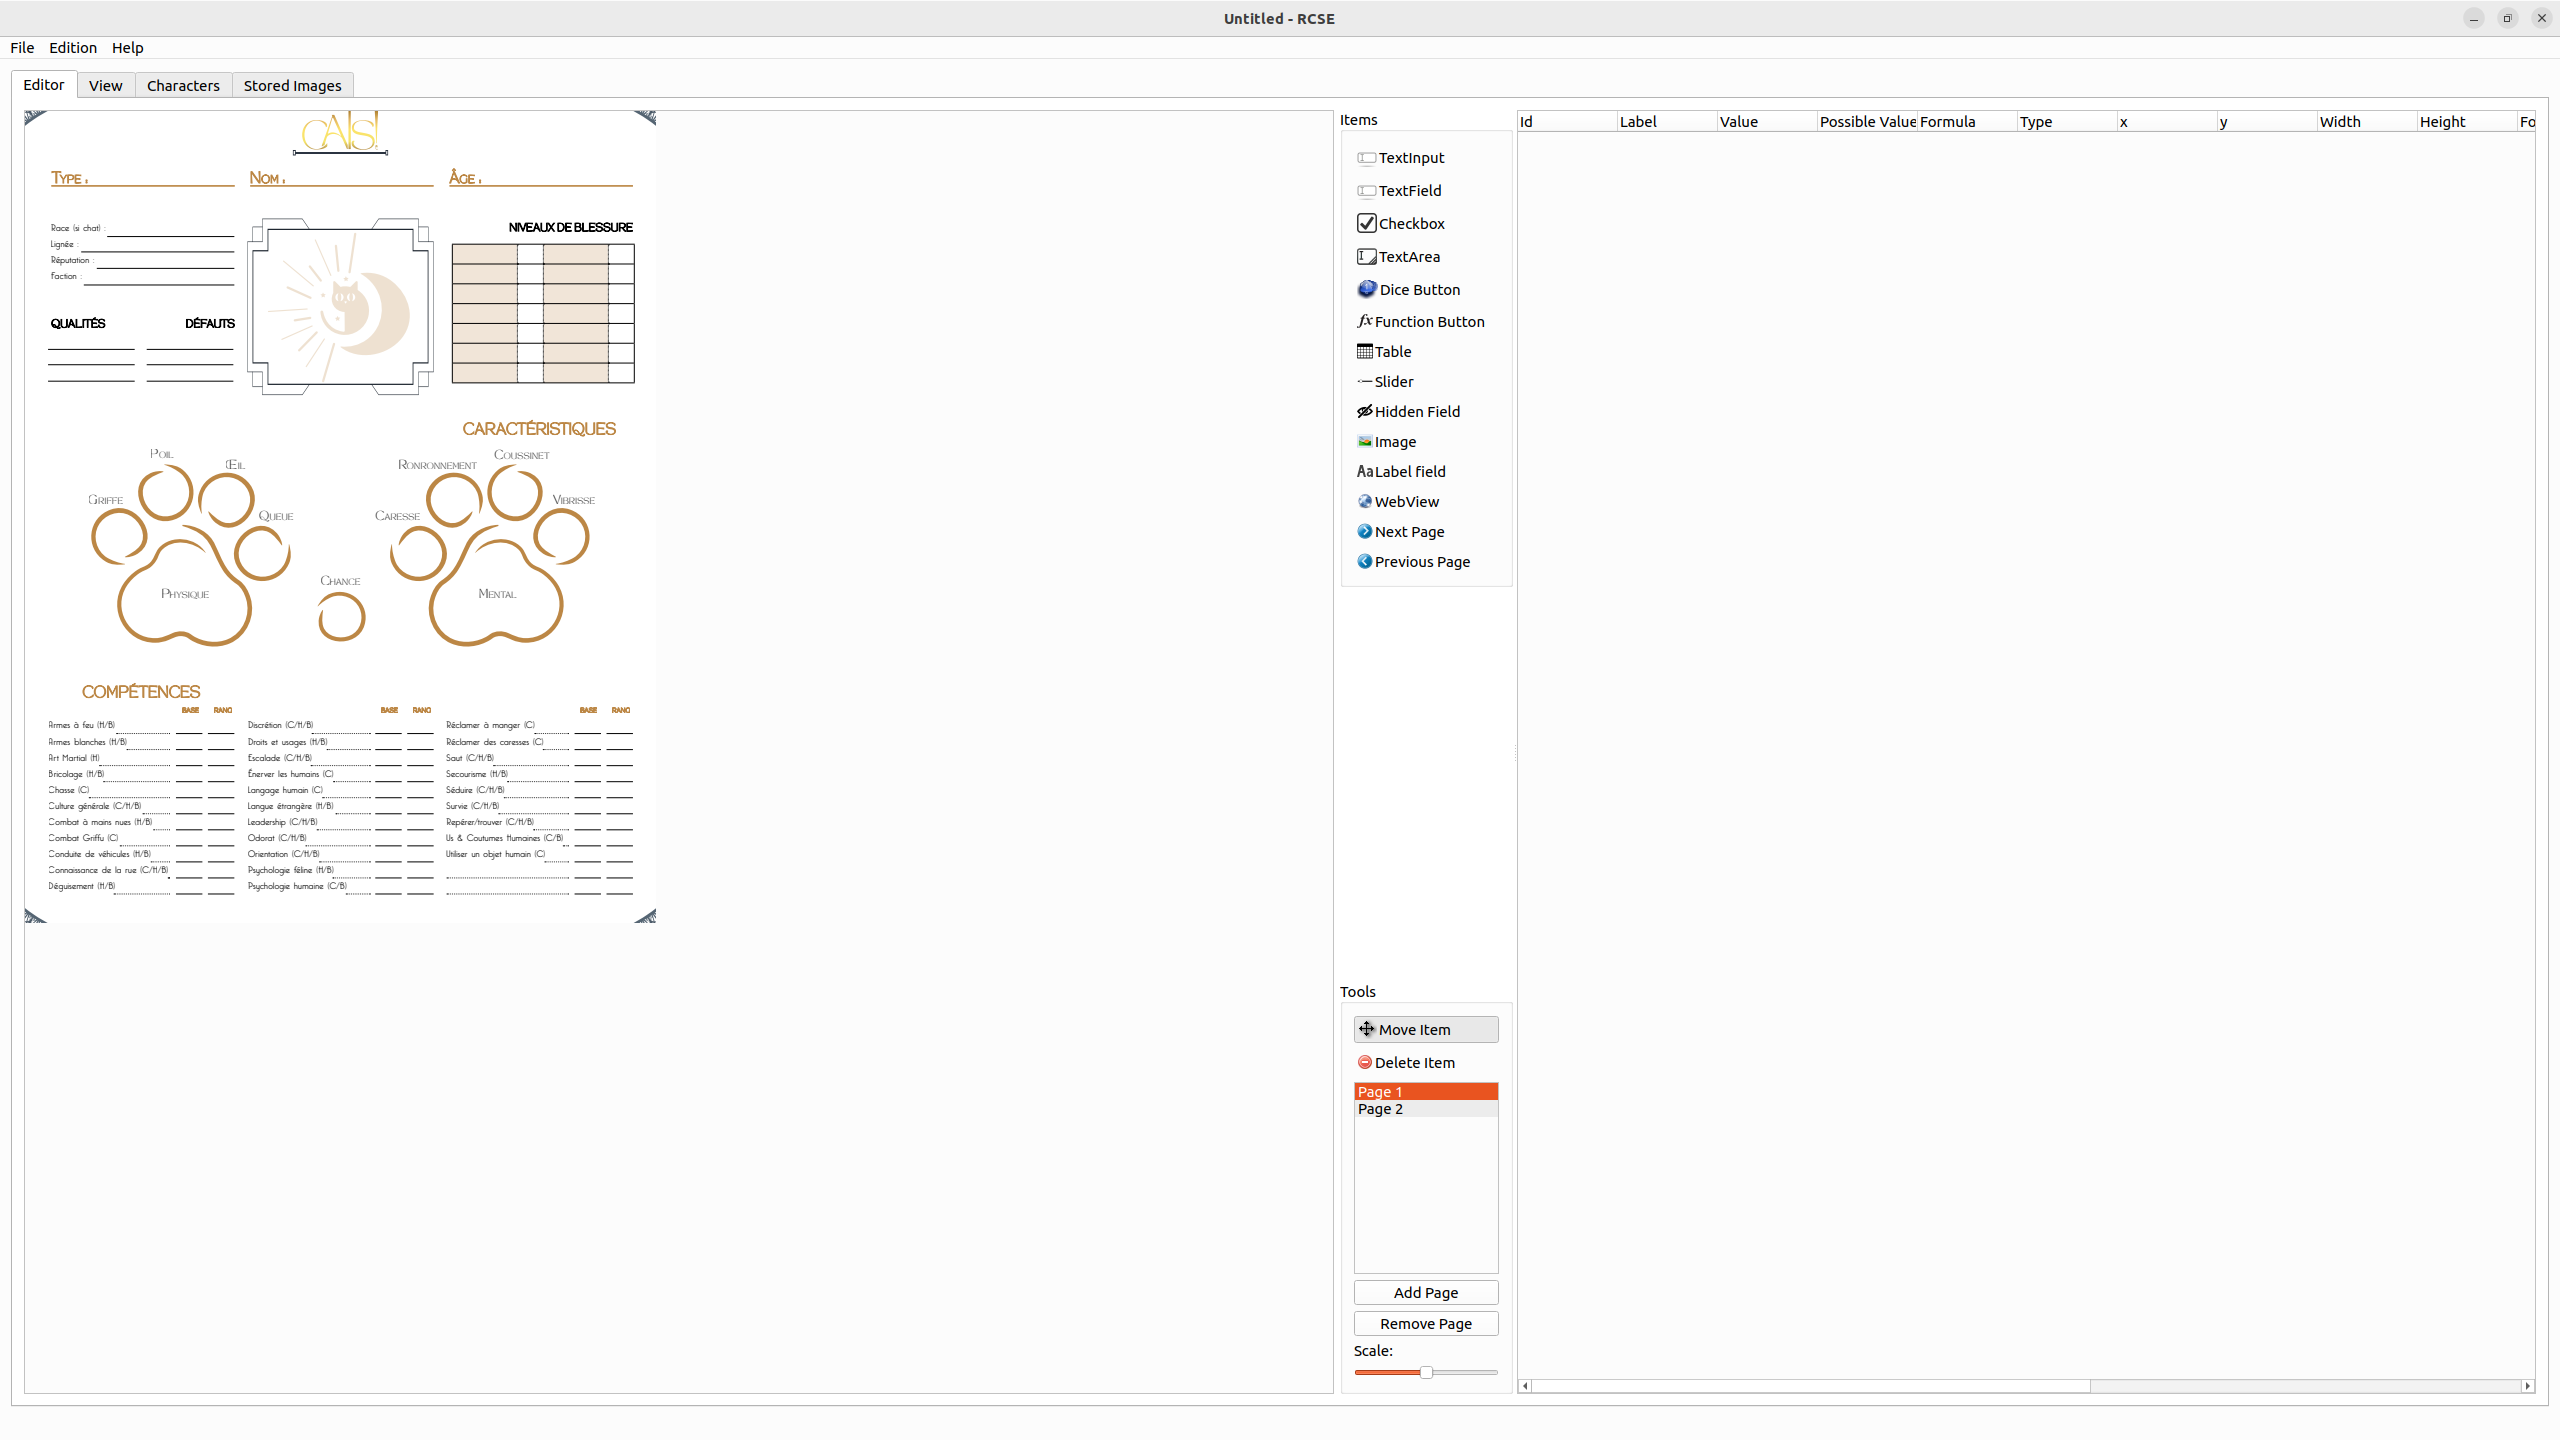
Passaggio 1: importare un'immagine (o un file PDF)
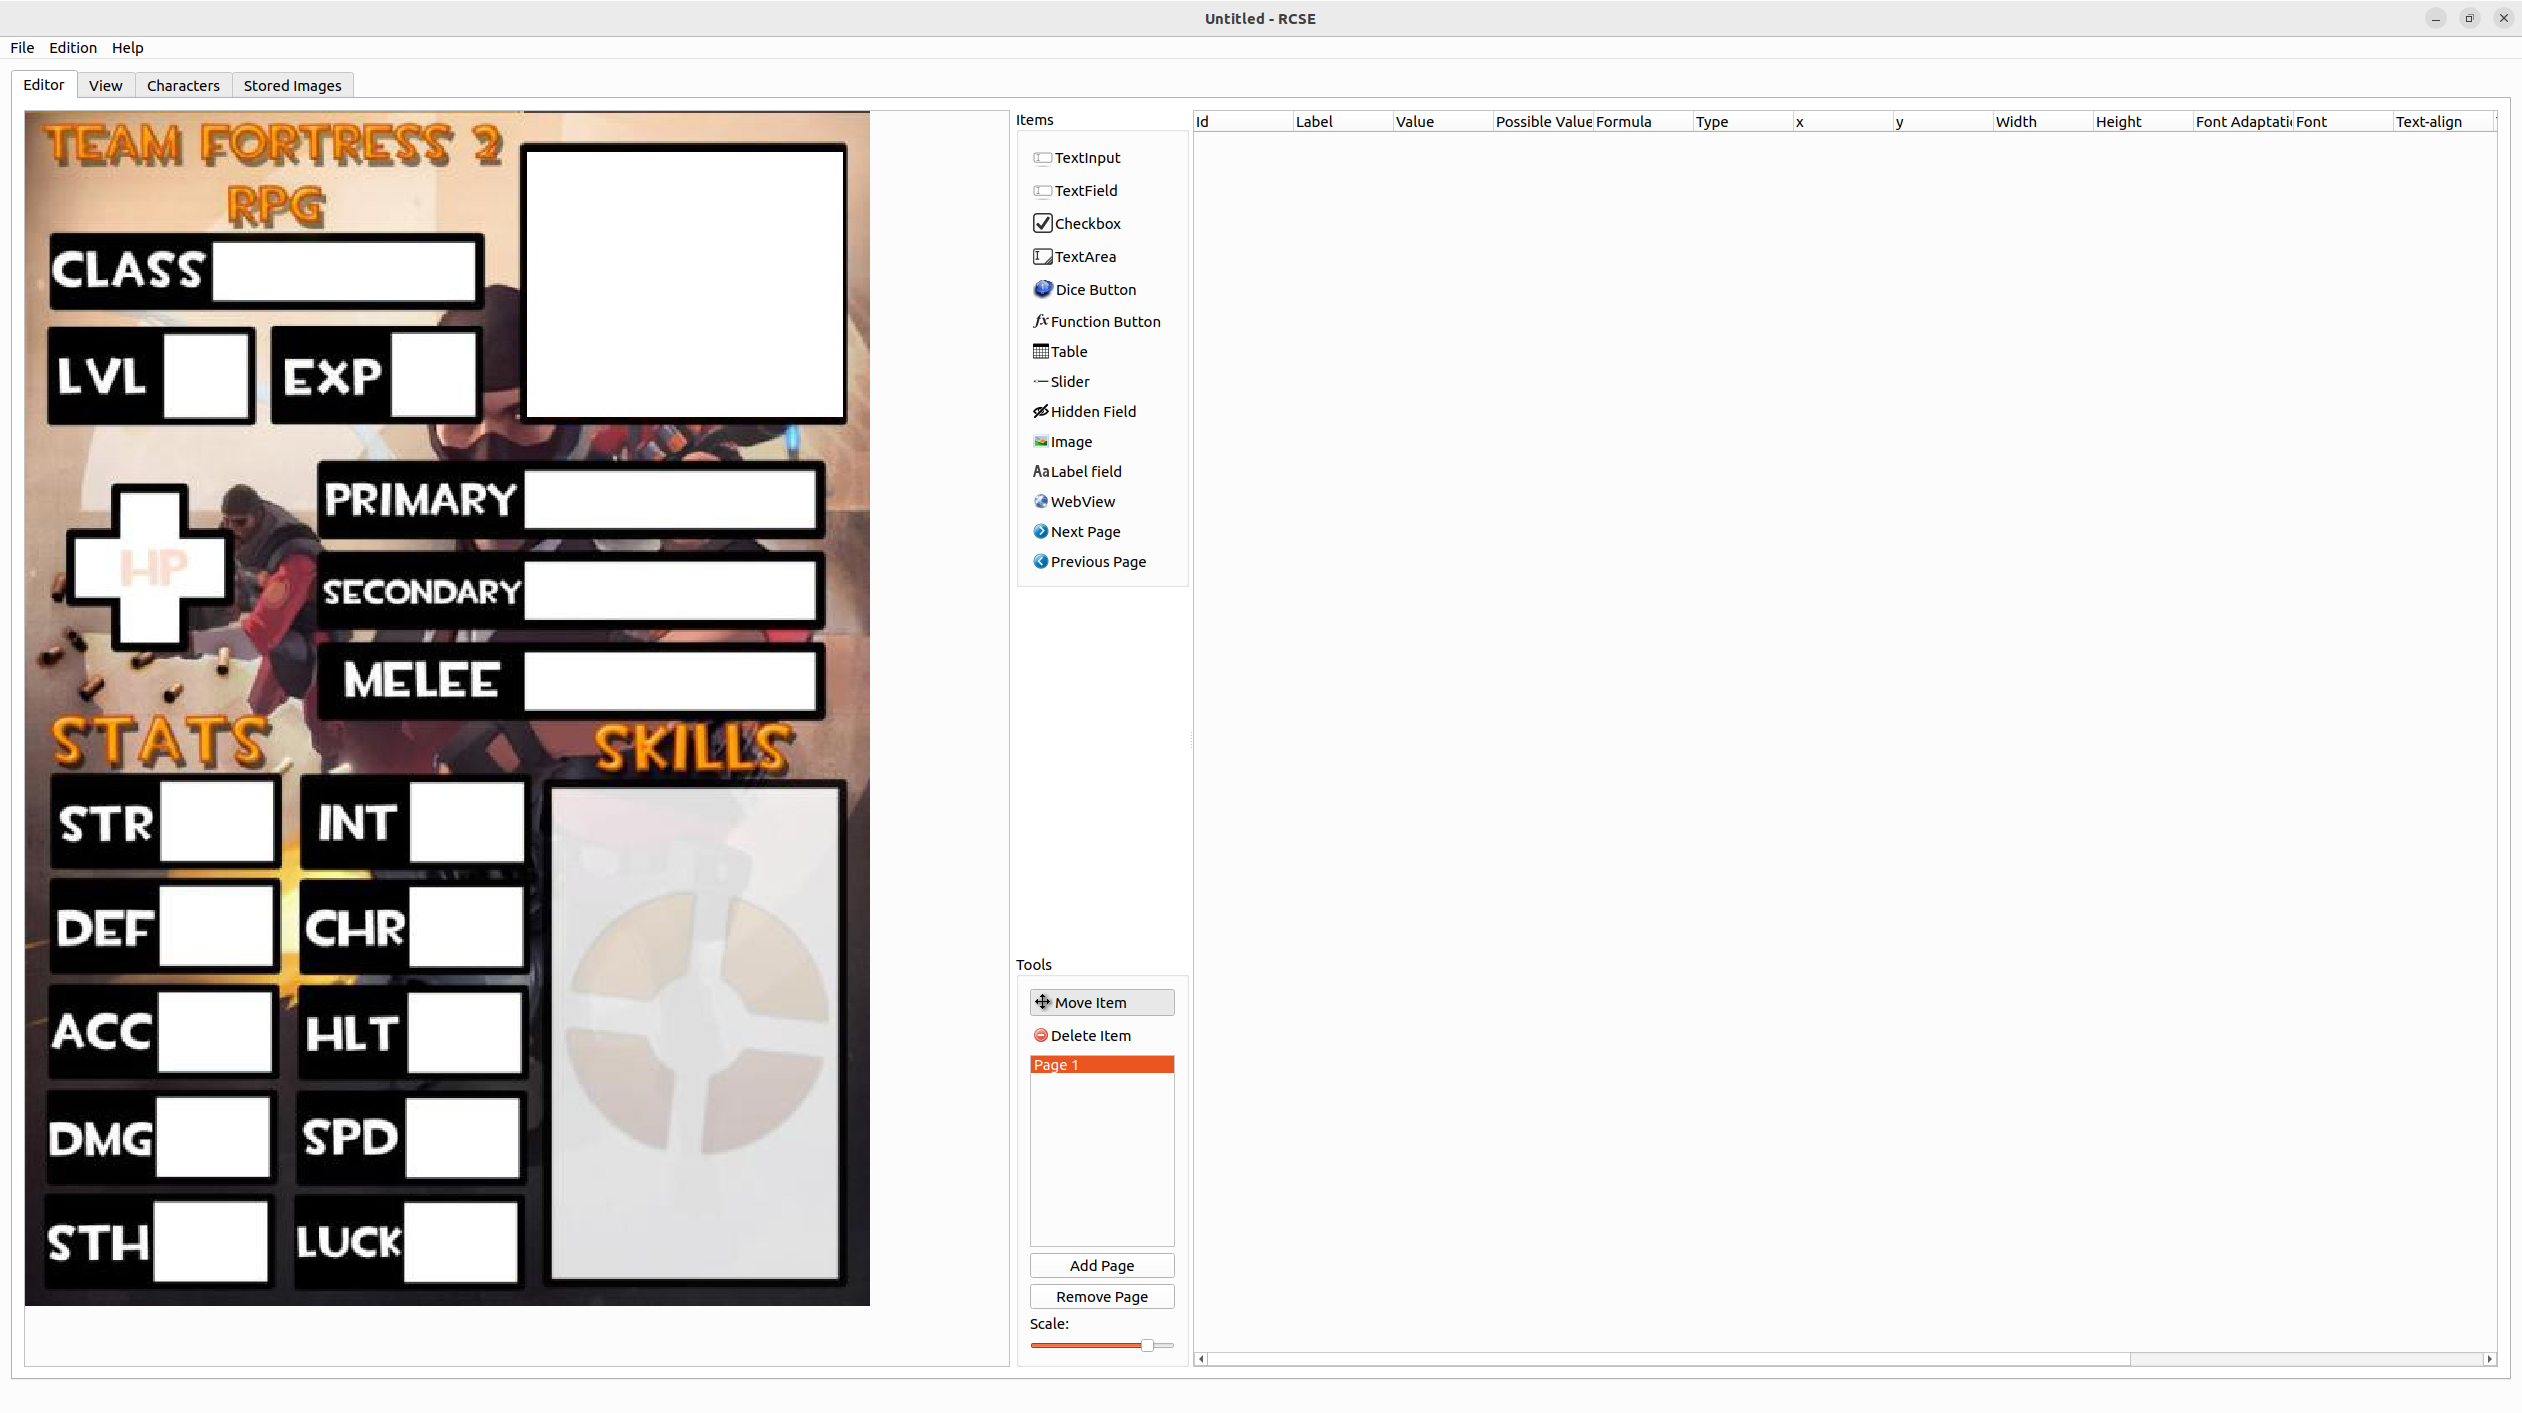
Il primo passaggio è rilasciare un'immagine di sfondo sull'editor (lato sinistro della scheda Editor). Quest'immagine potrebbe essere, per esempio, la scheda personaggio ufficiale del tuo gioco.
Esistono due modi per importare un'immagine:
- Trascinare e rilasciare 'immagine dal computer al RCSE (lato sinistro).
- Puoi anche importare dal menu > Imposta immagine di sfondo
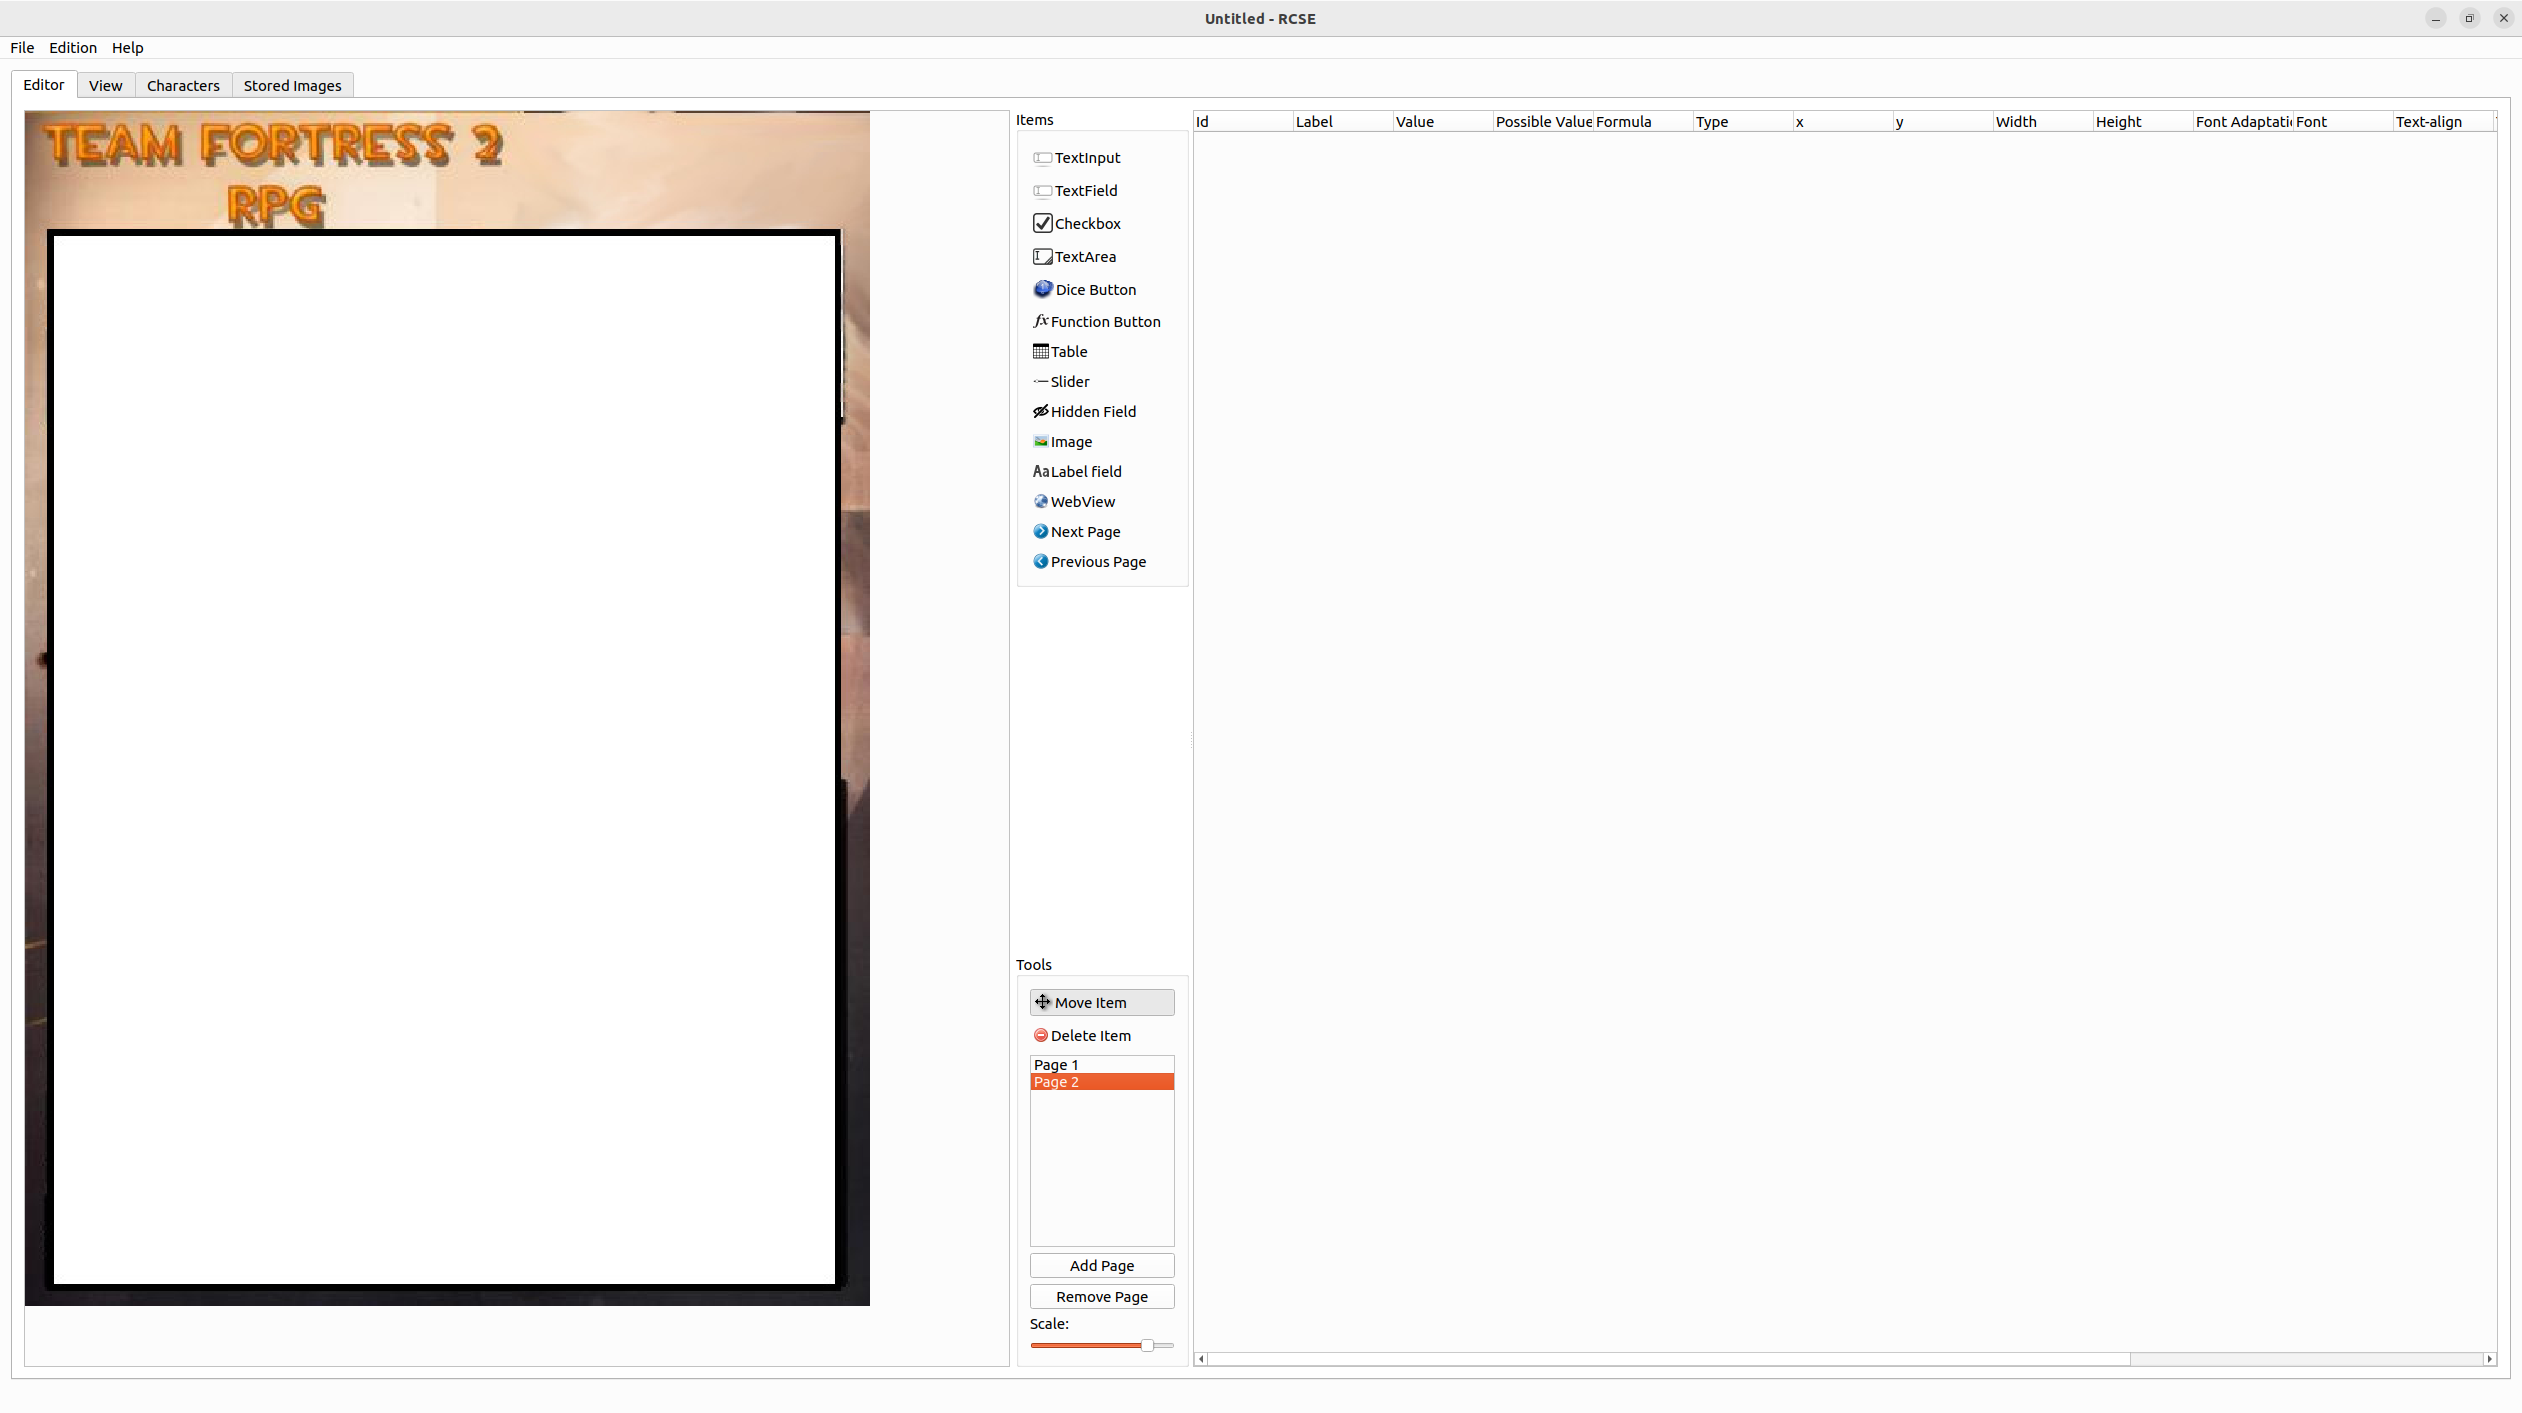
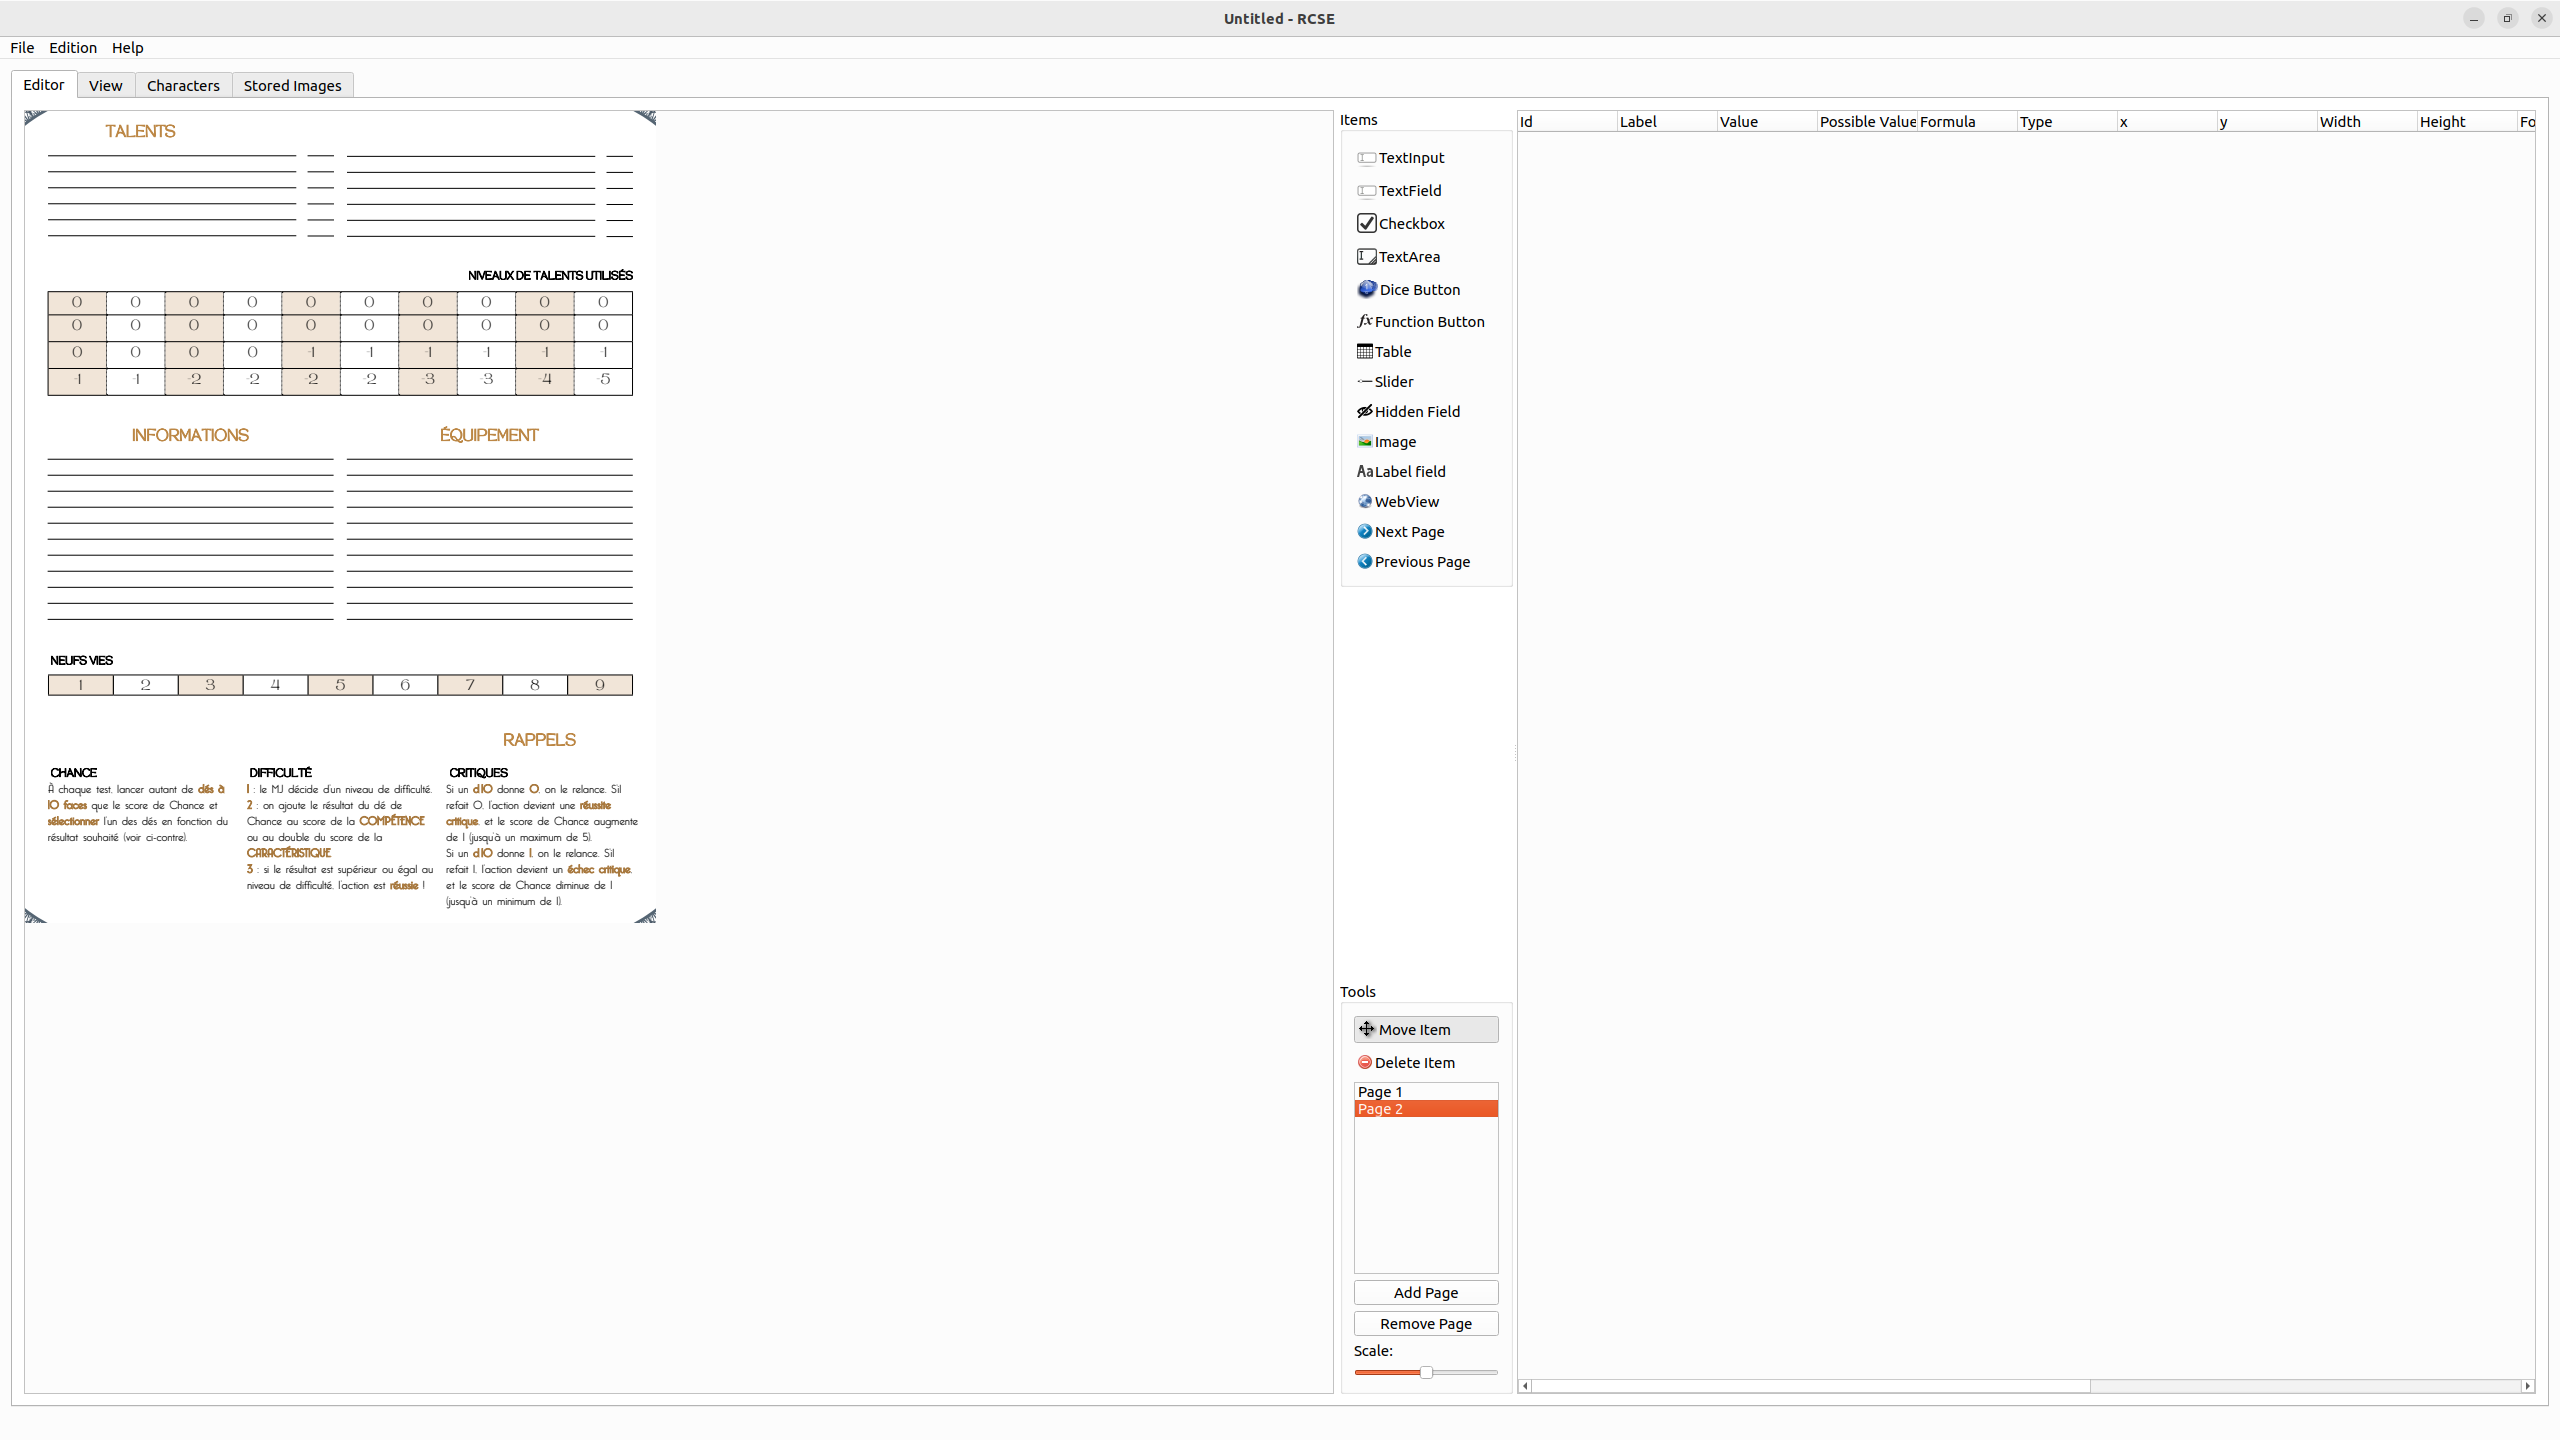
Nel caso in cui avessi bisogno di più pagine all'interno della tua scheda personaggio, potrai facilmente aggiungerne col pulsante dedicato a questo scopo. Quindi dovrai definirne lo sfondo importando le immagini.
Salva il tuo file!
Utilizzare un file PDF come sfondo
RCSE supporta nativamente il formato PDF.
Vai al menu File > Importa PDF. Si apre la finestra di dialogo seguente:
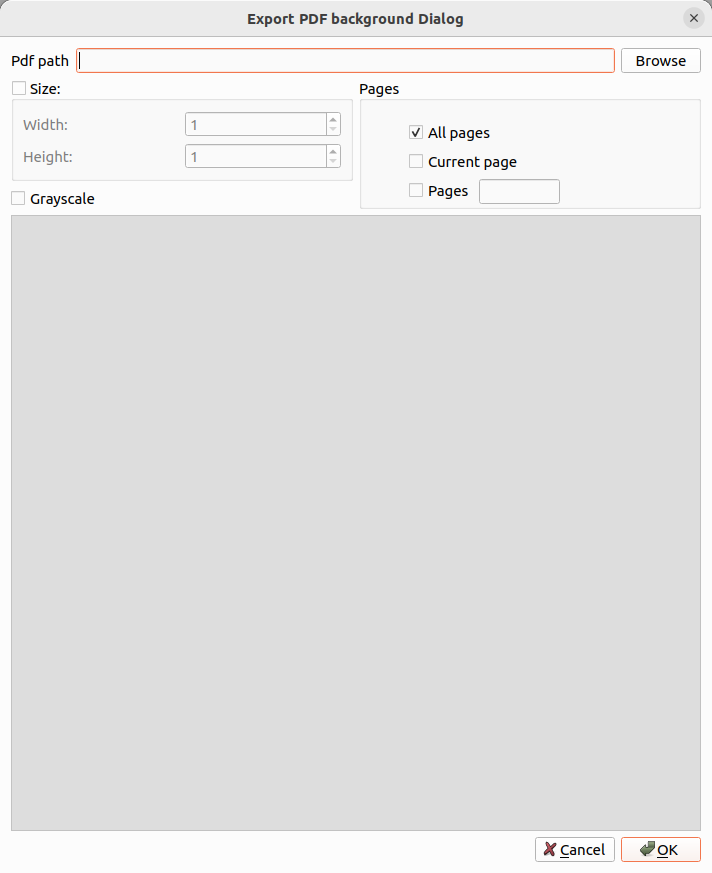
Fai clic su Sfoglia per selezionare il file della tua scheda personaggio.
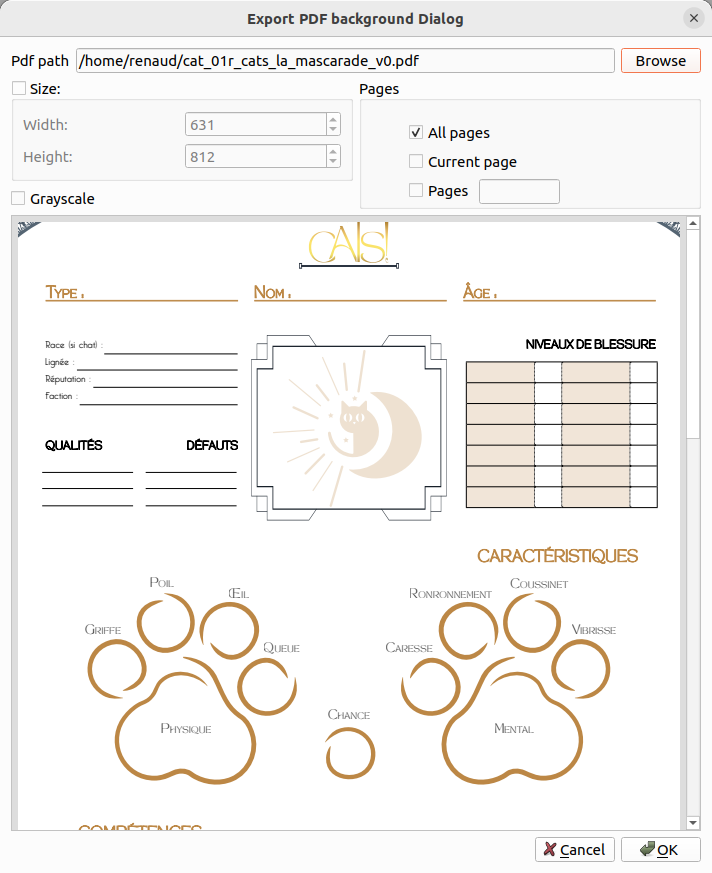
Quindi puoi
- Impostare la dimensione delle immagini esportate
- Selezionare le pagine
- Prendere l'immagine in toni di grigio
Per finire, fai clic su Ok.
E voilà: come puoi osservare, l'editor supporta schede con più pagine.
Passaggio 2: aggiungere campi alla scheda
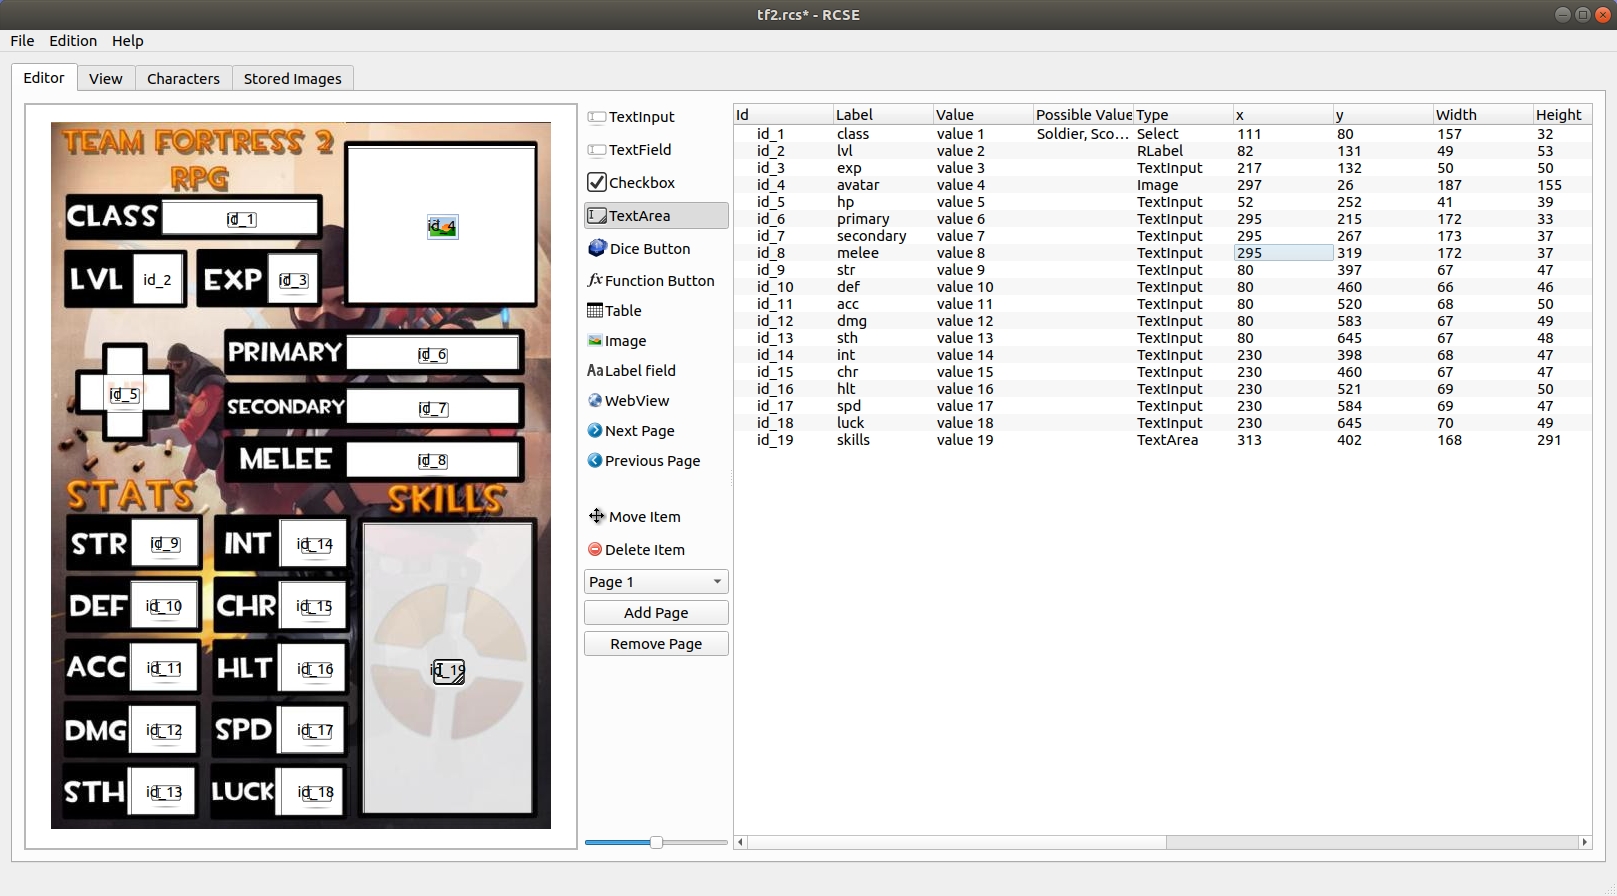
È quindi importante impostare la posizione di ciascun campo. Questo lavoro può essere piuttosto lungo, ma grazie a RCSE lo puoi fare graficamente.
Ogni campo viene anche aggiunto nella tabella di destra. Puoi rimuovere il capEach field is also added onto the right table. You can remove field from this table.
In RCSE sono disponibili molti tipi di campo.
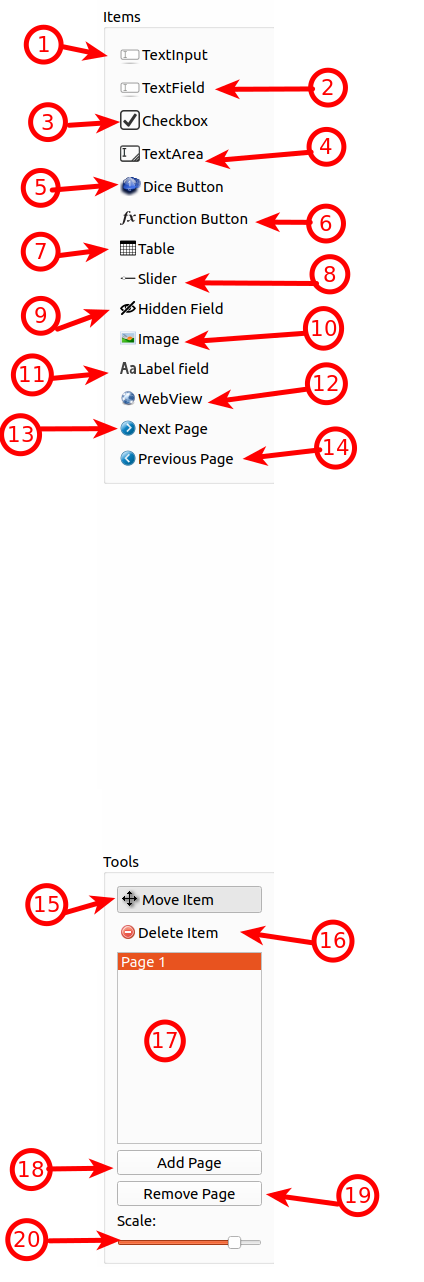
| id | Nome | Descrizione |
|---|---|---|
| 1 | Inserimento testo | Campo di testo a riga singola senza bordi o decorazioni. Può essere promosso a selettore (vedi sotto) |
| 2 | Campo di testo | Campo di testo a riga singola con bordi e decorazioni. |
| 3 | Casella di selezione | Memorizza valori 0 o 1 e li visualizza come casella di selezione. |
| 4 | Area di testo | Campo di testo a più righe con decorazione e bordo. |
| 5 | Pulsante dadi | Aggiunge un pulsante sul quale è possibile fare clic per lanciare un comando dadi; il comando deve essere impostato come valore del campo |
| 6 | Pulsante funzione | Aggiunge un pulsante sul quale è possibile fare clic per chiamare una funzione QML o eseguire qualsiasi calcolo |
| 7 | Tabella | Aggiunge una tabella dinamica, gestisce più righe (utile per gestire liste di abilità, oggetti, ecc.) |
| 8 | Cursore | Seleziona un valore tra un minimo e un massimo (da 0 a 100 per impostazione predefinita) |
| 9 | Campo nascosto | Aggiunge un campo nascosto sulla scheda; questo consente di eseguire calcoli intermedi. |
| 10 | Immagine | Visualizza un'immagine da un URL |
| 11 | Etichetta di testo | Aggiunge un'etichetta di testo in sola lettura |
| 12 | Vista web | Aggiunge una vista web, imposta l'URL come valore per mostrare qualsiasi sito web |
| 13 | Pagina precedente | Aggiunge un pulsante per facilitare la navigazione tra le pagine (vai alla pagina precedente) |
| 14 | Pagina successiva | Aggiunge un pulsante per facilitare la navigazione tra le pagine (vai alla pagina successiva) |
| 15 | Sposta | Strumento per selezionare o spostare campi. |
| 16 | Elimina elemento | Rimuove gli elementi quando ci fai sopra clic mentre questo strumento è quello attivo. |
| 17 | Selettore delle pagine | Offre un accesso rapido alle pagine |
| 18 | Aggiungi pagina | Aggiunge una pagina alla fine di tutte le pagine esistenti. |
| 19 | Rimuovi pagina | Rimuove la pagina attualmente selezionata |
| 20 | Scala | Imposta la scala corrente della scheda |
- Seleziona uno strumento
- Fai clic sull'editor visivo (lato sinistro)
- Appare un segnaposto nell'editor visivo e viene aggiunta una nuova riga sul lato destro
- Sposta il cursore del mouse per definire la dimensione corretta di questo elemento (la dimensione può essere modificata successivamente)
Salva il tuo file!
Passaggio 3: modificare i campi
Quando tutti i campi sono impostati, è importante assegnare loro un nome.Questo nome può essere utilizzato nelle formule.
Oltre al nome, è possibile modificare molte altre proprietà. Tutto ciò che devi fare è modificare dalla tabella a destra nella prima scheda.
Salva il tuo file!
Dettagli di ogni colonna:
Id
Questa proprietà è l'identificatore (ID) univoco per quei dati. Per impostazione predefinita, RCSE li genera automaticamente. Si consiglia di mantenere il valore predefinito. La loro modifica richiede il rispetto di alcune regole:
- Iniziare con una lettera minuscola
- Nessuno spazio
- Lettere, cifre e _
- Nessun carattere speciale
Gli identificatori possono essere utilizzati per accedere alle informazioni del personaggio nelle formule.
Più sono brevi, meglio è: Esempio: =${id_5}+4
Etichetta
Questa proprietà è un identificatore leggibile per quel campo.
Si consiglia di impostare l'etichetta di tutti i campi.
È possibile accedere ai dati tramite la loro etichetta: =${intelligenza}+4.
Valore
Il valore del campo viene visualizzato sulla scheda personaggio. Imposta valori vicini a quelli reali del gioco. Ci sono due motivi per questo:
- I valori vengono utilizzati nelle formule, quindi il calcolo delle formule può essere verificato.
- Poiché i valori vengono visualizzati, puoi regolare l'elemento (dimensione, tipo di carattere, colore) per assicurarti che sia leggibile.
I valori sono impostati con testo generato.
Valori possibili
Questo campo è utile solo per il campo «Inserimento testo». Permette di trasformare un inserimento testo in un selettore. I selettori (noti anche come caselle combinate) sono elementi dedicati alla selezione di un valore da un elenco limitato.
Per definire l'insieme dei valori, questi vanno separati da virgole: testa,corpo,braccio sinistro,braccio destro,gamba sinistra,gamba destra
Tipo
Cambia il tipo del campo in un altro. Le tabelle non possono essere convertite in un altro tipo (e nessun campo può diventare una tabella).
X
Posizione del campo sull'asse X (da sinistra a destra). Puoi modificarla per allineare i campi con precisione.
Y
Posizione del campo sull'asse Y (dall'alto verso il basso). Puoi modificarla per allineare i campi con precisione.
Larghezza
Larghezza del campo. Puoi modificarla per allineare i campi con precisione.
Altezza
Altezza del campo. Puoi modificarla per allineare i campi con precisione.
Adattamento dei caratteri
Questa opzione può essere abilitata per adattare la dimensione del tipo di carattere alla dimensione della scheda personaggio.
Allineamento del testo
Puoi impostare la posizione in cui deve essere visualizzato il testo nel campo.
| Angolo superiore sinistro | In alto al centro | Angolo superiore destro |
| Centrale a sinistra | Centrale | Centrale a destra |
| Angolo inferiore sinistro | In basso al centro | Angolo inferiore destro |
Colore del testo
Puoi impostare il colore del testo.
Colore di sfondo
Puoi impostare il colore di sfondo.
Bordo
Puoi impostare dove deve essere visualizzato il bordo (superiore, destro, sinistro, inferiore, tutti i bordi o nessun bordo).
Salva il tuo file!
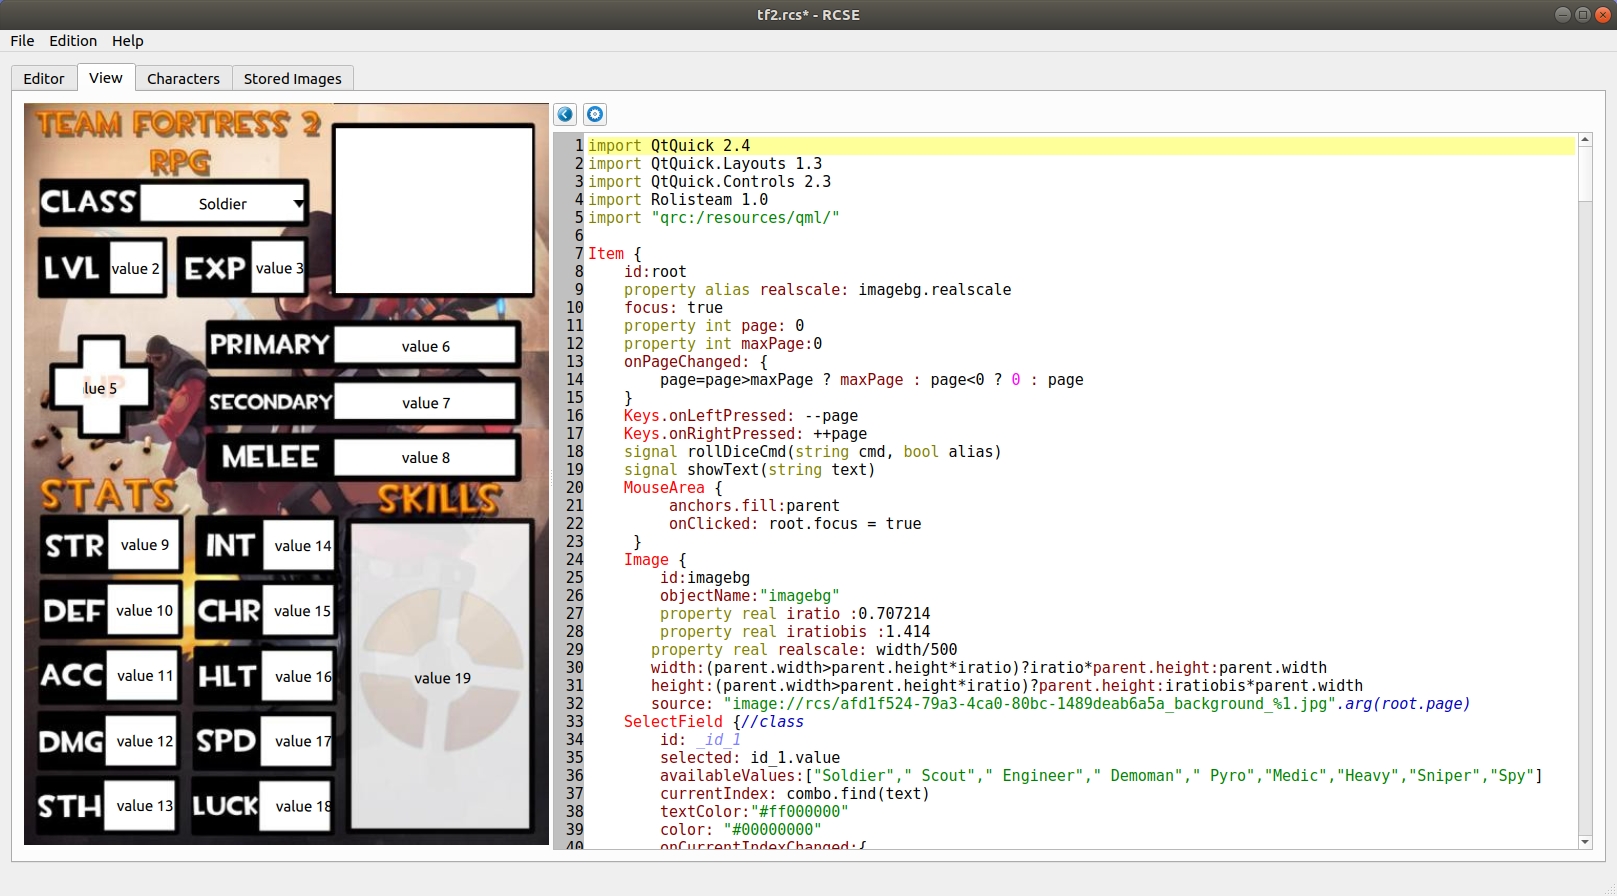
Passaggio 4: generare la scheda
Una volta aggiunti tutti i campi desiderati, puoi generare la scheda facendo clic sul menuModifica > Genera codice e scheda (Ctrl+R).
La scheda è visibile nella scheda Vista. Questa mostra la scheda esattamente come apparirà in Rolisteam.
La scheda del codice vede il suo contenuto modificato da questa azione.Mostra il codice QML.
Puoi regolare la scheda (nella scheda dell'editor, passaggio 3) e rigenerarla quante volte vuoi finché non soddisfa le tue esigenze.
Puoi ripetere questa operazione tutte le volte che vuoi per ottenere il risultato perfetto.
Salva il tuo file!
Personalizzare il codice QML

È anche possibile modificare direttamente il codice QML per aggiungere nuove funzionalità alla scheda. Puoi riprodurre musica, video, aggiungere animazioni e molte altre cose. Fai attenzione: quando modifichi il codice generato, non devi chiedere di generare nuovamente codice e scheda. Questo cancellerebbe tutte le tue modifiche.
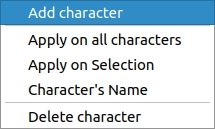
Passaggio 5: aggiungere personaggi
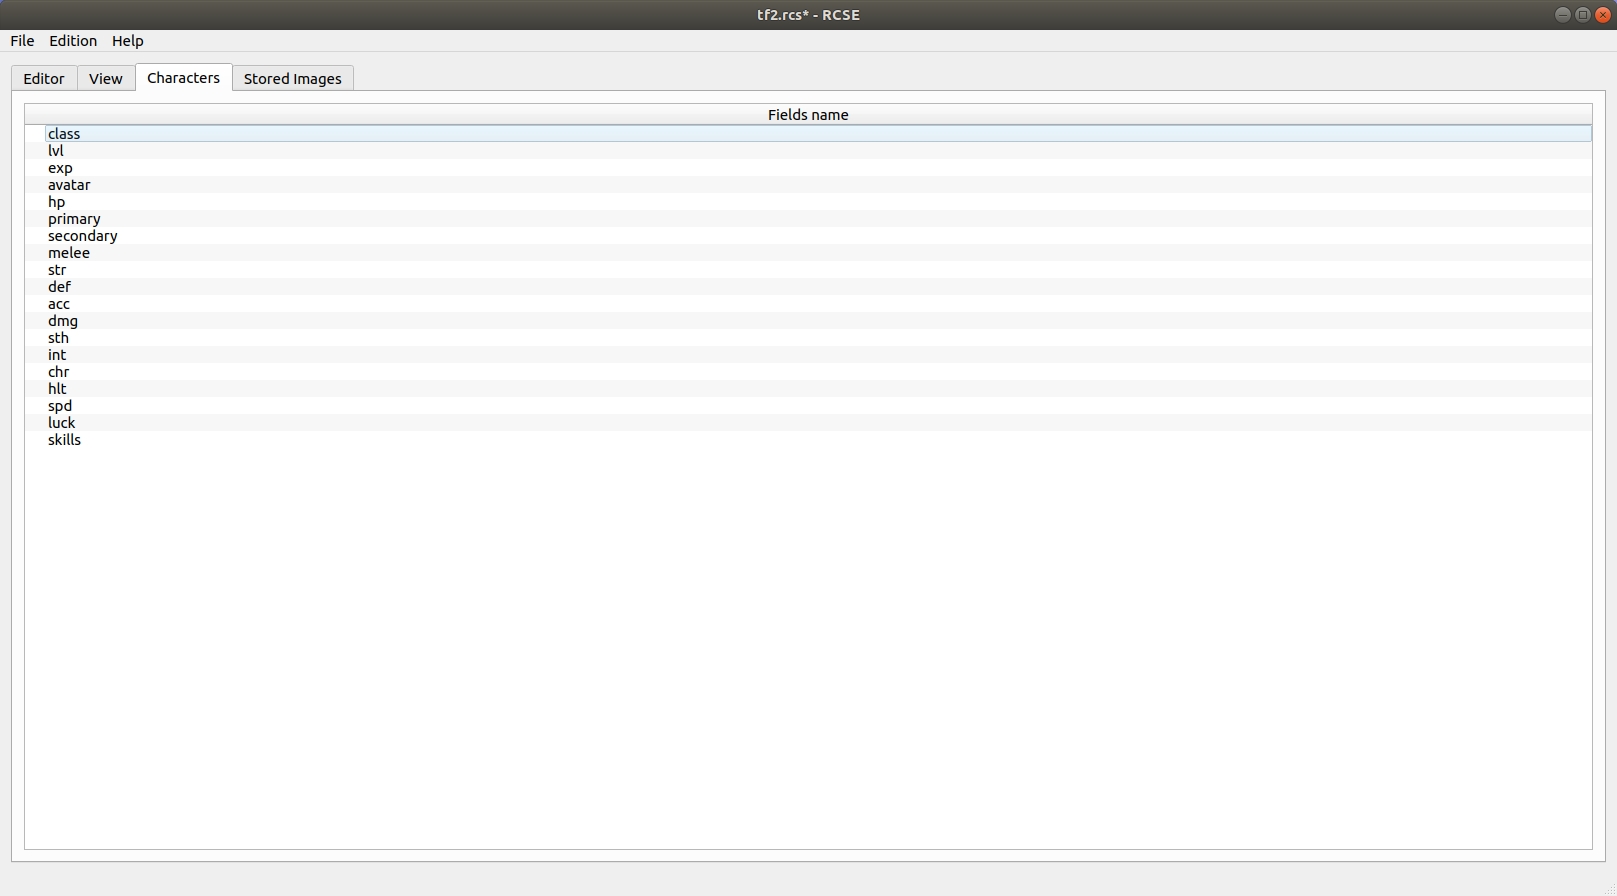
Andiamo alla terza scheda: Personaggi. Da qui è possibile aggiungere i personaggi al file.
Appare una colonna per ogni personaggio aggiunto. Si consiglia di aggiungere valori predefiniti per ogni campo. RCSE ti aiuta a impostare un valore su più righe. Una cella può essere definita come nome del personaggio. Questo imposterà l'intestazione della colonna.
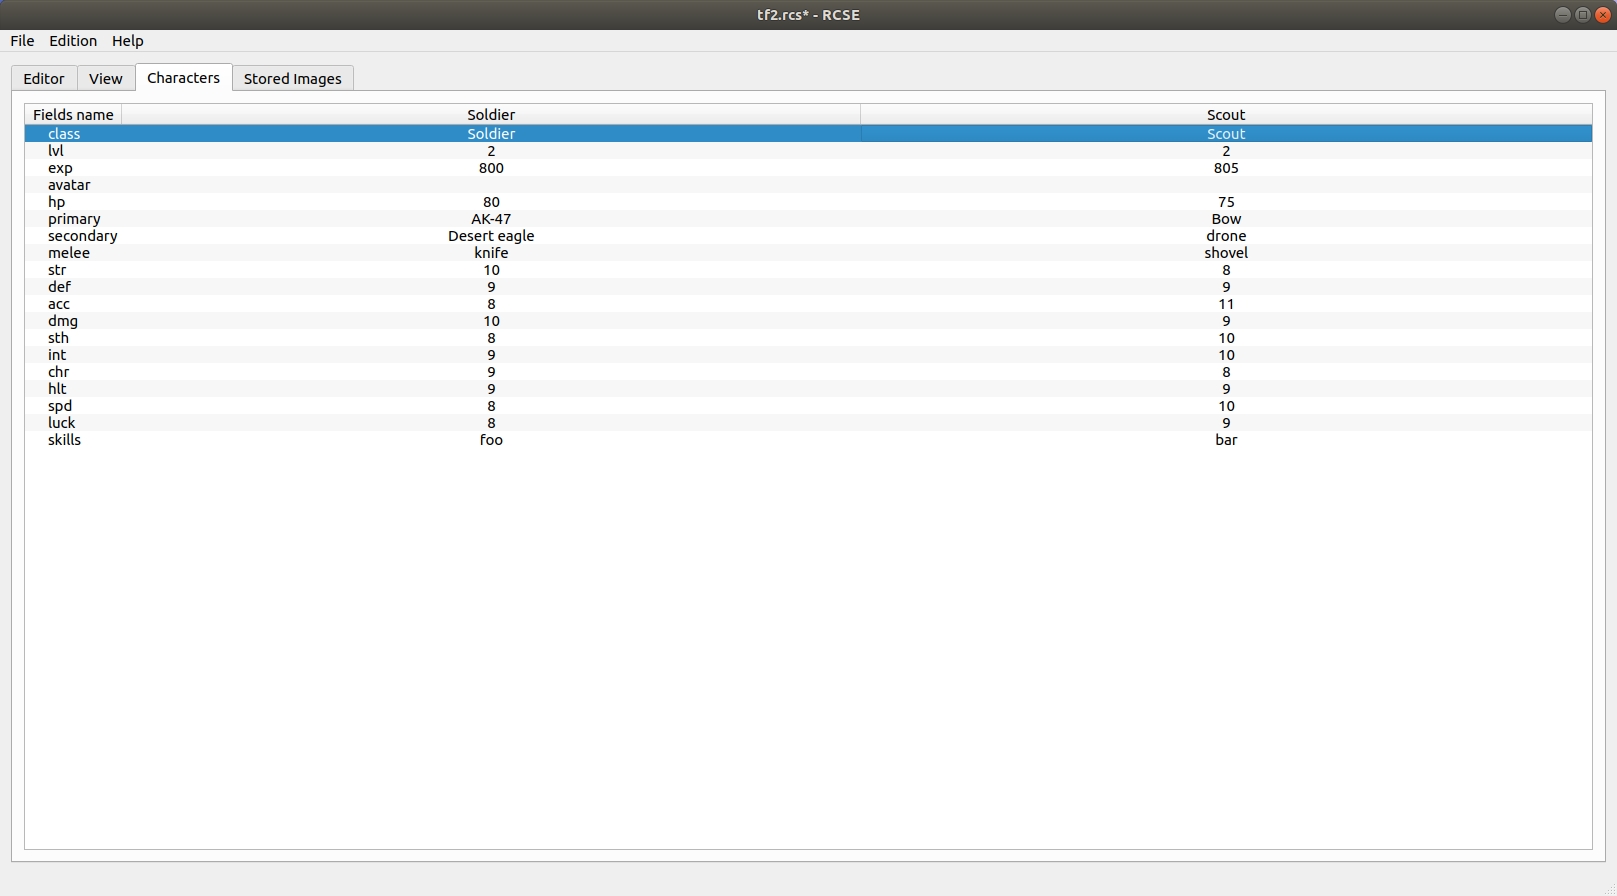
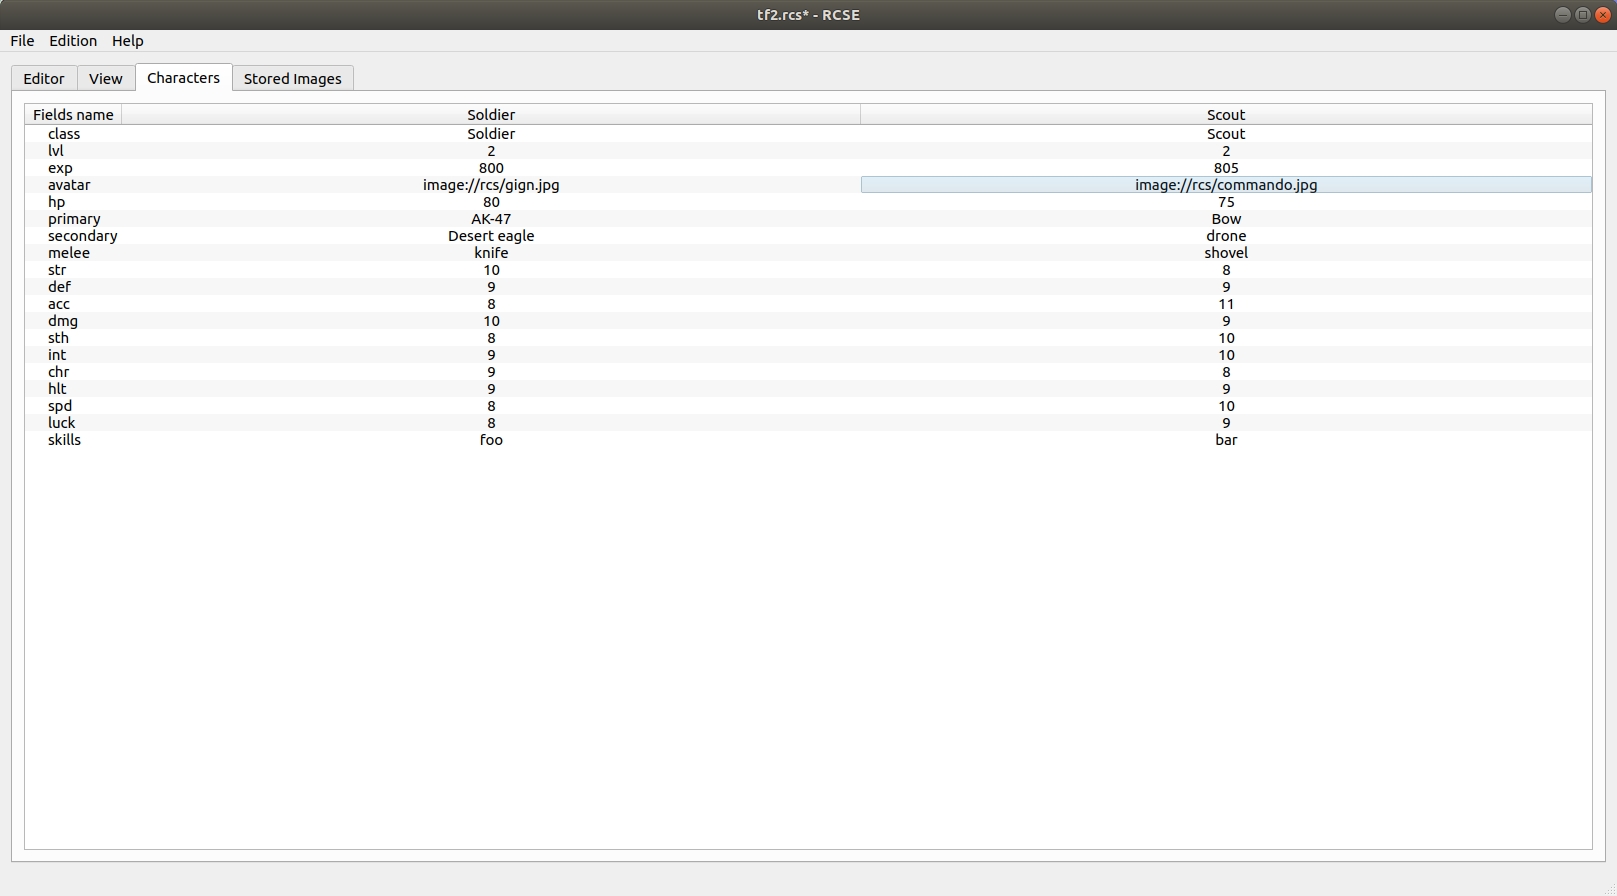
Come puoi notare, non ci sono dati per l'avatar. Per impostare immagini nella scheda personaggio, ci sono due opzioni: la soluzione più semplice consiste nell'inserire un URL dell'immagine (http://sito.com/immagine/mioAvatar.png). La seconda consiste nell'andare nella scheda Immagini salvate.
Passaggio 6 [facoltativo]: aggiungere immagini
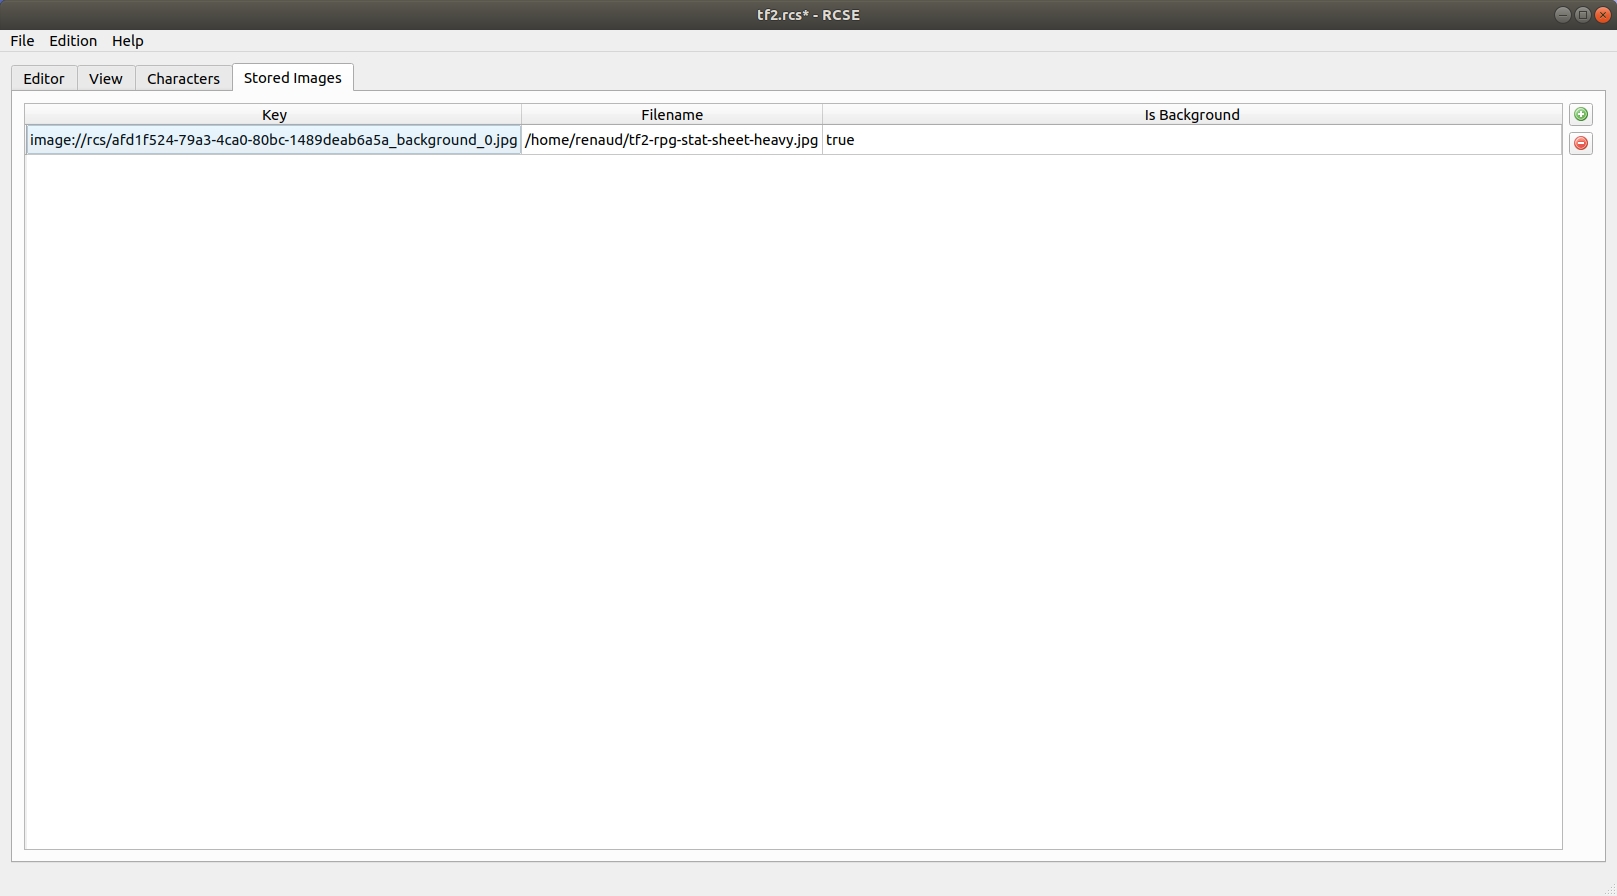
Fai quindi clic sul pulsante aggiungi

Dobbiamo poi copiare l'URL di ogni immagine e incollarlo nel personaggio appropriato. Il menu contestuale offre l'azione per copiare l'URL.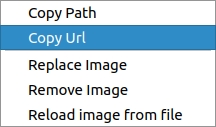
Incollalo all'interno del personaggio.
Salva il tuo file!
Passaggio 7 [facoltativo]: formule e automazione
La scheda personaggio integra un motore di formule. Puoi calcolare automaticamente i valori. La scheda svolge il lavoro per il GM o il giocatore. Per aggiungere una nuova formula, devi semplicemente iniziare la riga con = come in qualsiasi software di foglio elettronico.
Operazioni possibili
Il sistema di formule può gestire molte funzioni e operazioni.
Ottenere un valore
Come abbiamo visto, puoi ottenere il valore di qualsiasi campo grazie alla sua etichetta o ID. Devi racchiudere l'ID o l'etichetta in questo modo: ${label} oppure ${id}.
Aritmetica
Puoi fare tutte le normali operazioni.
Esempi:
Somma
4+4
${intelligence}+3
Sottrazione
12-3
${intelligence}-3
Moltiplicazione
=2*7
=2x7
=${intelligence}*3
Divisione
=15/5
=15÷5
=${intelligence}/3
=${intelligence}÷3
abs (assoluto)
Il valore assoluto prende solo un argomento.
=abs(-3)
3
=abs(3)
3
=abs(${intelligence}-11)
8
min
Questa funzione prende più argomenti.
=min(3,8,10,1)
1
=min(${wits},${dexterity})
3
max
Questa funzione prende più argomenti.
=max(3,8,10,1)
10
=min(${wits},${dexterity})
4
concat
Questa funzione prende più argomenti.
=concat(${investigation}+${perception},"G",${perception})
7G3
=concat(${investigation},"d10k",${perception})
4d10k3
floor (arrotondamento per difetto)
La funzione prende un argomento.
=floor(3.9)
3
=floor(3.1)
3
=floor(${force}/2)
1
ceil (arrotondamento per eccesso)
La funzione prende un argomento.
=ceil(3.9)
4
=ceil(3.1)
4
=ceil(${force}/2)
2
avg (media)
Questa funzione prende più argomenti.
=avg(10,10)
10
=avg(8,4)
6
=avg(${intelligence},${dexterity})
3.5
Passaggio 8: usare la scheda personaggio in Rolisteam
Aprire/caricare una scheda personaggio
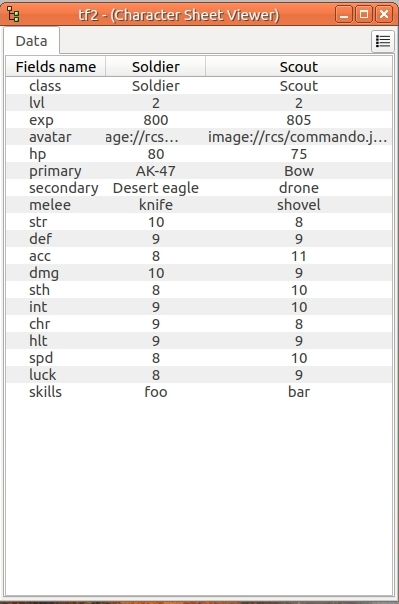
Quando salvi una scheda personaggio con RCSE, ottieni un file .rcs. Questo file deve essere caricato in Rolisteam (menu File > Apri > Scheda del personaggio o CTRL+U). Si apre una nuova finestra in cui è presente una scheda dati (immagine).
È uguale alla scheda Personaggi in RCSE.
Mostra tutti i valori dei personaggi. In questo modo il GM può avere all'istante una panoramica di tutti i personaggi salvati.
Condividere la scheda personaggio con il giocatore
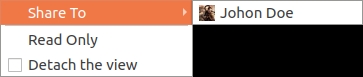
Il GM deve condividere la scheda personaggio con il personaggio del giocatore.
La vista verrà generata e inviata al giocatore. Per farlo, devi fare clic sul sottomenu «Condividi» del menu contestuale (tasto destro del mouse).
Devi quindi scegliere un personaggio (immagine).
Viene aggiunta la scheda Vista.
Sul computer del giocatore appare la finestra della scheda personaggio con due schede: Dati e Vista. Il giocatore e il GM possono modificare i valori da entrambe le viste.

A causa di limitazioni tecniche, la scheda Dati non mostra i dati dei campi secondari nelle tabelle.
Molte pagine
Come abbiamo visto, è possibile creare schede personaggio con più pagine.Nella scheda Vista puoi cambiare pagina premendo il tasto freccia sinistra o freccia destra.
È anche possibile mettere a disposizione pulsanti su cui è possibile fare clic per gestire le operazioni.
Puoi anche copiare la vista e/o staccare la scheda. In questo modo puoi visualizzare più pagine contemporaneamente.
Domande frequenti
Come usare il Pulsante dadi?
Il pulsante dadi permette agli utenti di lanciare i dadi direttamente dalla scheda personaggio. Il risultato viene visualizzato nella chat globale. Il comando lanciato è il valore del campo e visualizza la sua etichetta.
Impostare l'etichetta su Iniziativa mostrerà Iniziativa su tutte le schede personaggio.
Il comando dadi viene impostato nella colonna valore. Ad esempio, se imposti 3d6, il tiro lancerà sempre «3d6» (è strettamente equivalente a lanciare !3d6 nella chat). Molti tiri di dado dipendono dai valori contenuti nella scheda personaggio.
Supponiamo di dover lanciare «1d20+il bonus agilità del personaggio»; il bonus agilità è memorizzato in un campo (id: id_64, etichetta: agilityBonus).
Nel valore del pulsante dadi puoi scrivere: 1d20+${agilityBonus} oppure 1d20+${id_64}.
Qui non è necessaria una formula. Il sistema di dadi è infatti in grado di tradurre le variabili «${....}» in valori. Dopo aver condiviso le schede personaggio con i giocatori, ogni giocatore sarà in grado di lanciare: !1d20+${agilityBonus} nella chat.
Attenzione: questo comando funzionerà solo dopo aver condiviso la scheda personaggio con il suo giocatore. Se il GM fa clic sul pulsante, Rolisteam non sarà in grado di sapere in quale personaggio deve leggere il valore. Prevediamo di correggere questo problema in una versione futura.
Il pulsante dadi emette un segnale di lancio dadi. Questo segnale accetta due parametri: il comando da lanciare e un valore logico (booleano). Il valore logico serve ad abilitare o disabilitare l'uso degli alias dei dadi.
Lanciare comandi molto lunghi con risultati stringa (tipo 1L[head,left leg, right leg, left arm, right arm, chess]) può causare conflitti con gli alias.
Come trasformare un Inserimento testo in selettore?
Il tipo selettore visualizza un menu in cui i giocatori possono scegliere un'opzione tra diverse proposte. Per trasformare un campo qualsiasi nel tipo selettore, l'unica azione richiesta è definire i valori possibili nella colonna dedicata all'interno della tabella di destra. I valori sono separati da virgole.
Esempio: rosso, blu, verde, marrone, giallo, nero, bianco, arancione, viola.